- Getting Started
- Recommended Integration & Registration Flow
- Admin Console Overview
- User Onboarding and Management
- User Registration and Login
- Enterprise Applications
- Microsoft Integration
- Installing TraitWare PAM Module for SSH and SFTP
GitLab SAML SSO
Posted on July 21, 2022
Contents
- What You Need From GitLab
- What You Need From TraitWare
- SSO Settings in GitLab
- Creating a GitLab SAML Application in TraitWare
- Getting Settings from GitLab
- Add TraitWare Settings to GitLab
- Test the Login
- Passwordless Login to GitLab
Getting Started
This will guide you in enabling a passwordless login to GitLab.
What You Need From GitLab
You need a GitLab account with a premium or higher subscription and owner access.
What You Need From TraitWare
You need an active TraitWare account with administrator access.
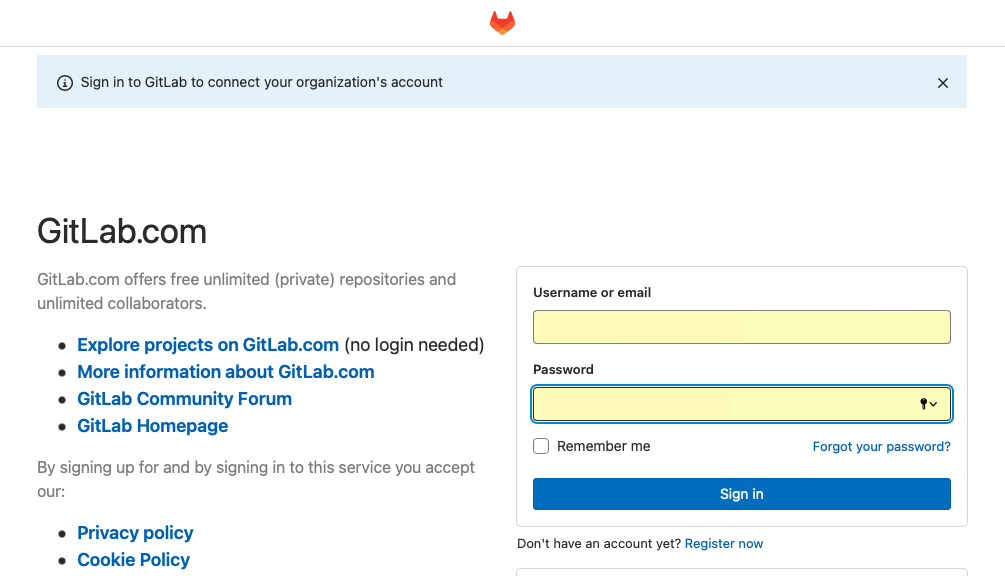
SSO Settings in GitLab
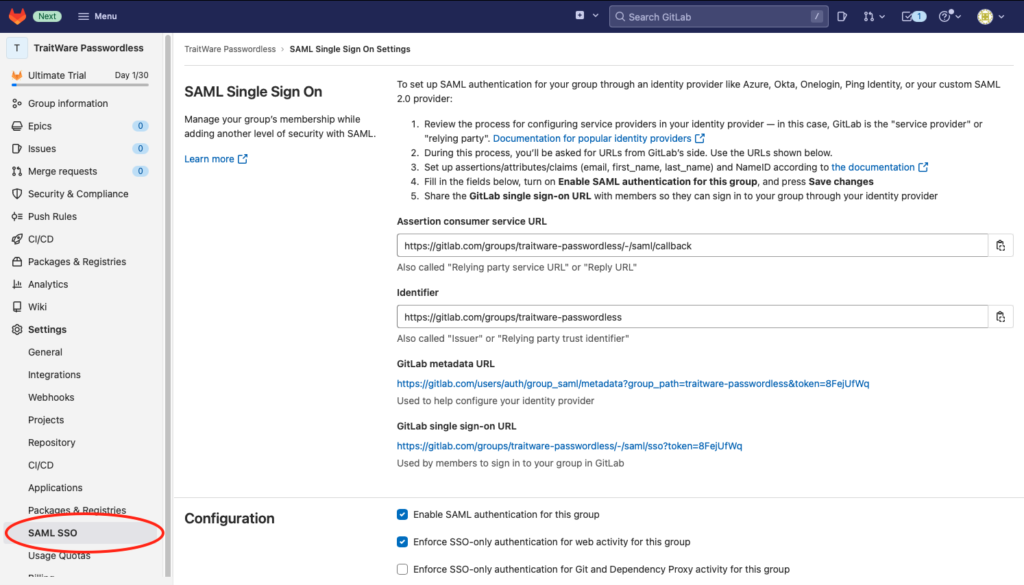
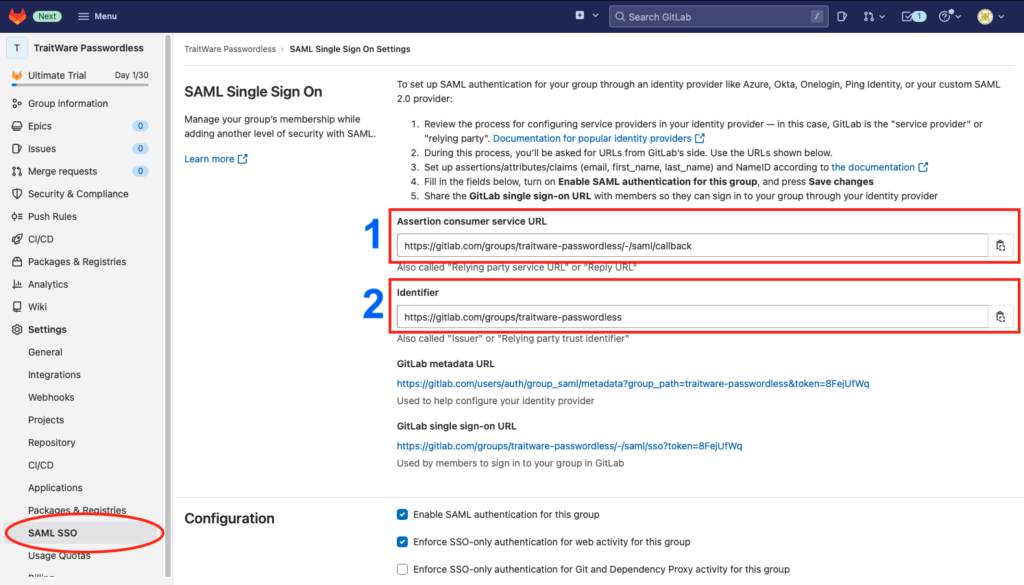
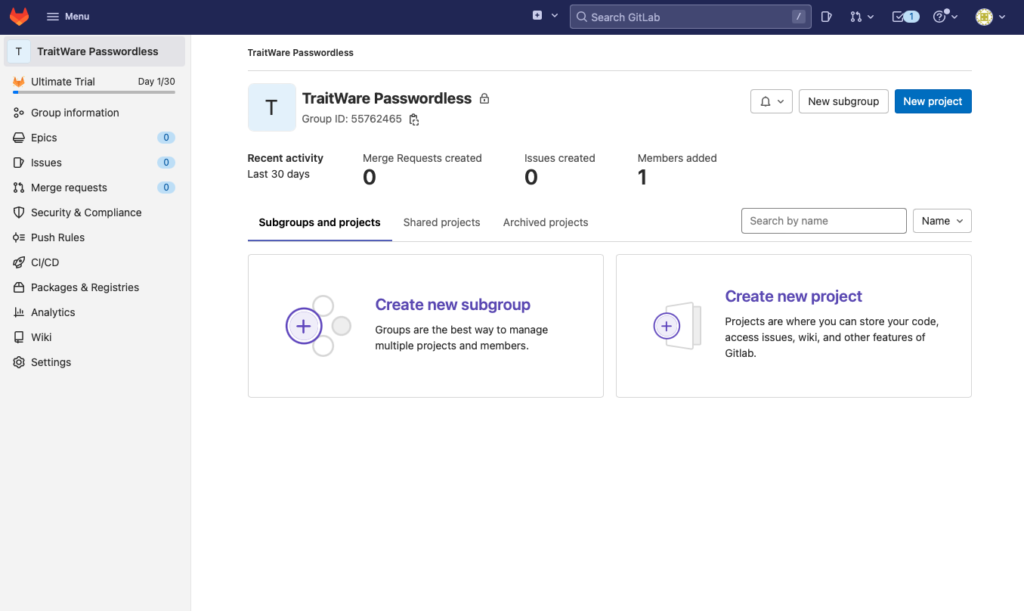
In your GitLab Group Console, select Settings>SAML SSO to verify you have the correct account type to add SAML SSO. You should see a screen similar to the one below. If you don’t, contact GitLab about plans that support SAML SSO.
Creating an Application in TraitWare
Login to your TraitWare Admin Console (admin.traitware.com).
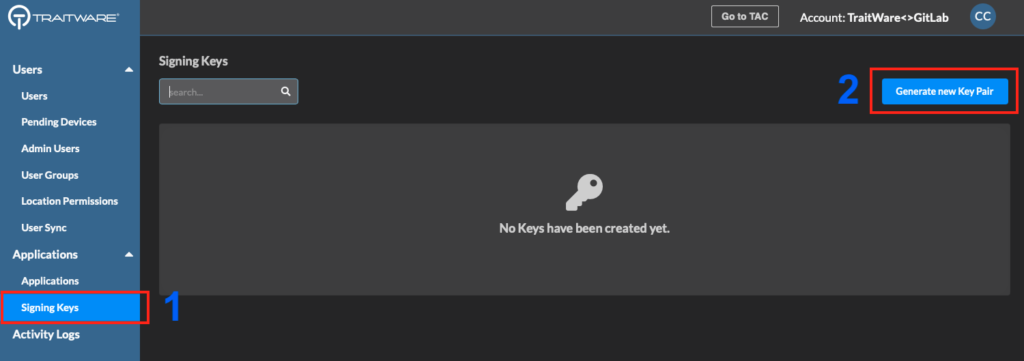
Create a signing key for your application.
- Click Signing Keys under the Applications menu.
- Select Generate new Key Pair.
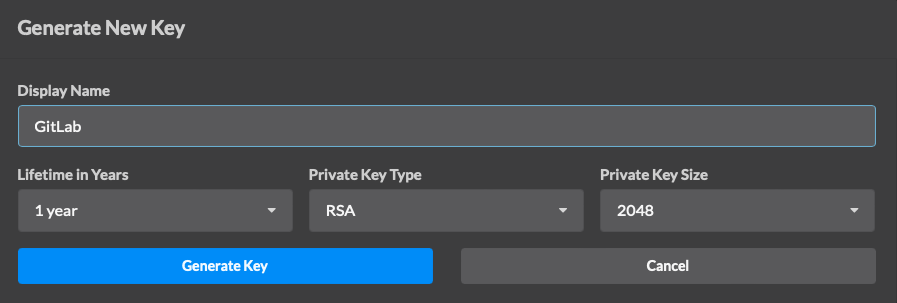
- Enter a Display Name.
- Select the lifetime of time you prefer for your key. NOTE: Owners will be notified by email of pending key expirations. The other options are fixed.
- Select Generate Key.
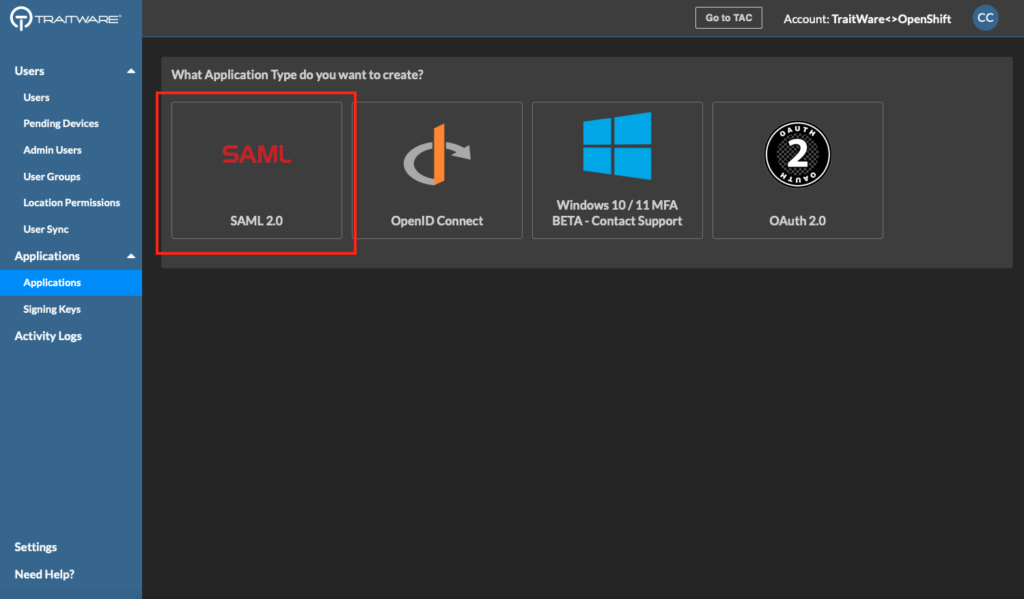
Go to the Applications menu and select Add Application.
Select the SAML application type.
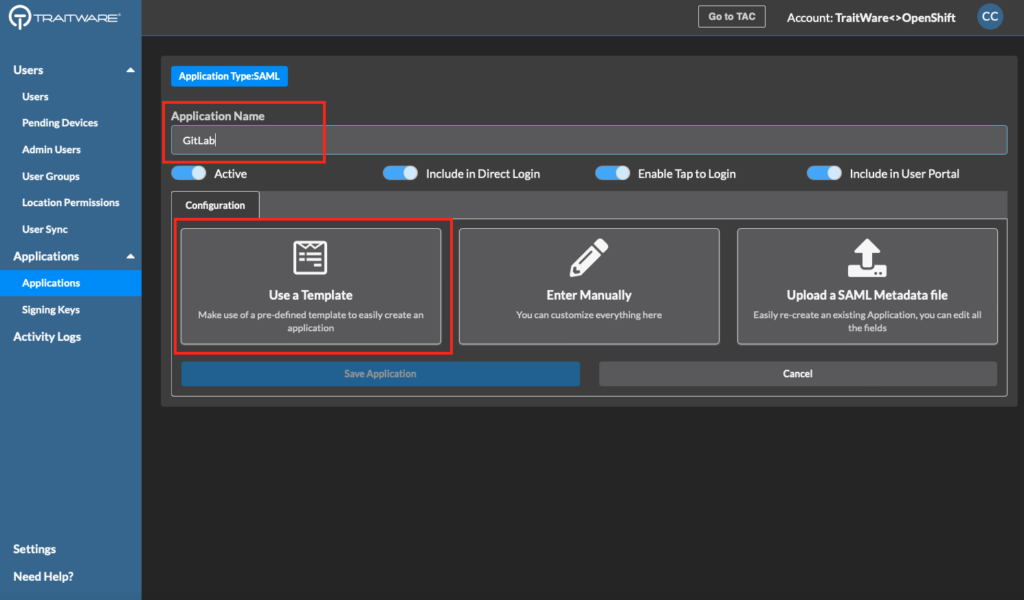
- Create an Application Name.
- Select Use a Template.
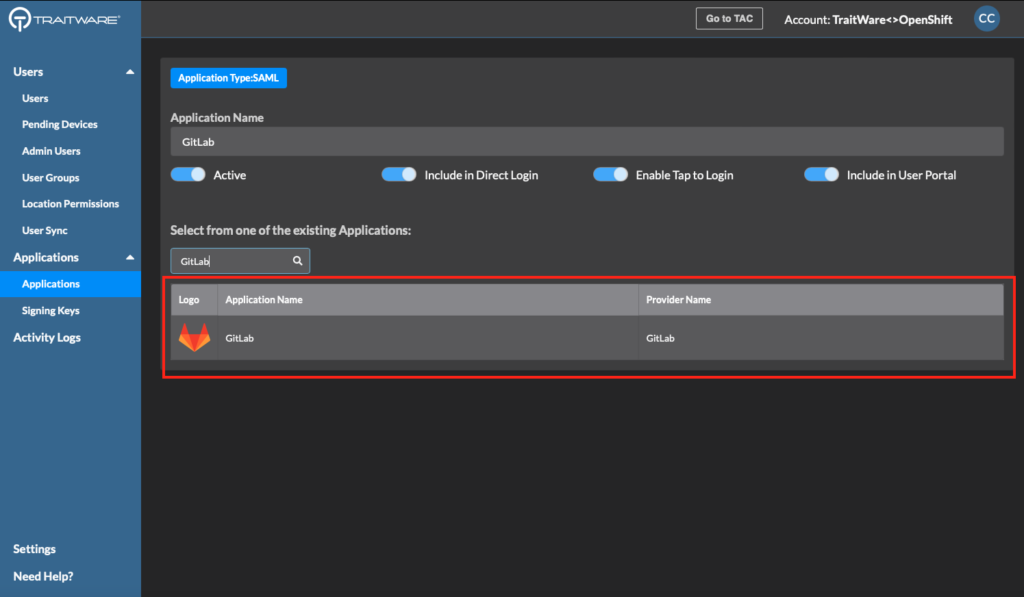
Type GitLab in the search and click on the template.
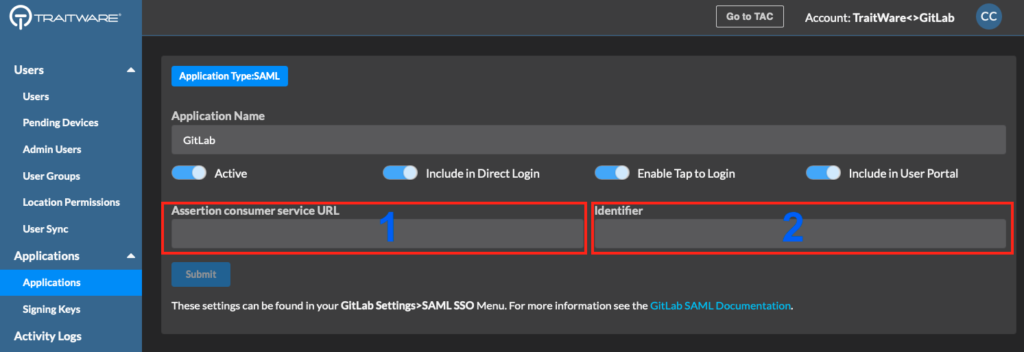
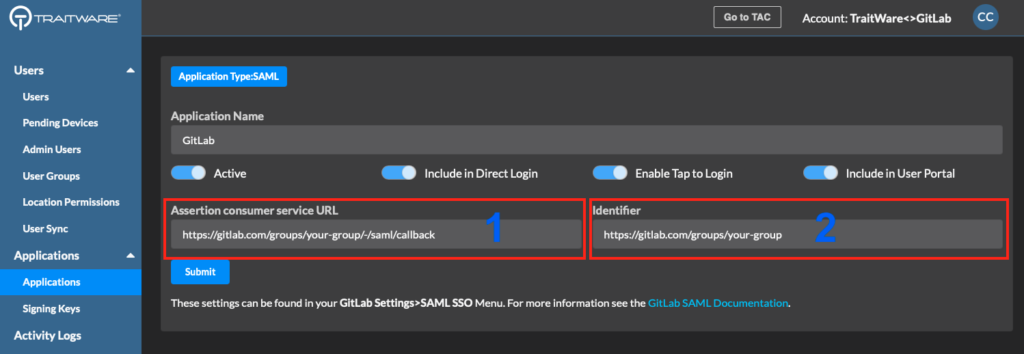
You will see two fields that need to be filled in with settings from your GitLab SAML SSO Settings.
Getting the Settings from GitLab
Copy the two items from GitLab and paste them into the TraitWare Application.
- Assertion consumer service URL
- Identifier.
- Paste the two items into the matching fields in the TraitWare application.
- Click Submit.
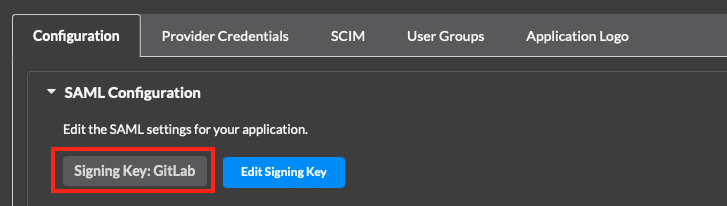
Your saved application should look like the image below.
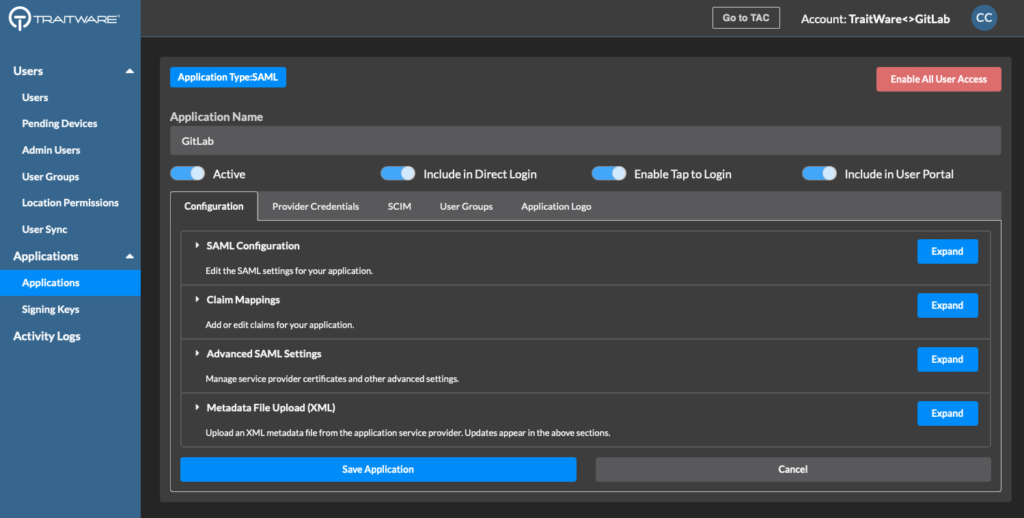
Add the Signing Key you created earlier to the application.
- Click SAML Configuration to expand the section.
- Select Edit Signing Key.

Select the signing key you created for this application.
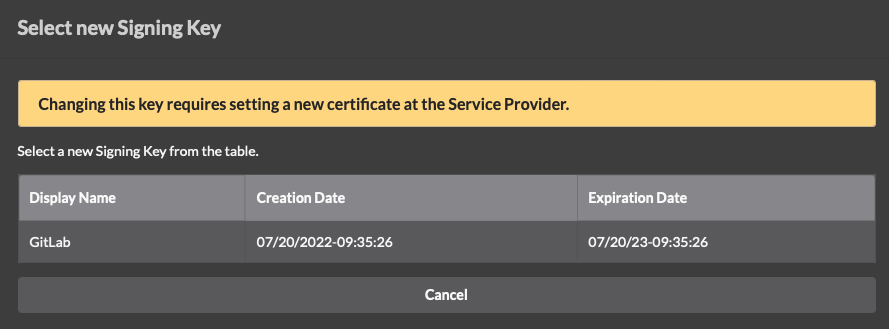
Verify that the key is assigned to your GitLab application.
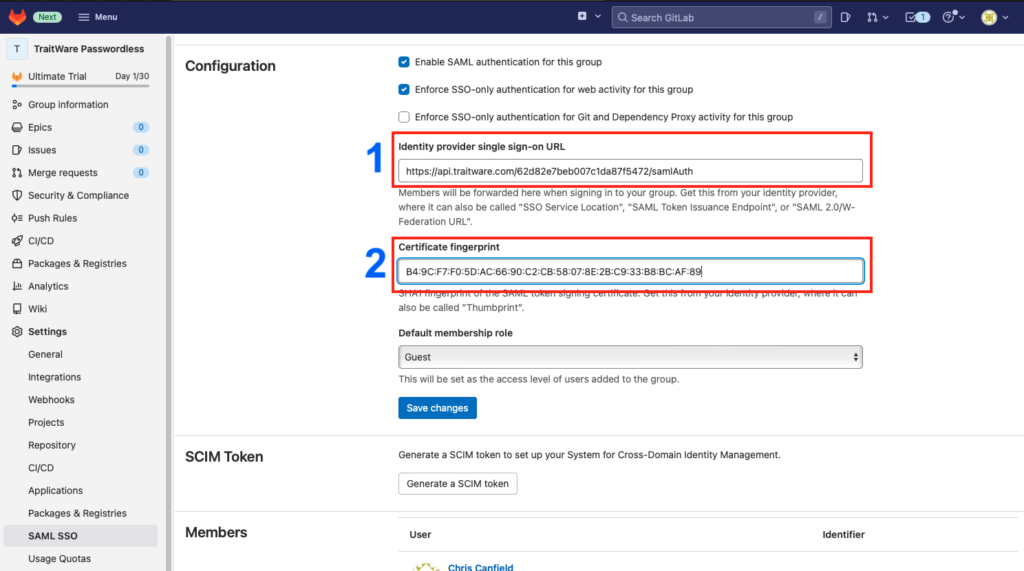
Add TraitWare Settings to GitLab (last step!)
Select the Provider Credentials tab. Copy the two fields into your GitLab SAML SSO settings.
- SAML Login Endpoint
- Certificate Fingerprint Formatted
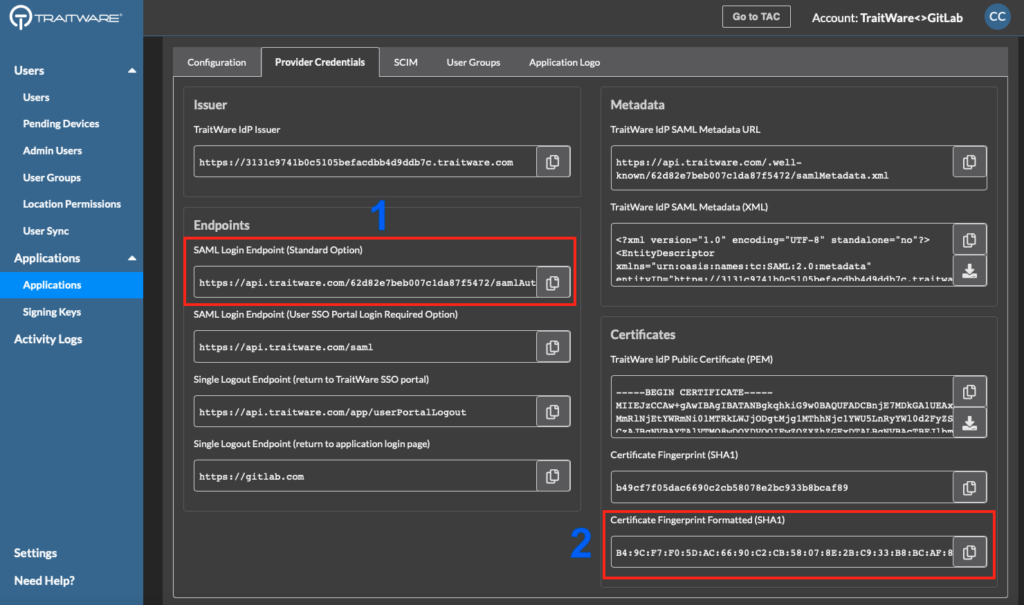
- Paste the two fields into the corresponding fields in GitLab.
- Click Save changes.
Testing the Login
Make sure your users are registered in TraitWare and have access to the GitLab application you created in TraitWare. You can add and remove them as needed.

In the GitLab SAML SSO page, select Verify SAML Configuration.
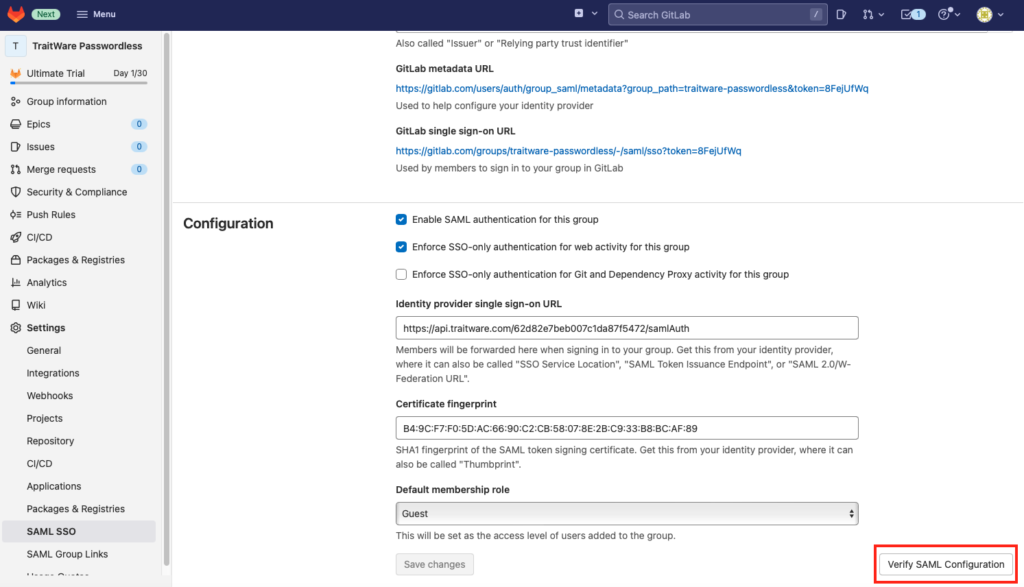
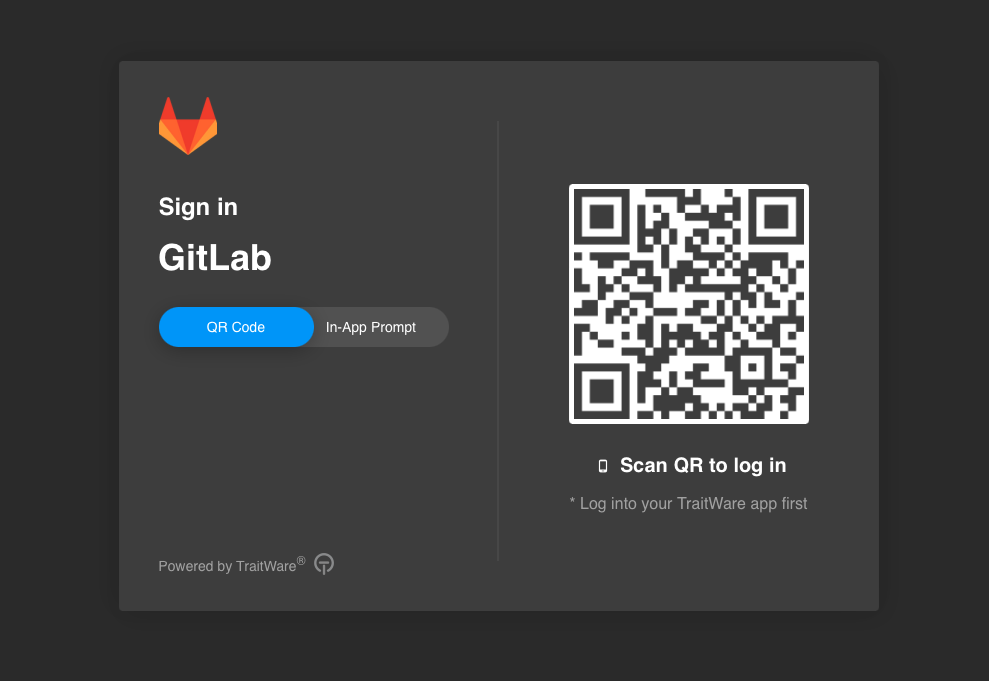
- You will be taken to the TraitWare login screen.
- Use your TraitWare mobile app to scan the QR.

You may be prompted to enter your username and password for GitLab one last time.
- Enter your username and password
- Authorize GitLab to log you in via TraitWare (your Identity Provider)
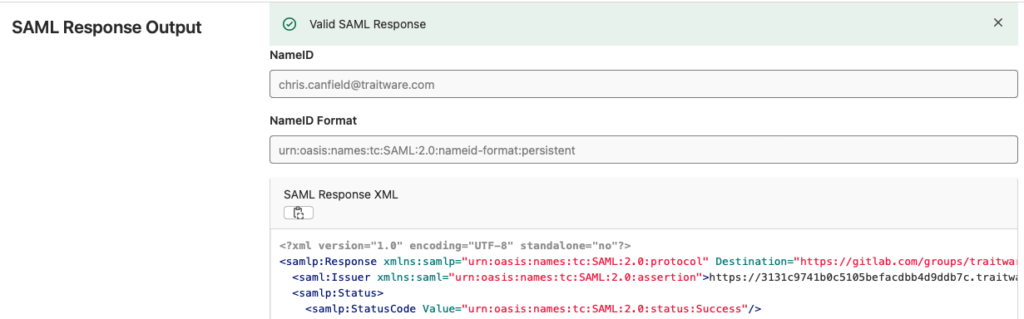
If everything is configured correctly, you should see the Valid SAML Response message.
Passwordless Login to GitLab
There are two ways to login on your desktop.
- GitLab SSO login URL (found in the GitLab SAML SSO Settings).
- TraitWare SSO Portal.
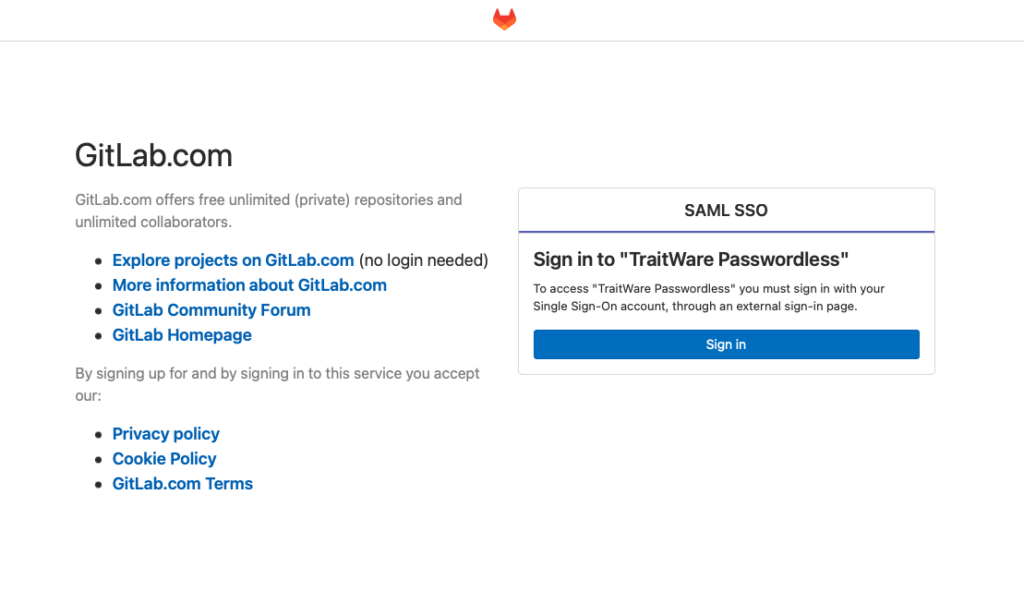
GitLab.com SSO Login
You can find your unique GitLab SSO URL in the SAML SSO Settings in GitLab. This can be bookmarked and shared with team members.

- Navigate to your GitLab SSO URL
- Click Sign In
You will see the TraitWare QR login screen. Scan the QR with you mobile TraitWare Authentication app.
You are now logged in to your GitLab group!
TraitWare SSO Portal Login
- Navigate to sso.traitware.com
- Login to your TraitWare User Portal
- Select the GitLab tile
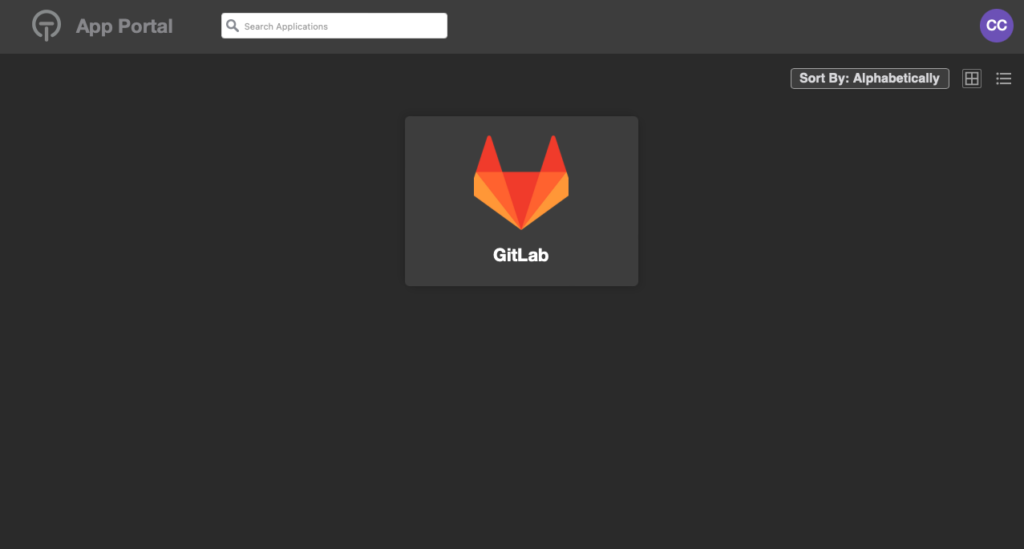
You are now logged in to your GitLab group!
If you have any questions about your setup we are here to help. Email support@traitware.com.