- Getting Started
- Recommended Integration & Registration Flow
- Admin Console Overview
- User Onboarding and Management
- User Registration and Login
- Enterprise Applications
- Microsoft Integration
- Installing TraitWare PAM Module for SSH and SFTP
Generic Application
Posted on May 13, 2019
Generic SAML Integration
Contents
- What you need from the Service Provider
- What you need from TraitWare
- Manually filling in fields
- Uploading .xml metadata file
Getting Started
Both TraitWare and your Service Provider require certain information to be able to communicate securely with each other. This walkthrough will show you how to setup a Service Provider that does not currently exist in the TraitWare SAML templates.
What You Need From Your Service Provider
- Entity ID
- POST URL
- Recipient, Destination, Audience URLs
- Which version of SAML (p or 2p)
- NameID format type (i.e. unspecified, email, transient, persistent)
- NameID Attribute
- Signature and Digest Algorithm
- Optional: Relay State, Metadata URL
-OR-
- XML Metadata File
What You Need From TraitWare
- Depending on what your Service Provider needs, TraitWare will supply Public Certificate, XML, Issuer, and SAML Endpoint
- To create an application
- Navigate to admin.traitware.com and sign in with you existing TraitWare account. If you do not have access or do not have an account, set up a trial here.
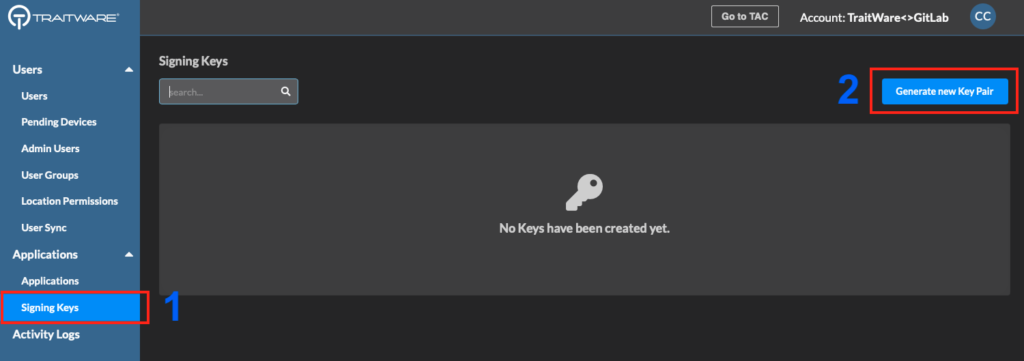
Create a Signing Key
First create a signing key for your application (SAML apps).
- Click Signing Keys under the Applications menu.
- Select Generate new Key Pair.
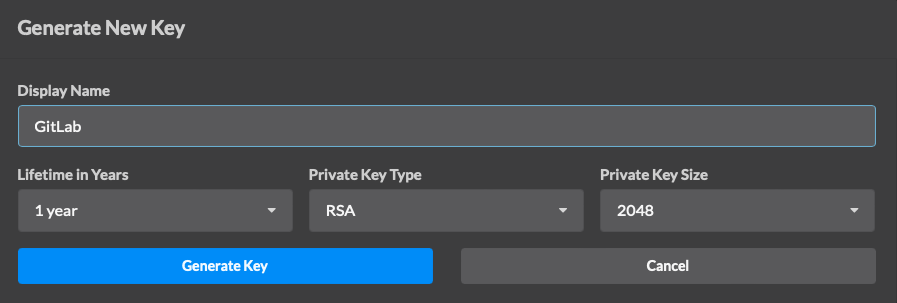
- Enter a Display Name.
- Select the lifetime of time you prefer for your key. NOTE: Owners will be notified by email of pending key expirations. The other options are fixed.
- Select Generate Key.
Manually Inputting Service Provider Information
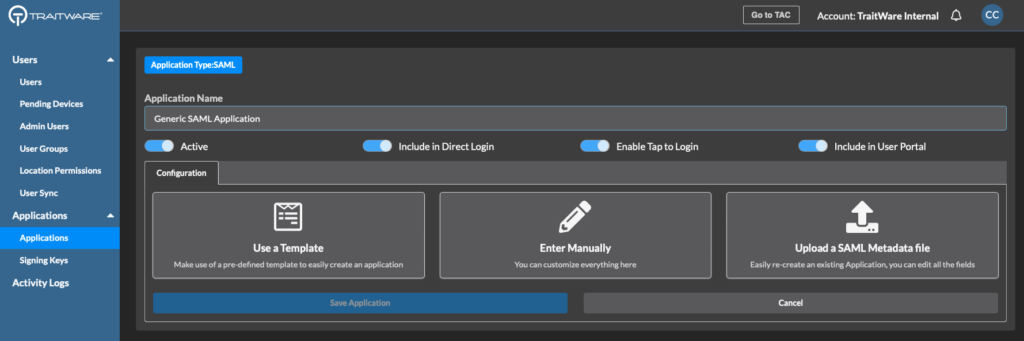
- Start by adding a new application
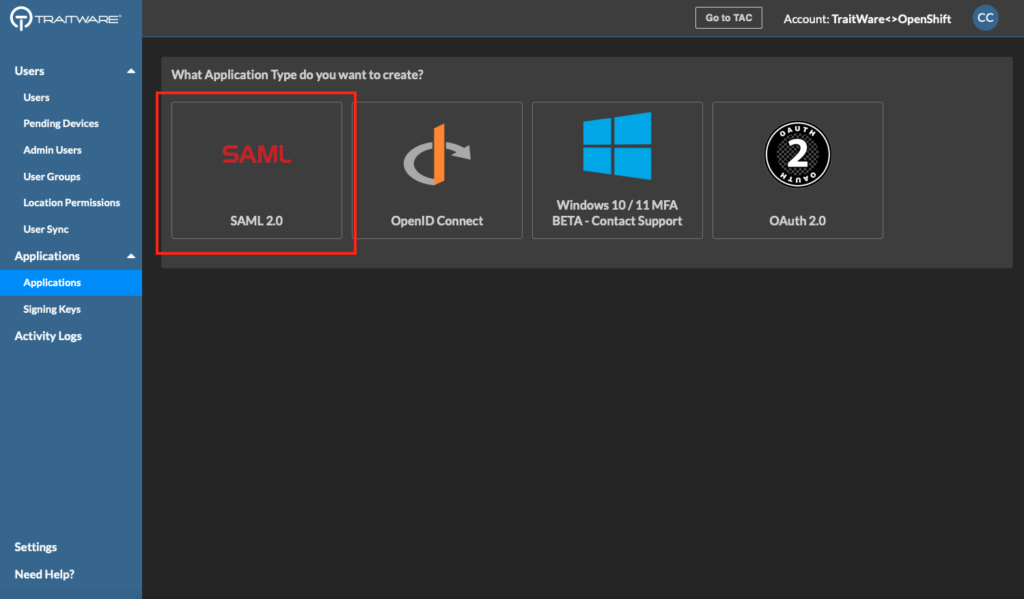
- Navigate to Applications in the upper right
- Select Add Application
- Select SAML as your Application Type
- Give the application a Name
- Select Enter Manually or Upload a SAML Metadata file
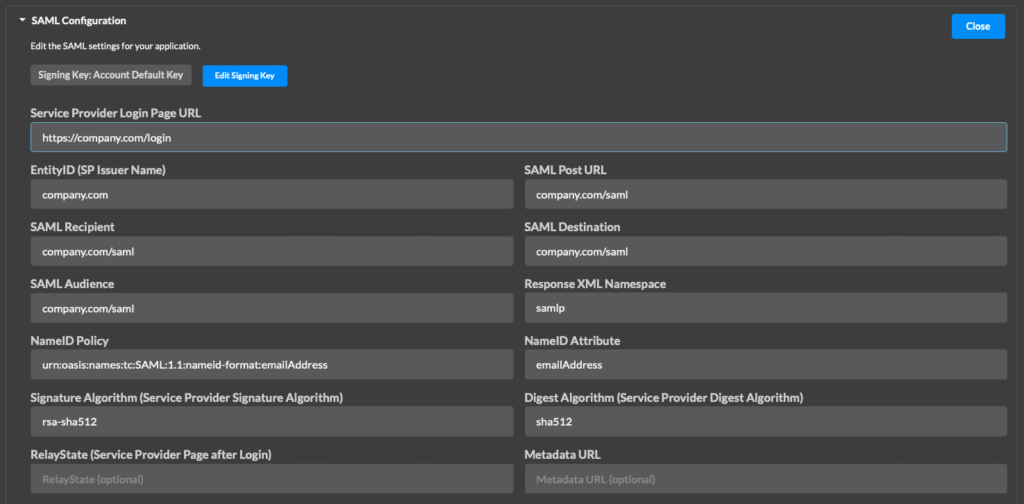
- In order to set up a generic SAML application template, all fields except for Relay State are required. If you don’t have a Metadata URL, put n/a
- Claims Mapping will be required if the Service Provider has specific claims (like username or email) that are mapped with custom values. (most service providers will tell you these attributes requirements).
- If you are unsure about claims mapping, this can be added later
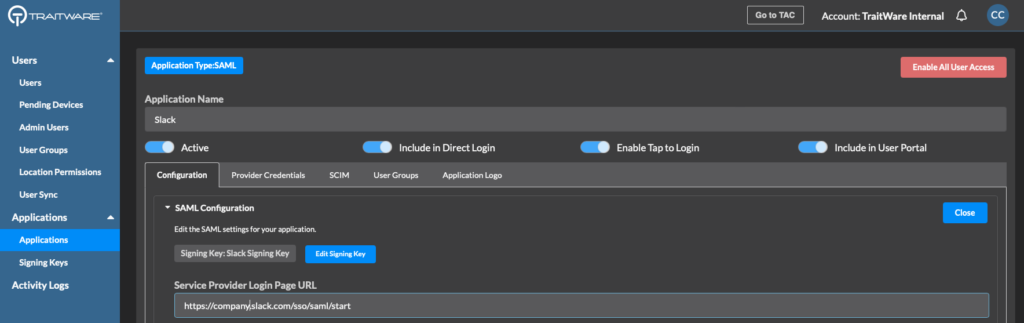
- After selecting Save Application, add the Signing Key you created earlier.
- Select the application
- Select Edit Signing Key
- Select the key you created for the application from the list
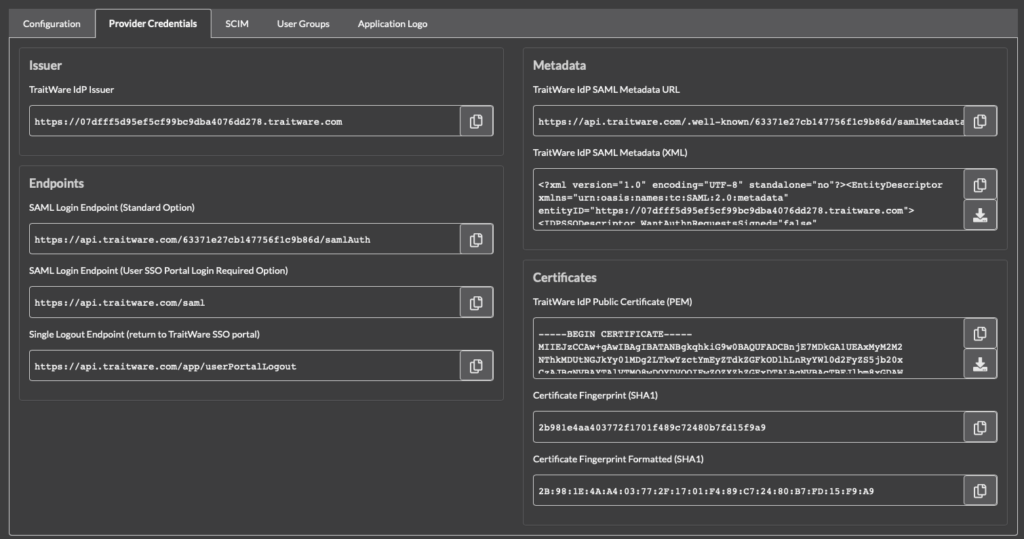
You will also now be able to see the Provider Credentials tab. This information can be used to configure your service provider for SAML SSO. See specific provider SAML integration documentation for more information.
Uploading a Metadata.xml File
- If your Service Provider supplies you with an .xml file, it can be uploaded in order to populate the fields. Claims Mapping and Provider Name will still need to be added manually
- This can be done to an existing or new application
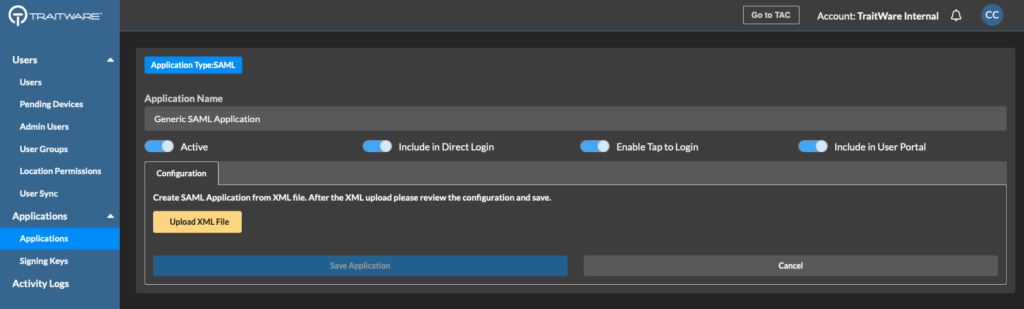
- For a new application, select Add Application
- Select SAML for the Application Type
- Provide a name and select Upload XML file
- Enter Provider Name and double-check the other fields
- Select Save Application when you are done. You can update these fields at any time
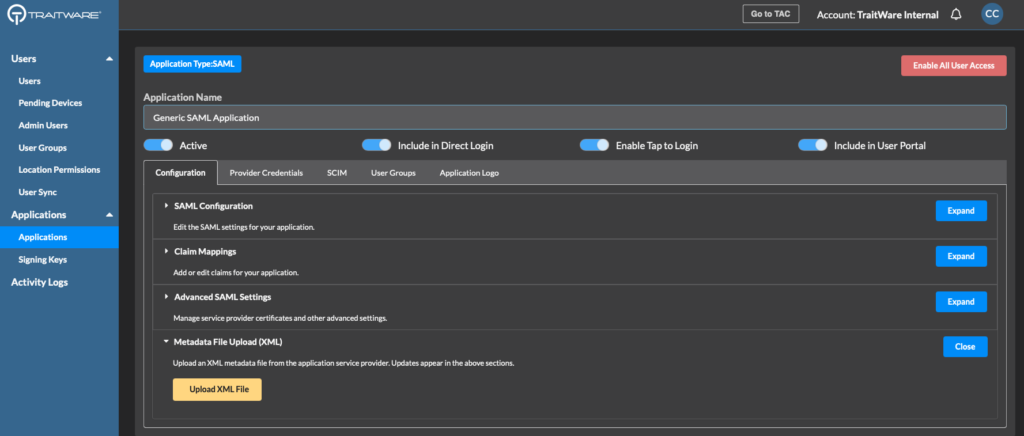
- To update the metadata file, open the desired application
- Expand the Metadata File Upload (SAML) section
- Select Upload XML File and navigate to where you saved your Service Provider XML
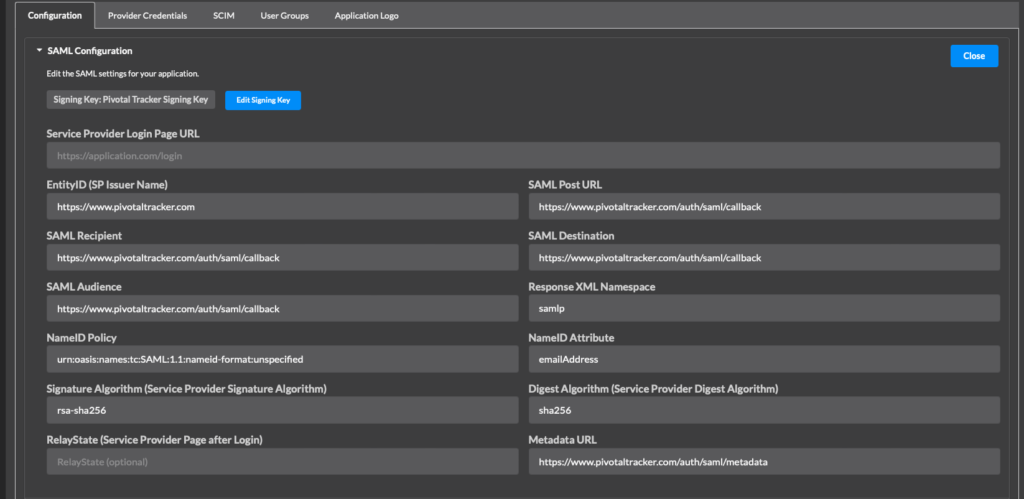
- If you select the SAML Configuration section, you will see the appropriate information filled in the fields
- Update any information as necessary such as Claims Mapping or any information in the other sections
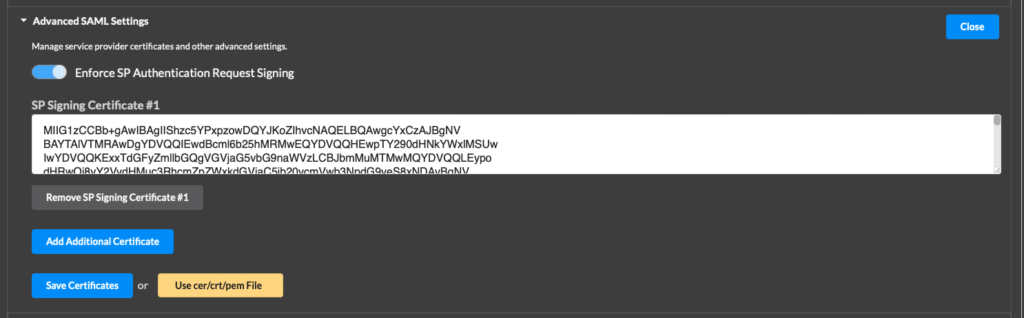
- You can also choose to enforce Service Provider request signing if available (varies by provider).