- Getting Started
- Recommended Integration & Registration Flow
- Admin Console Overview
- User Onboarding and Management
- User Registration and Login
- Enterprise Applications
- Microsoft Integration
- Installing TraitWare PAM Module for SSH and SFTP
Atlas MongoDB SAML Integration
Posted on March 24, 2020
Contents
- What you need from TraitWare
- Setting up TraitWare
- Adding SAML Application
- Turning on application access for a user
- Setting up your service
Getting Started
Both TraitWare and MongoDB require certain information to be able to communicate securely with each other.
What You Need From G Suite
- An Organization Account
- Your SAML IDs (provided by MongoDB)
- An Account with Organization Owner Access
- Verified Domain
What You Need From TraitWare
You will obtain the following when you create your TraitWare application.
- SAML Endpoint/Sign-in URL
- Issuer
- Public Verification Certificate
Setting Up TraitWare
In order for TraitWare to communicate with MongoDB, an application will need to be created. Once you have access from TraitWare, navigate to https://admin.traitware.com and use your TraitWare app to sign in.
If you do not have access to login to https://admin.traitware.com, please setup a trial account, or contact us at support@traitware.com
Adding a SAML Application
- Select Applications in the menu on the left.
- Select Add Application to add a new application.
- Select SAML as your Application Type.
- Enter an Application Name that will make sense when you see it (ex: Atlas MongoDB).
- Choose to Use a Template.

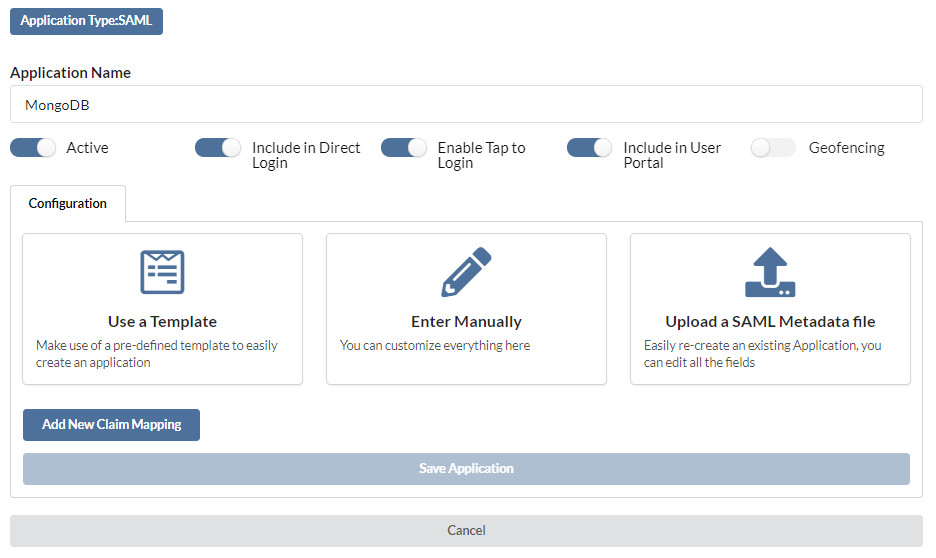
- In the SAML Applications dropdown list, select MongoDB.
- The fields following will auto-fill with generic information.
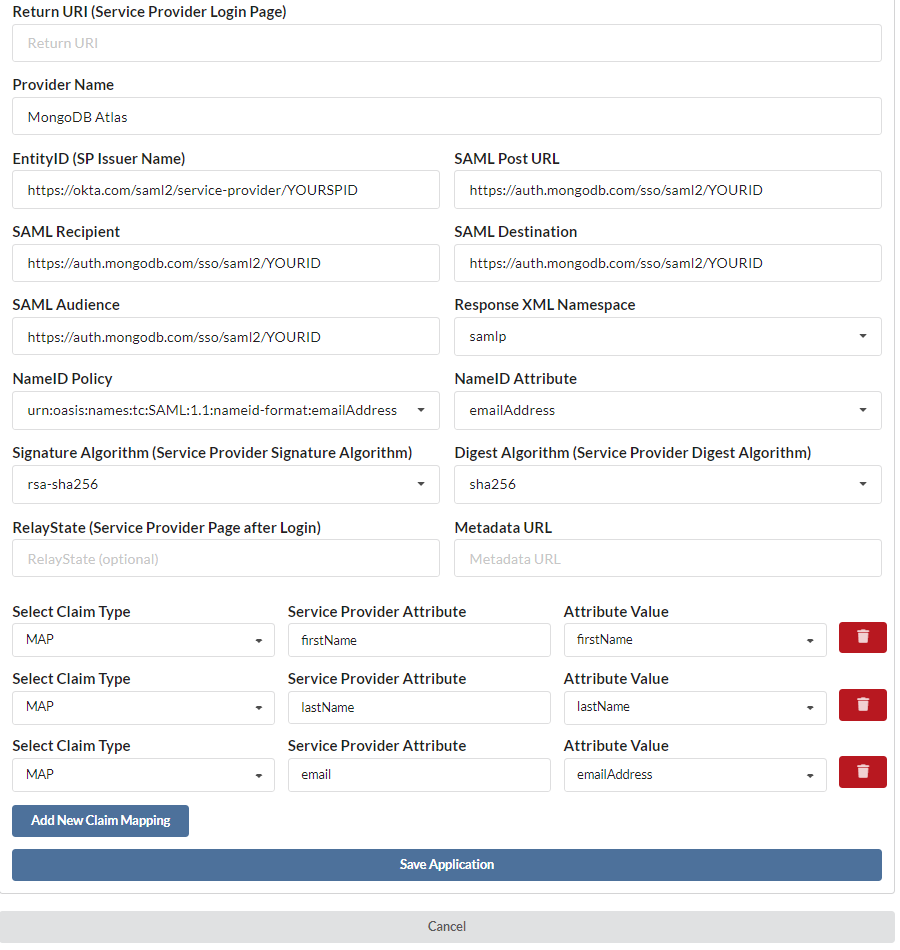
- For Return URI, you can leave the field empty, or put a URL to redirect users back to upon timeout
- For now, leave the YOURSPID and YOURID in each field. The information provided by MongoDB will be obtained in a later step (this will be edited after the applications are created)
- For Relay State, you can leave this field blank
- Metadata can be left blank
- You will not need to add any additional mapping.

- Select Save Application.
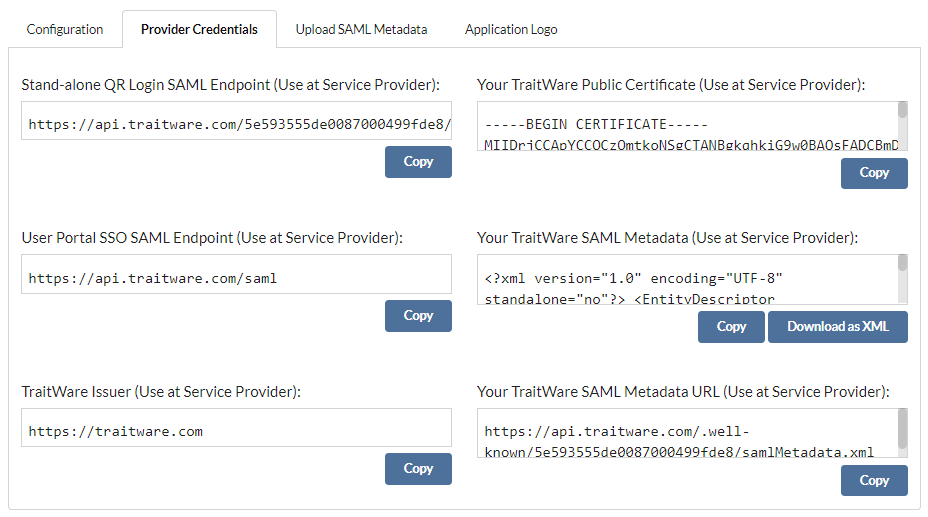
- Once your application is submitted, it will populate the information required by your service provider
- Open the appropriate application, navigate to the Provider Credentials tab, and you will then be able to copy the information required
- Copy the TraitWare Public Cert and save it as a FILENAME.pem
Setting Up Your MongoDB Application
MongoDB will provide you with necessary information to set up your TraitWare SAML application. However, because it requires the Public Cert from TraitWare, it will need to be completed after TraitWare is setup
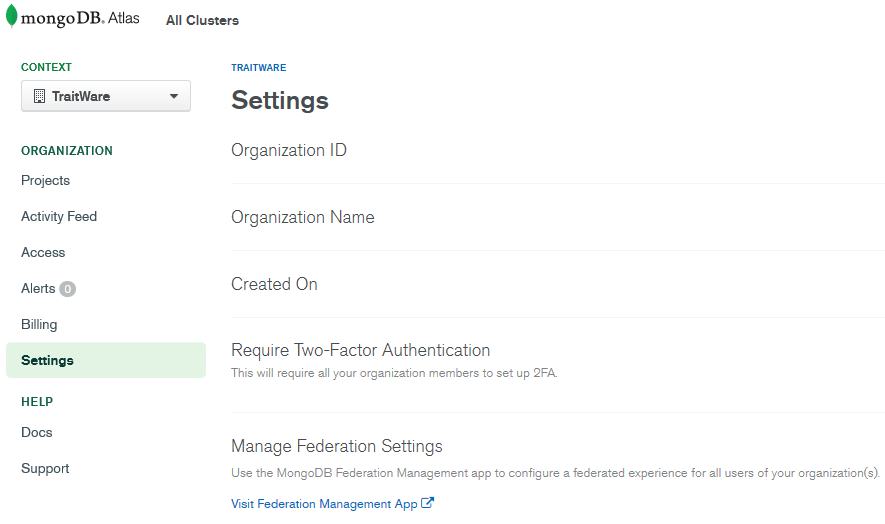
- Sign in to your account as an Organization Owner
- Navigate to the desired Organization
- Select Settings
- Select Visit Federation Management App
- Select Manage Identity Providers
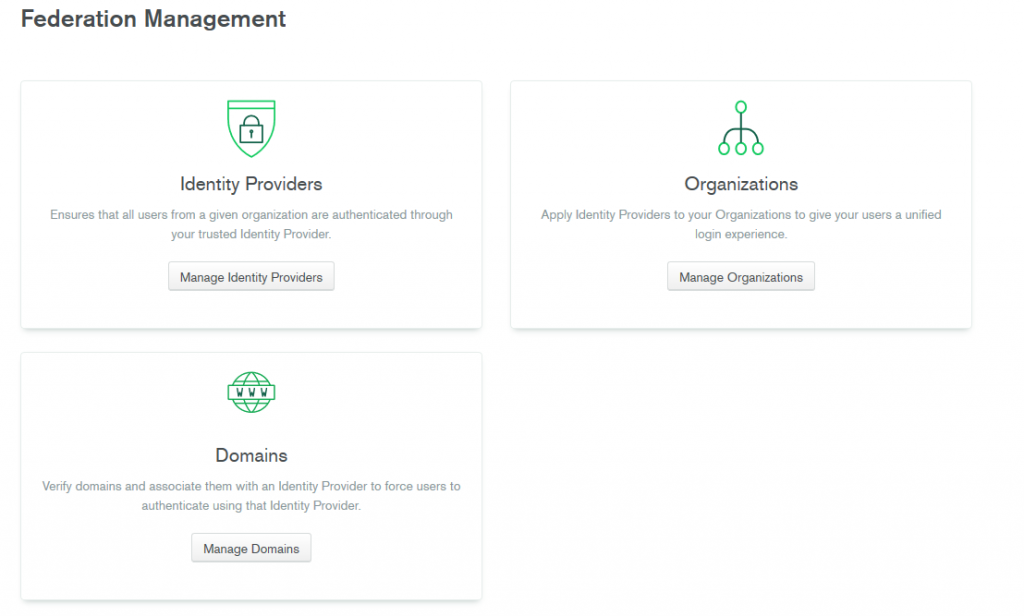
- Make sure you have a Verified domain under Domains
- If you do not, Add Domain and complete setup of DNS records

- Navigate back to Identity Providers
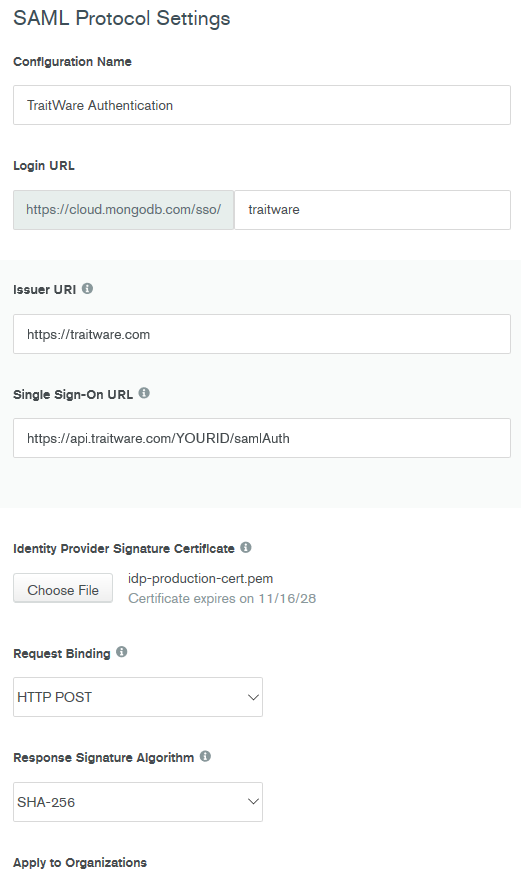
- Select Add Identity Provider

- Enter your desired Configuration Name and Login URL
- Enter https://traitware.com for your Issuer URI
- Enter the Stand-alone QR Login SAML Endpoint for your Single Sign-On URL
- Upload the TraitWare Public Cert you saved previously
- Select Next
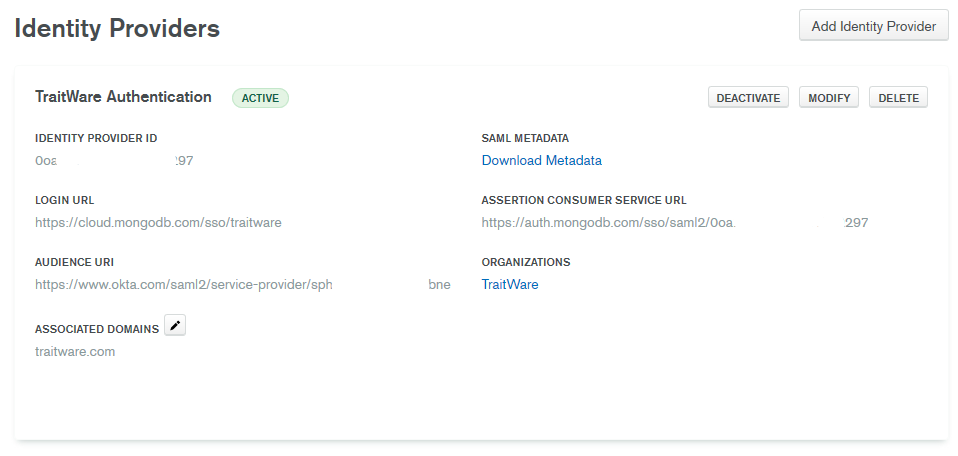
- MongoDB will then provide you with the information required to finish setting up TraitWare
- Use the Audience URI as the Entity ID
- Use the Assertion Consumer Service URL as the Post URL, Recipient, Destination, and Audience
Turning on Application Access for User
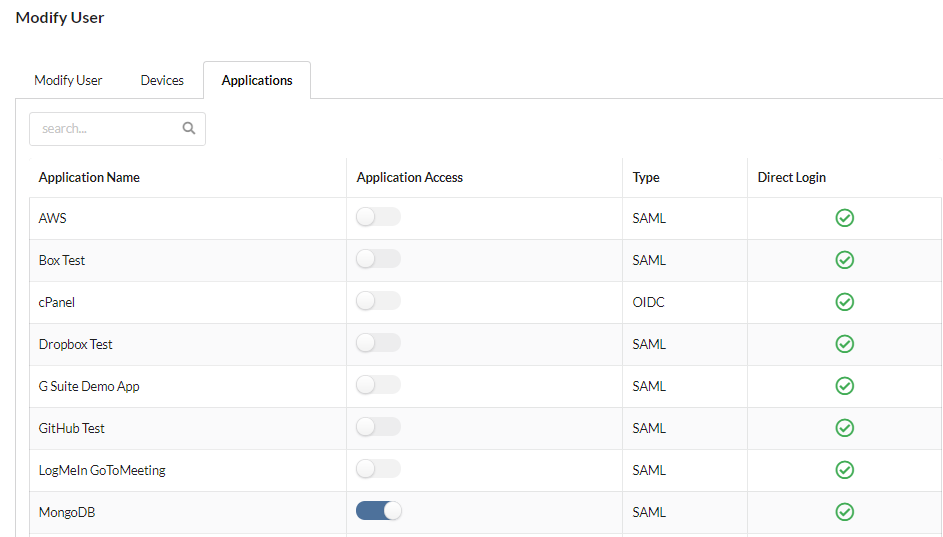
- Select Users from the menu on the left.
- Select a user. Their User Profile will open.
- Find the MongoDB Application name under Applications, and select the application to enable access for that user.
Additional Information
If you do not see an application in the dropdown list during the Application setup, you can fill in the fields with your generic information. If you have issues, please contact us at support@traitware.com, and we will work with you to see if the application can be added.