- Getting Started
- Recommended Integration & Registration Flow
- Admin Console Overview
- User Onboarding and Management
- User Registration and Login
- Enterprise Applications
- Microsoft Integration
- Installing TraitWare PAM Module for SSH and SFTP
AWS (Amazon Web Services) SAML Integration
Posted on April 9, 2024
Contents
- What you need from TraitWare
- Setting up TraitWare
- Adding SAML Application
- Turning on application access for a user
- Setting up your service
Getting Started
Both TraitWare and AWS require certain information to be able to communicate securely with each other.
What You Need From AWS
- An AWS account. Pricing types vary drastically depending on your needs.
- ARN information(Role ARN and Trusted Entities value/Provider ARN – will be created with this walk-through)
What You Need From TraitWare
You will obtain the following when you create your TraitWare application.
- Metadata XML File
Setting Up TraitWare
- In order for TraitWare to communicate with AWS, an application will need to be created. Once you have access from TraitWare, navigate to https://admin.traitware.com and use your TraitWare app to sign in.
- If you do not have access to login to https://admin.traitware.com, please setup a trial account, or contact us at support@traitware.com
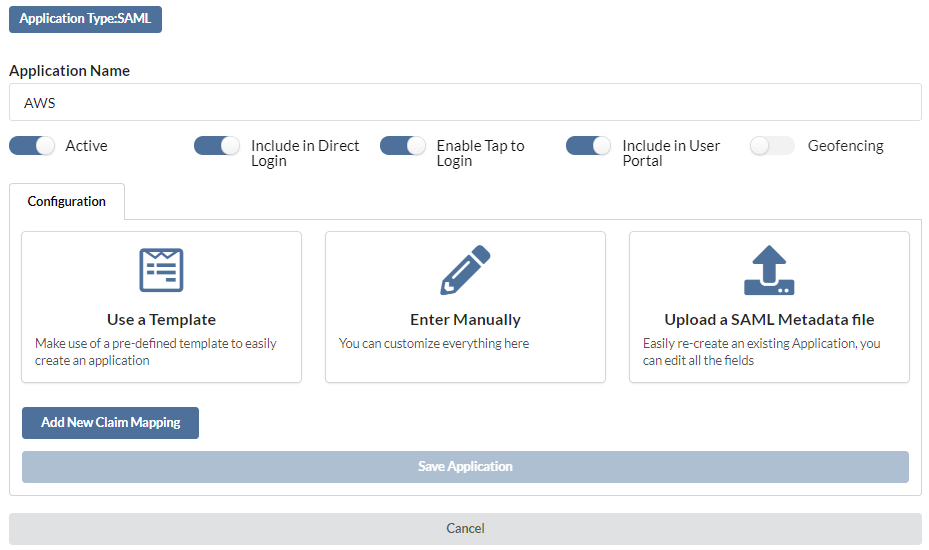
Adding a SAML Application
- Select Applications in the menu on the left.
- Select Add Application to add a new application.
- Select SAML as your Application Type.
- Enter an Application Name that will make sense when you see it (ex: AWS TraitWare).
- Choose Use a Template.

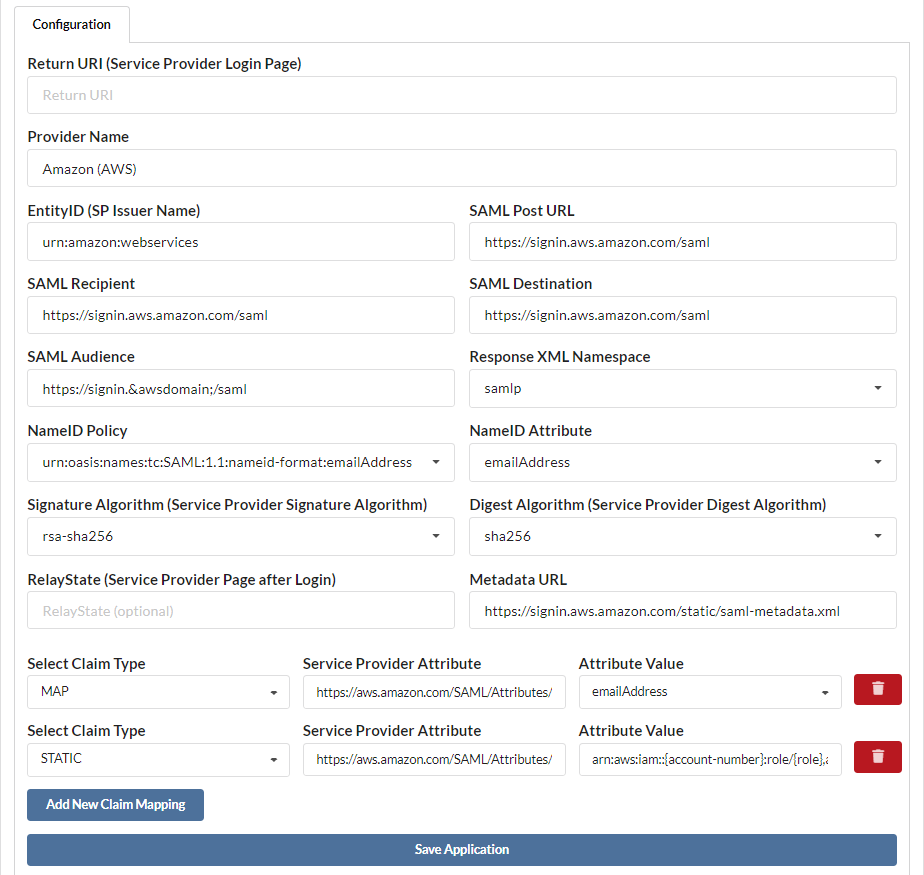
- In the SAML Applications dropdown list, select AWS Template. The fields following will auto-fill with generic information.
- For Return URI, you can leave the field empty, or put a URL to redirect users back to upon timeout
- For Relay State, you can leave the field empty.
- For Metadata URL, leave https://signin.aws.amazon.com/static/saml-metadata.xml
- For the Claims Mapping
- Make sure that you have a MAP Service Provider Attribute set to https://aws.amazon.com/SAML/Attributes/RoleSessionName and the Attribute Value set to emailAddress.
- Make sure you have a STATIC Service Provider Attribute set to https://aws.amazon.com/SAML/Attributes/Role and the Attribute Value set to Role ARN,Trusted Entities/Provider ARN (you will get these values later. Make sure that you paste them both into the STATIC claim Attribute Value field as shown with a comma and no space between them – arn:aws:iam::{account-id}:role/{role-name},arn:aws:iam::{account-id}:saml-provider/{provider-name} – these are the two ARN values separated by a comma )
- Select Save Application.
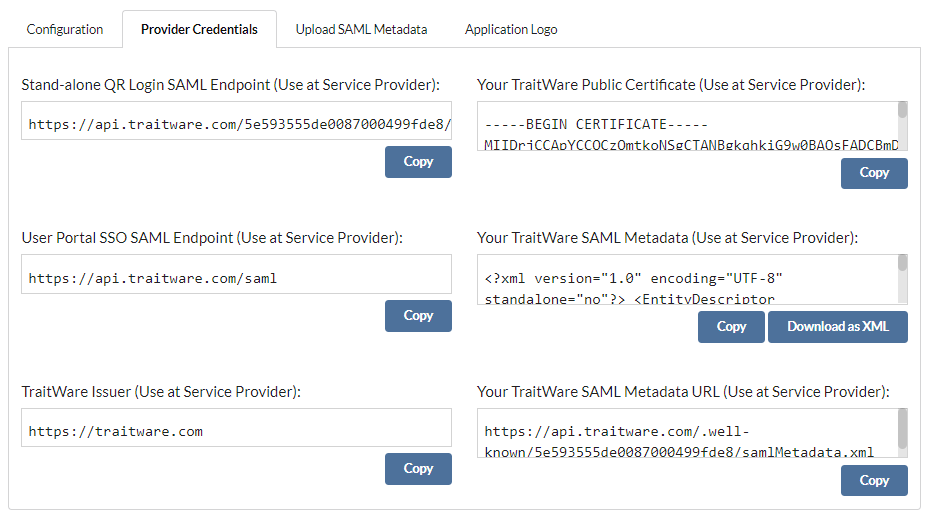
- Once your application is submitted, it will populate the information required by your service provider
- Open the appropriate application, navigate to the Provider Credentials tab, and you will then be able to copy the information required
- To use the Metadata, select Download as XML and save it somewhere you will be able to easily find
Turning on Application Access for User
- Select Users from the menu on the left.
- Select a user. Their User Profile will open.
- Find the AWS Application name under Applications, and toggle the application to enable access for that user.

Setting Up AWS
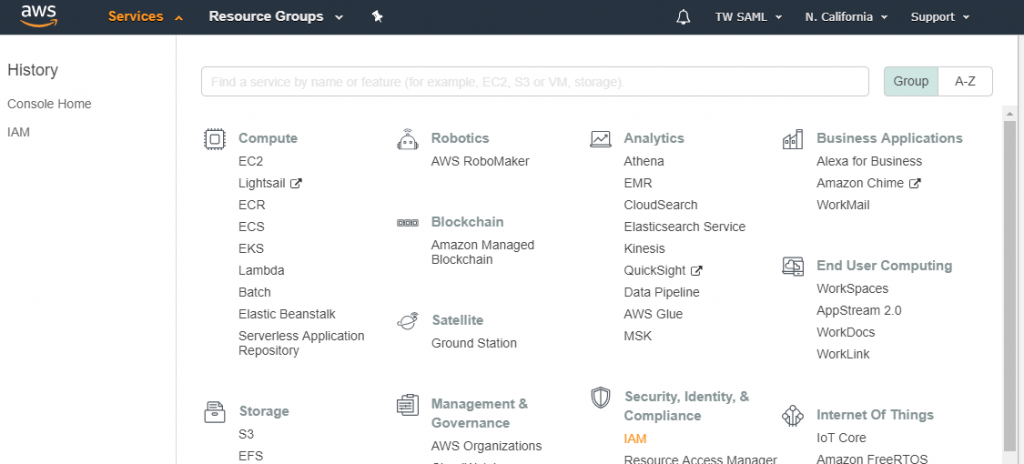
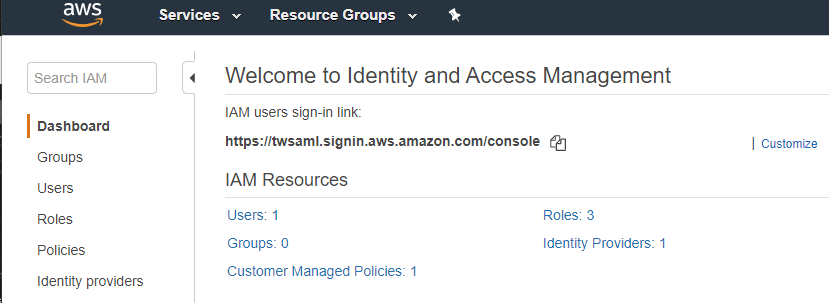
- Navigate to your AWS console and sign in with an admin account
- Select Services
- Select IAM under Security, Identity, & Compliance
- Make sure that you have an IAM users sign-in link for ease of navigation
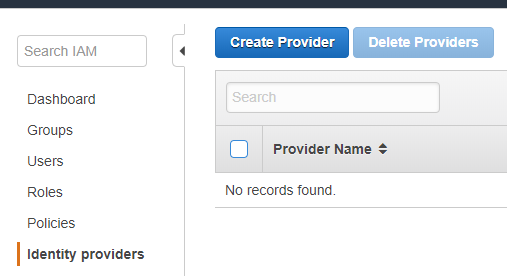
- Select Identity Providers
- Select Create Provider
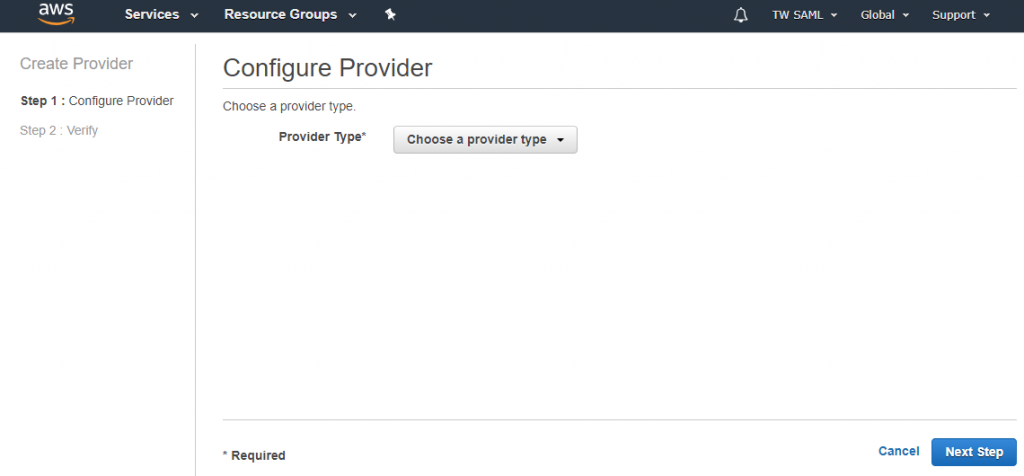
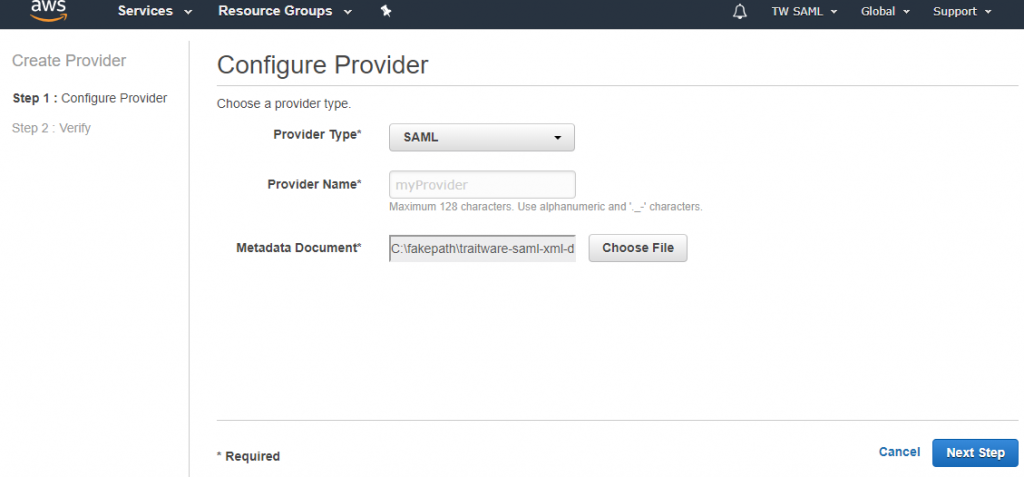
- Select SAML as your Provider Type
- Provide a Provider Name and select Choose File and navigate to where you downloaded your TraitWare Metadata XML file in the previous steps
- Select Next Step
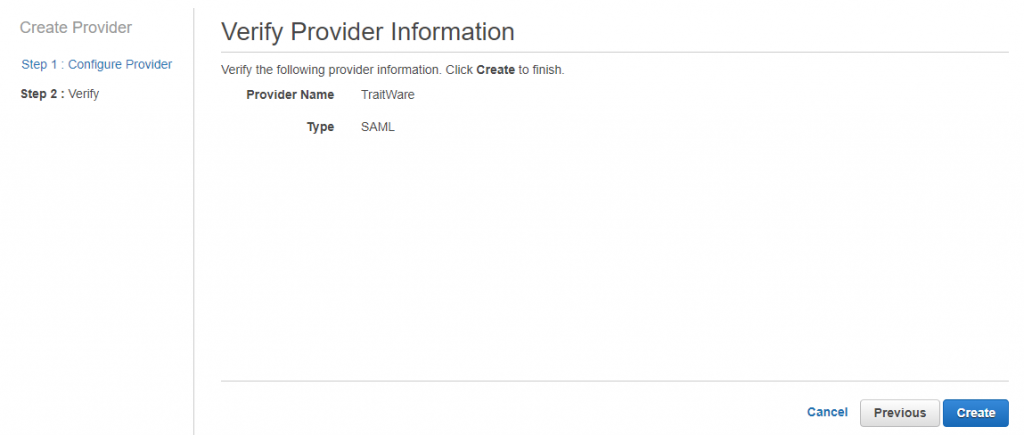
- Verify the information provided
- Select Create to continue
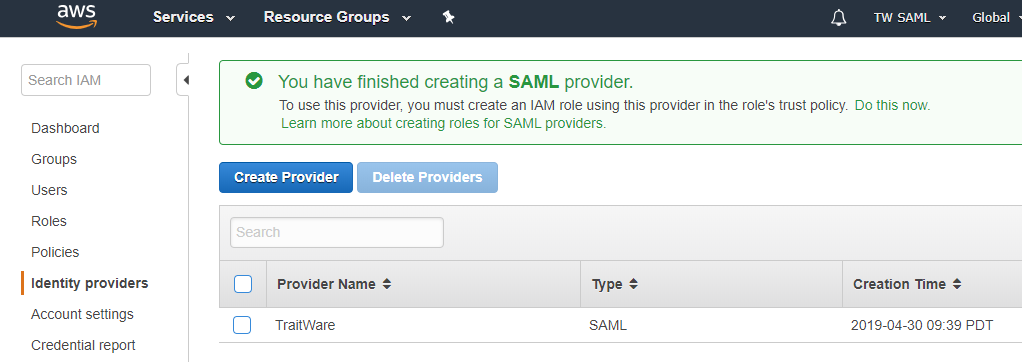
- You will see your Identity Provider and a success screen upon successful creation
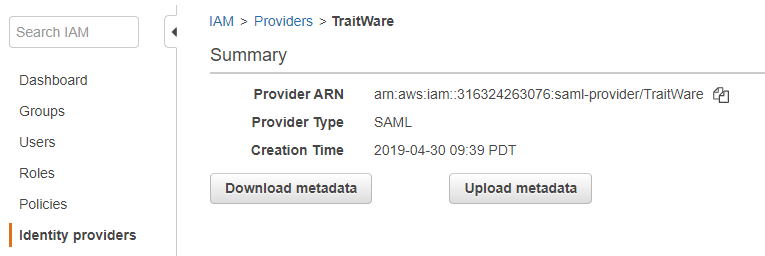
- If you select the Provider, you will see the Provider ARN which will be used as one of the AWS SAML Claims in the TraitWare Console.
- An option to collect this later will also be shown as you will still need to get the Roles ARN
Creating/Updating AWS Roles
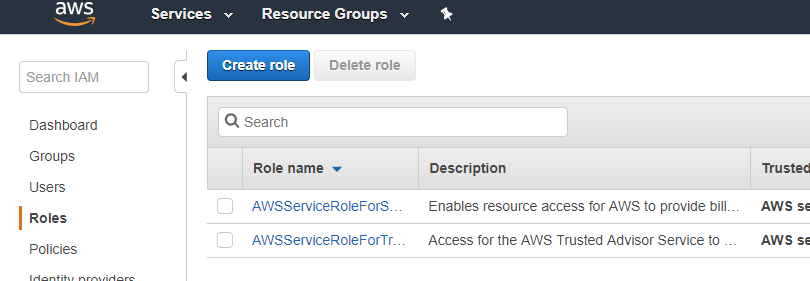
- Navigate to Roles
- Select Create role
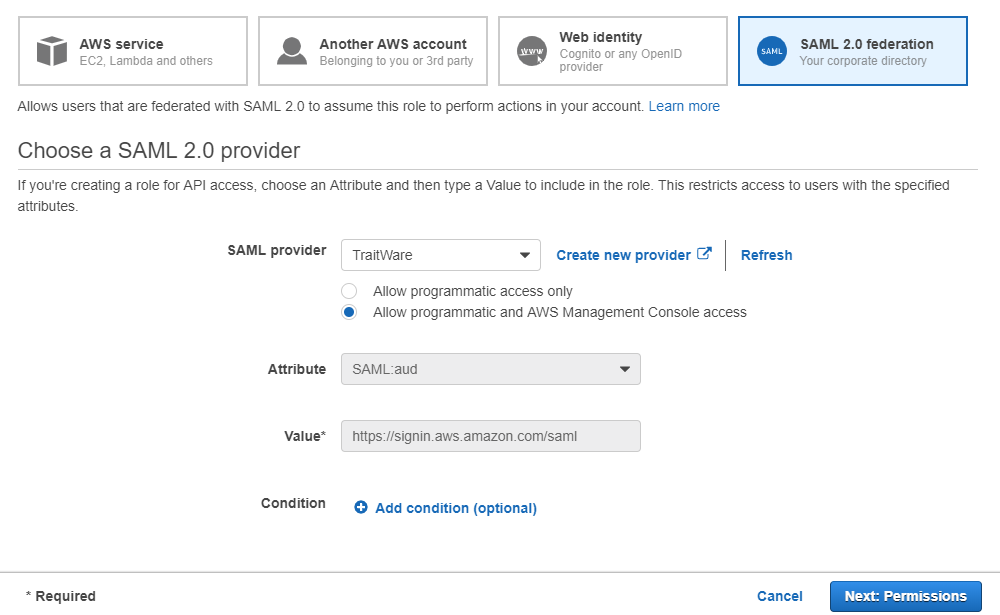
- Select SAML 2.0 federation
- Choose the SAML provider you just created
- Select Allow programmatic and AWS Management Console access
- Make sure the Attribute is SAML:aud and the Value is https://signin.aws.amazon.com/saml
- Select Next: Permissions
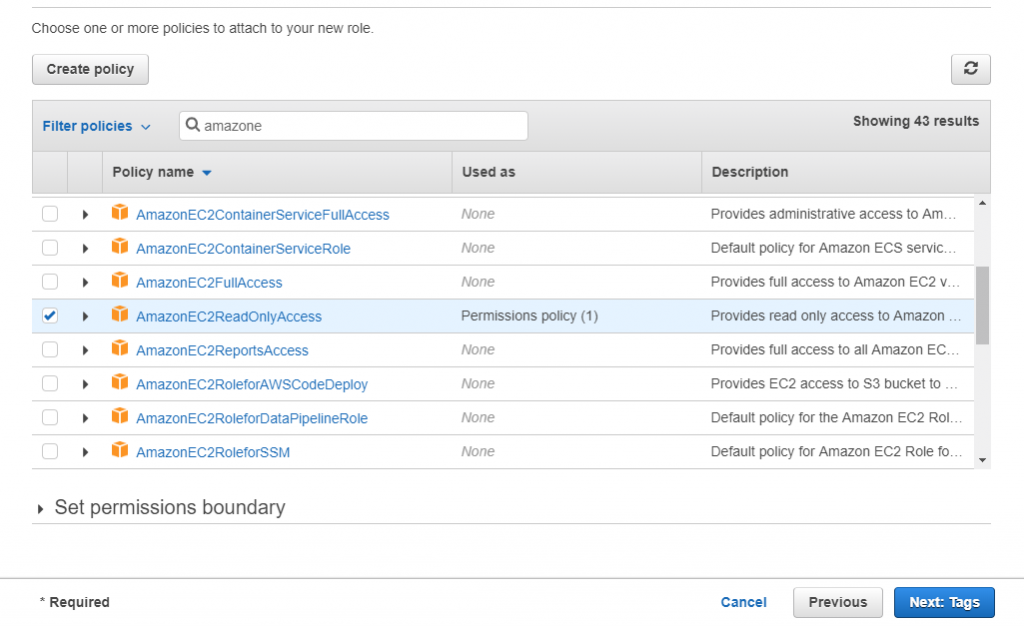
- Select the Policies you wish to assign (more can always be added later)
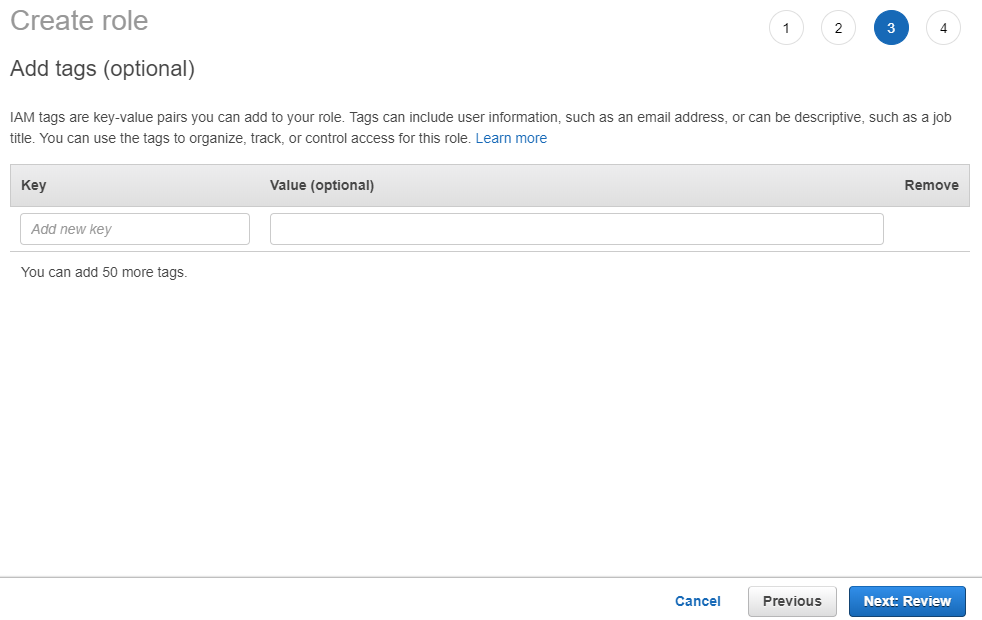
- Select Next: Tags
- Add any tags you may desire
- Select Next: Review
- Assign your role with a Role name
- Select Create role
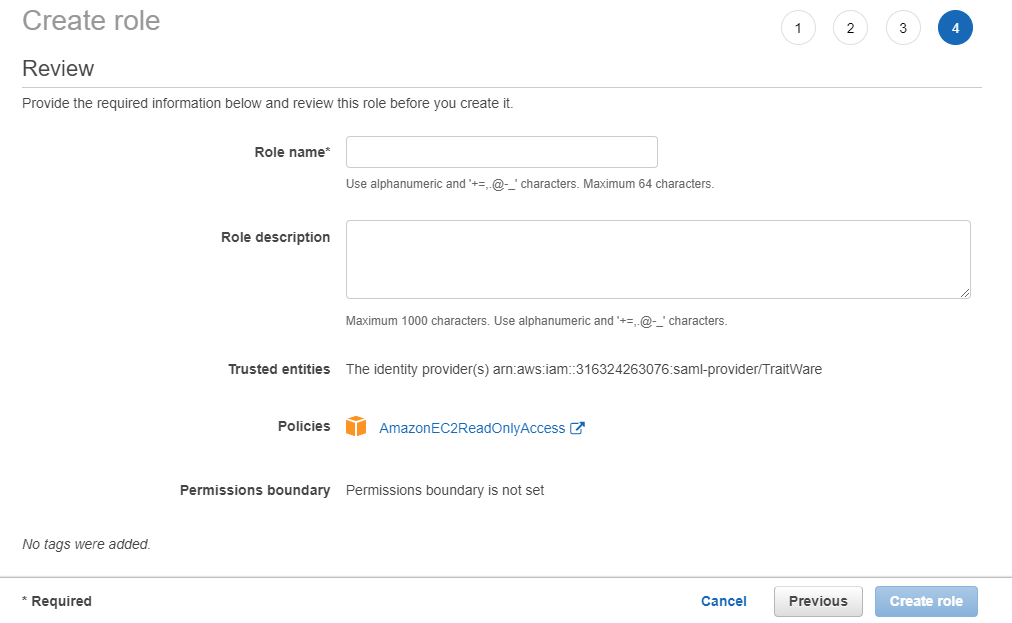
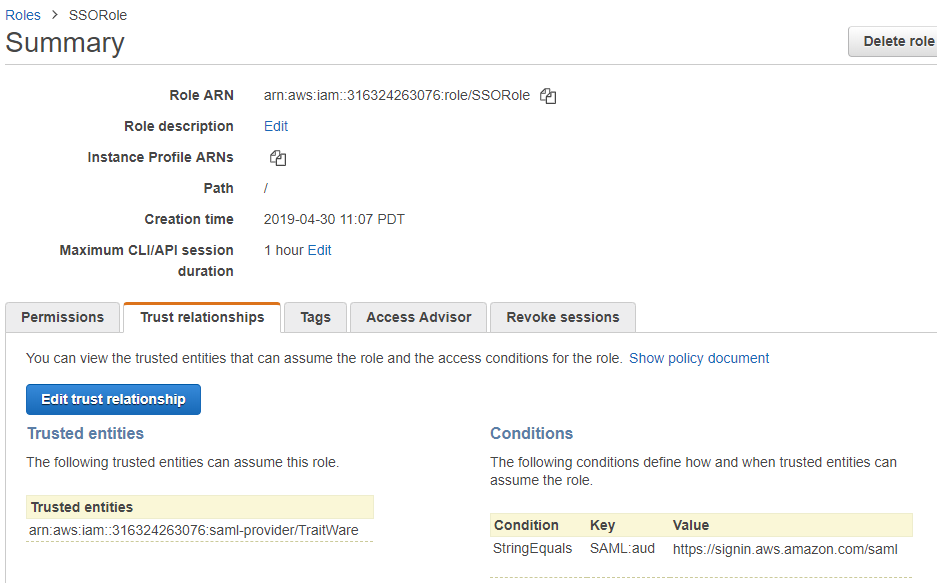
- Once you have created your role, select it to open it
- Select Trust relationships
- Copy the Role ARN and Trusted entities ARN to copy into the Claims field in the TraitWare Application Setup
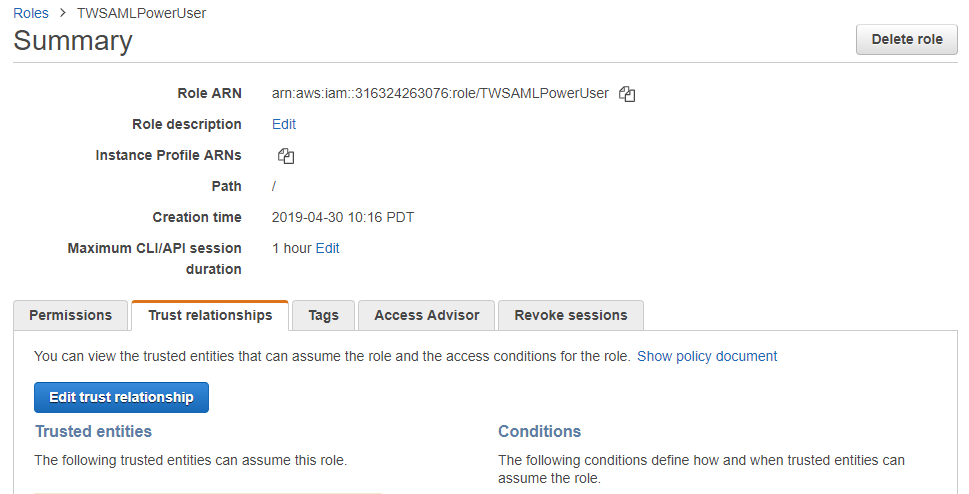
- To update an existing role with your new Identity Provider, select the one you wish to modify
- Select the Trust relationships tab
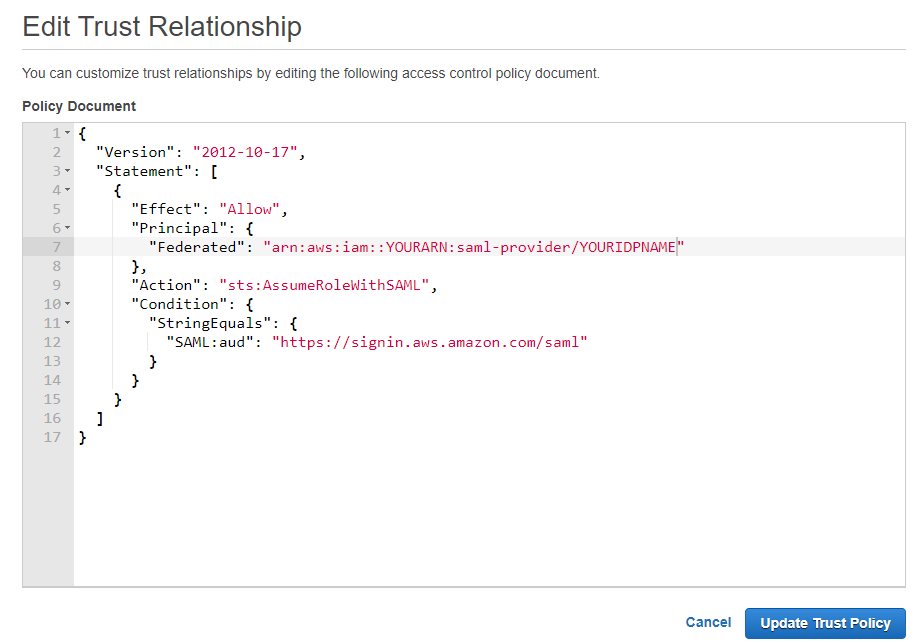
- Select Edit trust relationship
- Edit the Trust Relationship with the below information
- Note that you can copy what you need from the new role you created above
- Select Update Trust Policy
Additional Information
If you do not see an application in the dropdown list during the Application setup, you can fill in the fields with your generic information. If you have issues, please contact us at support@traitware.com, and we will work with you to see if the application can be added.