- Getting Started
- Recommended Integration & Registration Flow
- Admin Console Overview
- User Onboarding and Management
- User Registration and Login
- Enterprise Applications
- Microsoft Integration
- Installing TraitWare PAM Module for SSH and SFTP
Okta
Posted on April 18, 2024
TraitWare Console
- TraitWare Console
- Generate Signing Key
- Create Application
- Download metadata
- Okta Console
- Add Identity Provider
- Download metadata
Generate Signing Key
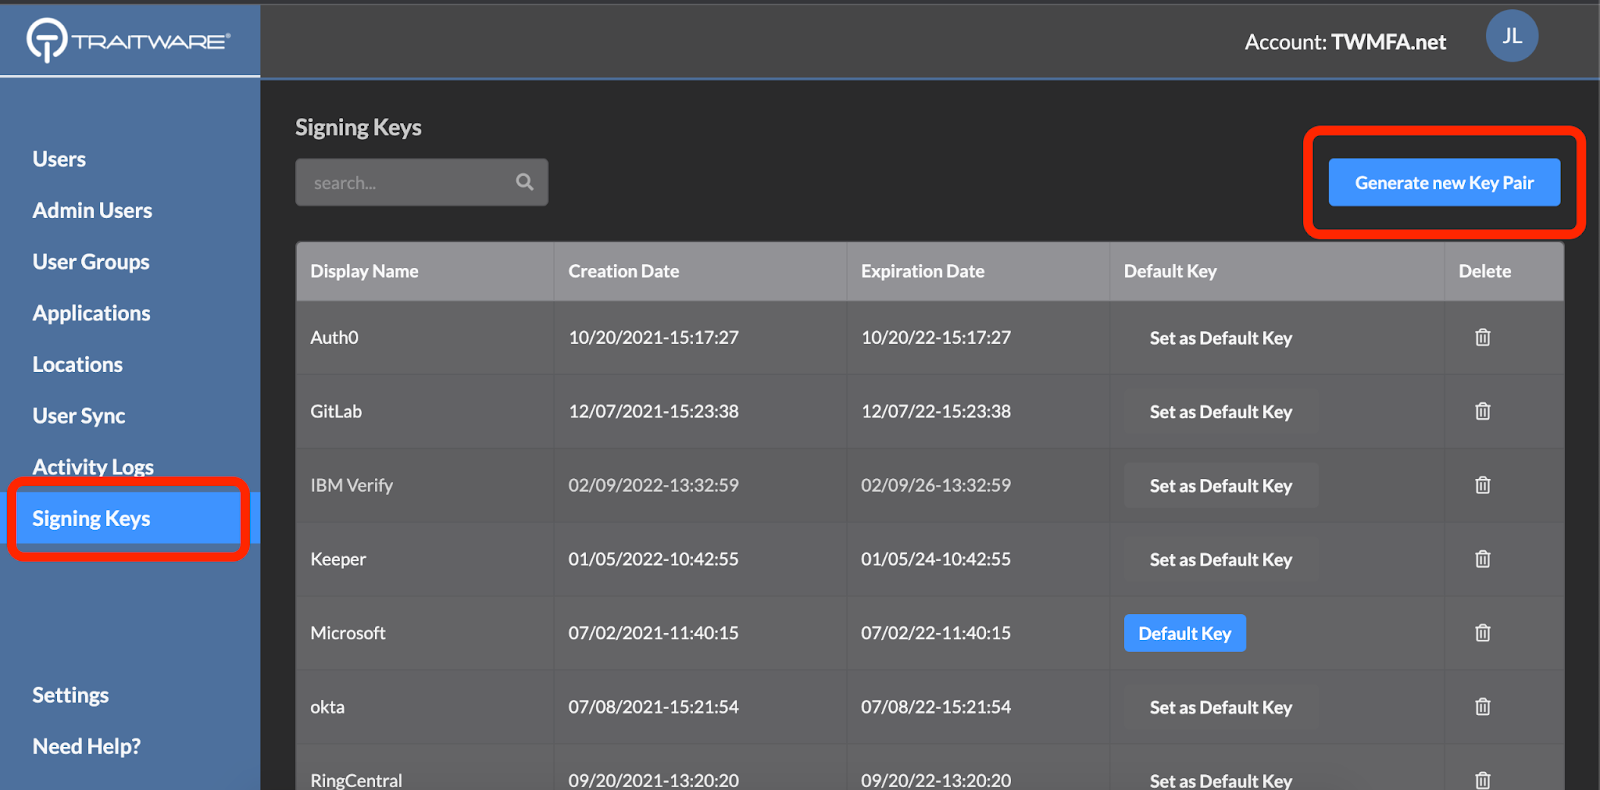
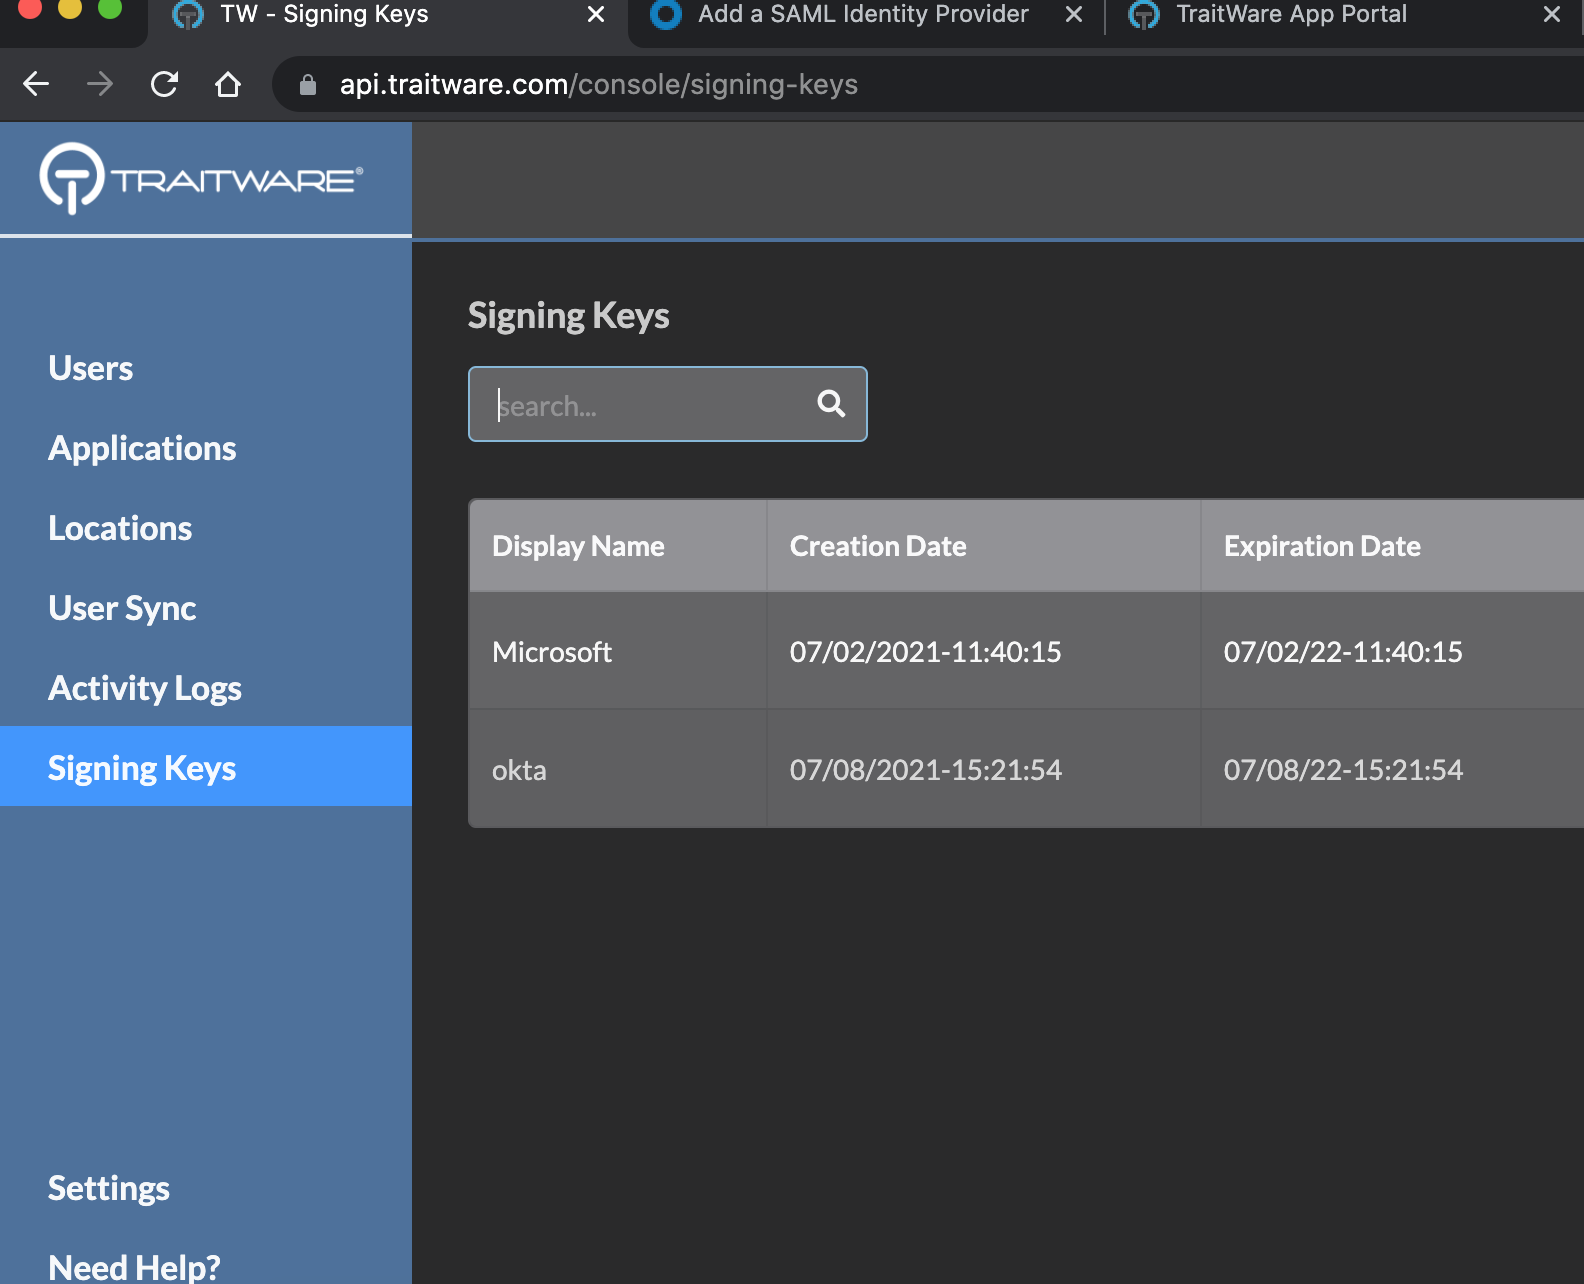
Navigate to the TraitWare administrative panel. Select Signing Keys then select Generate new Key Pair.
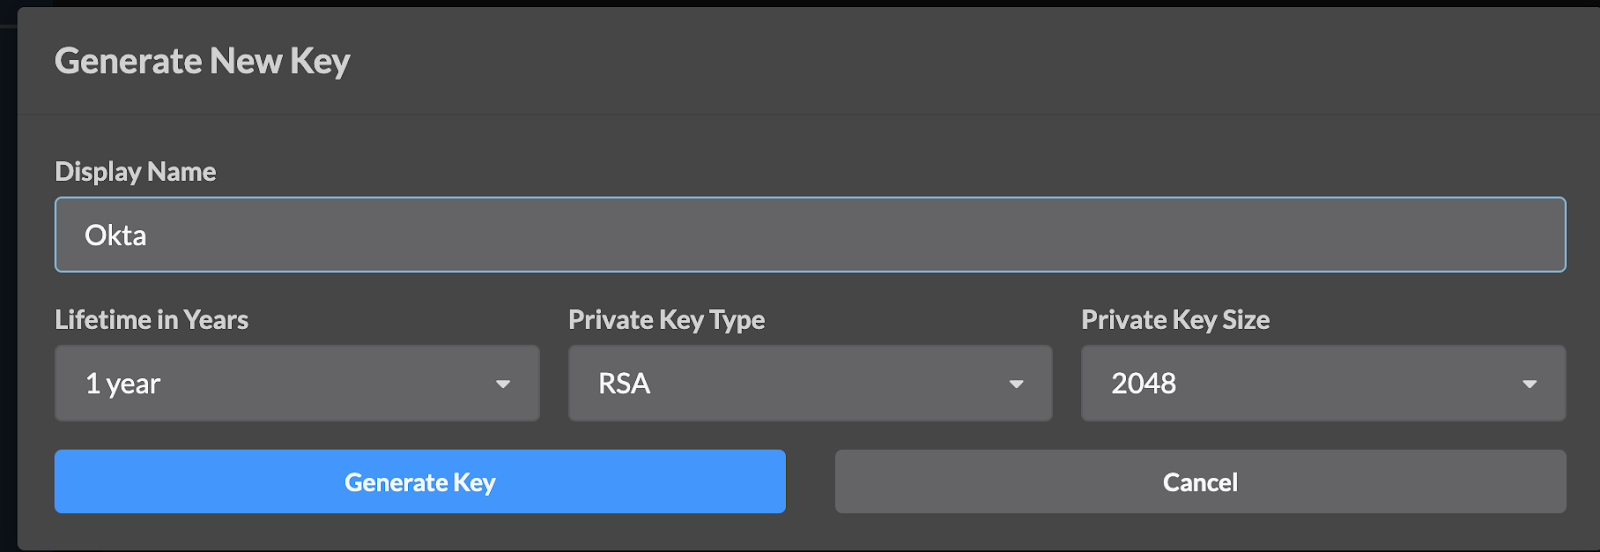
Enter a Display Name, and Lifetime in Years. Select Generate Key.
Okta Console
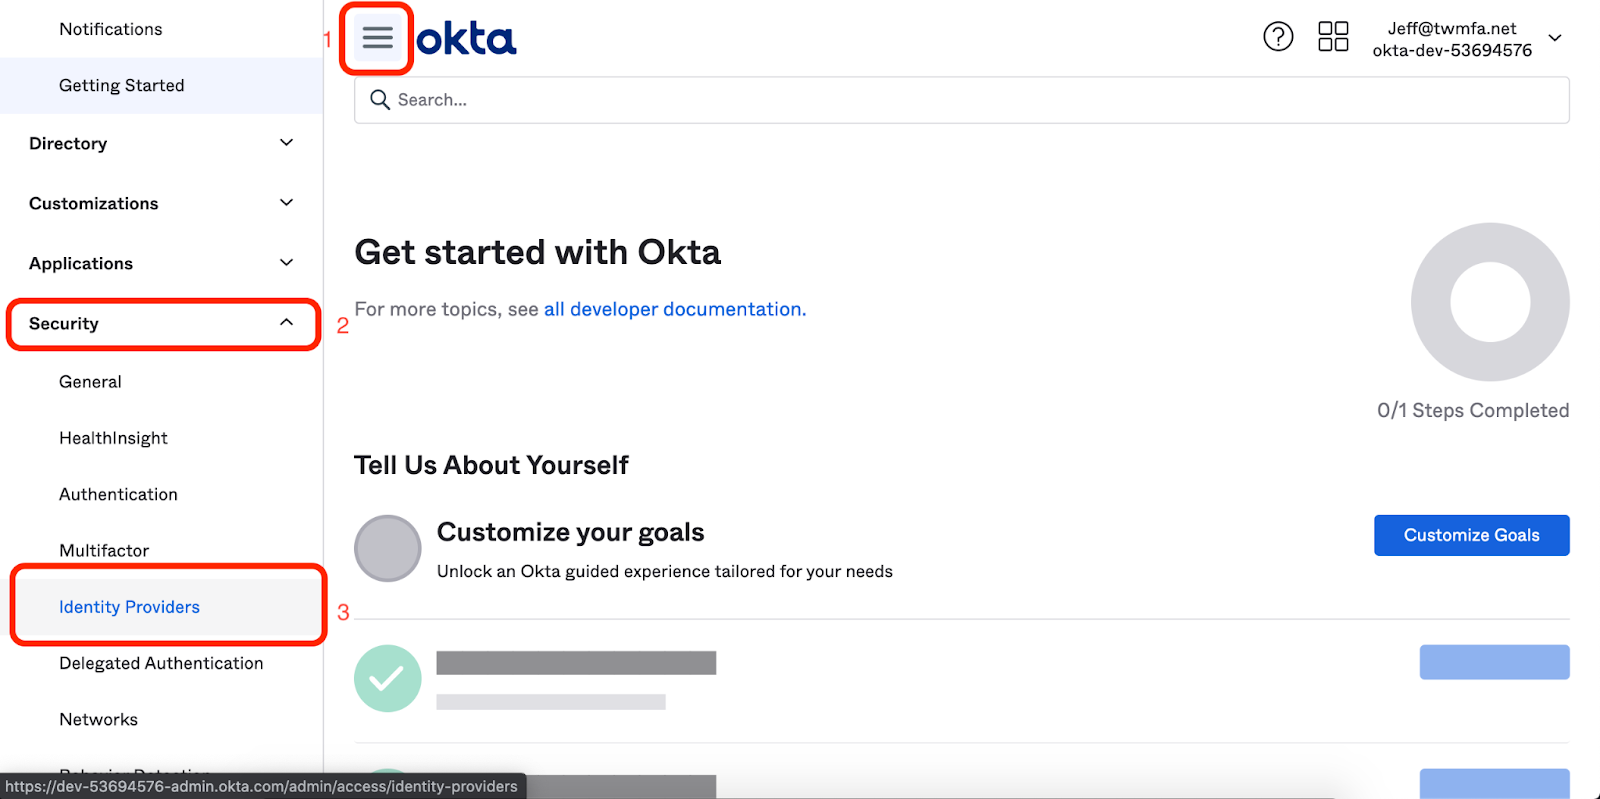
- Select on the Menu Icon in the top left corner.
- Select the Security drop down.
- Select Identity Providers.
Add Identity Provider
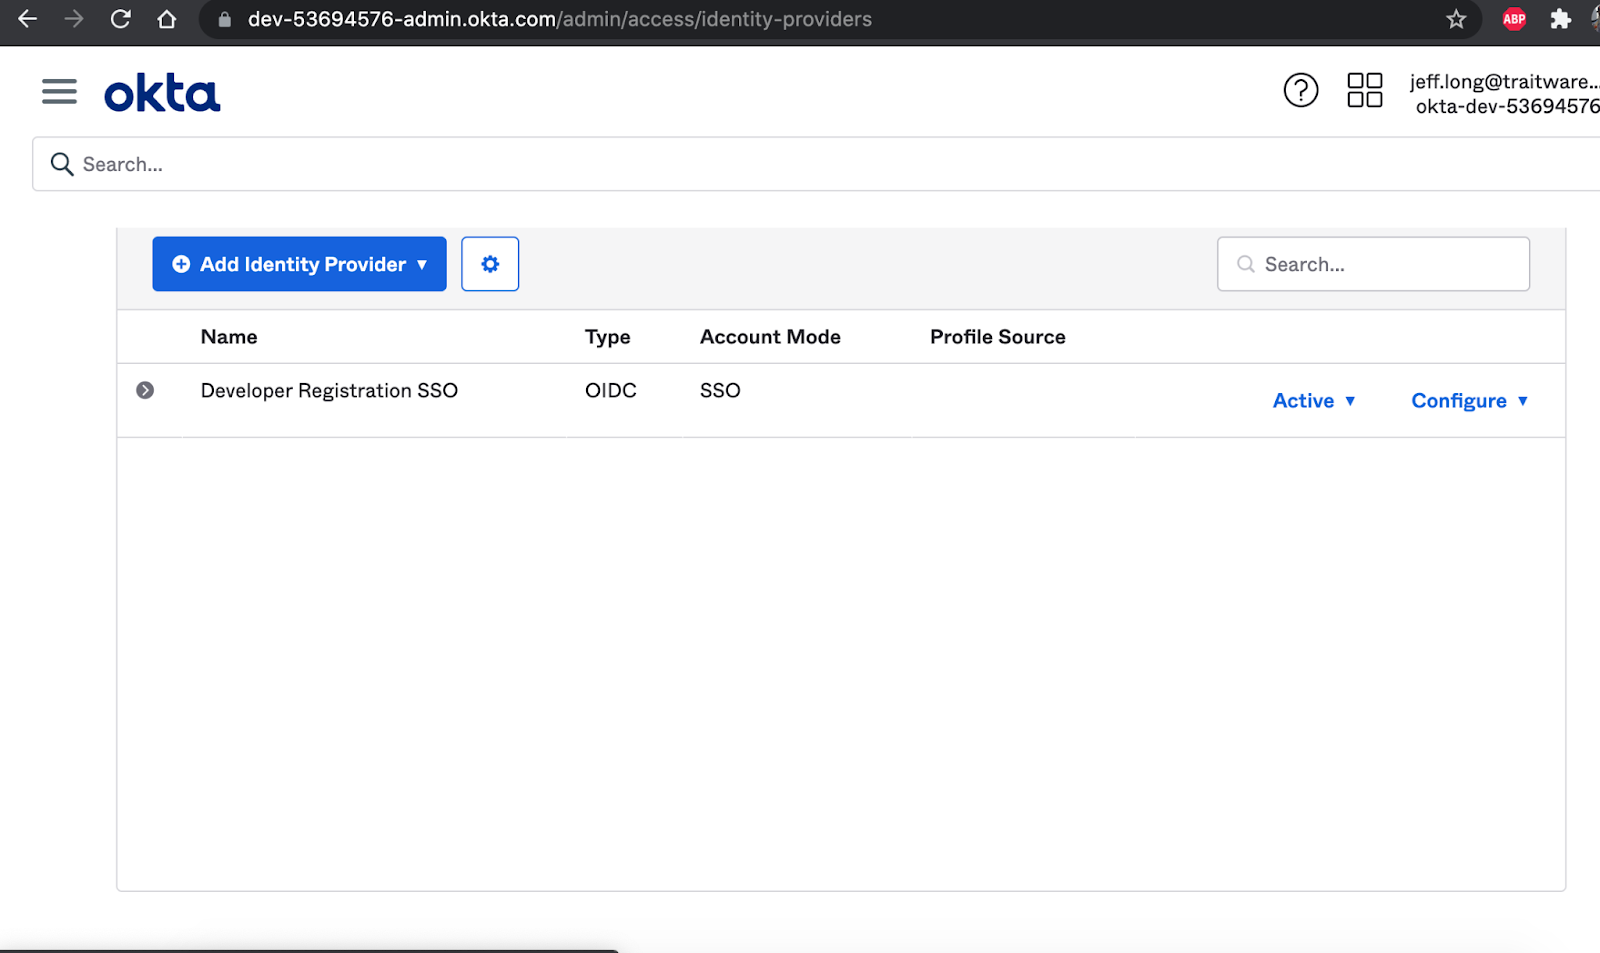
Select Add Identity Provider.
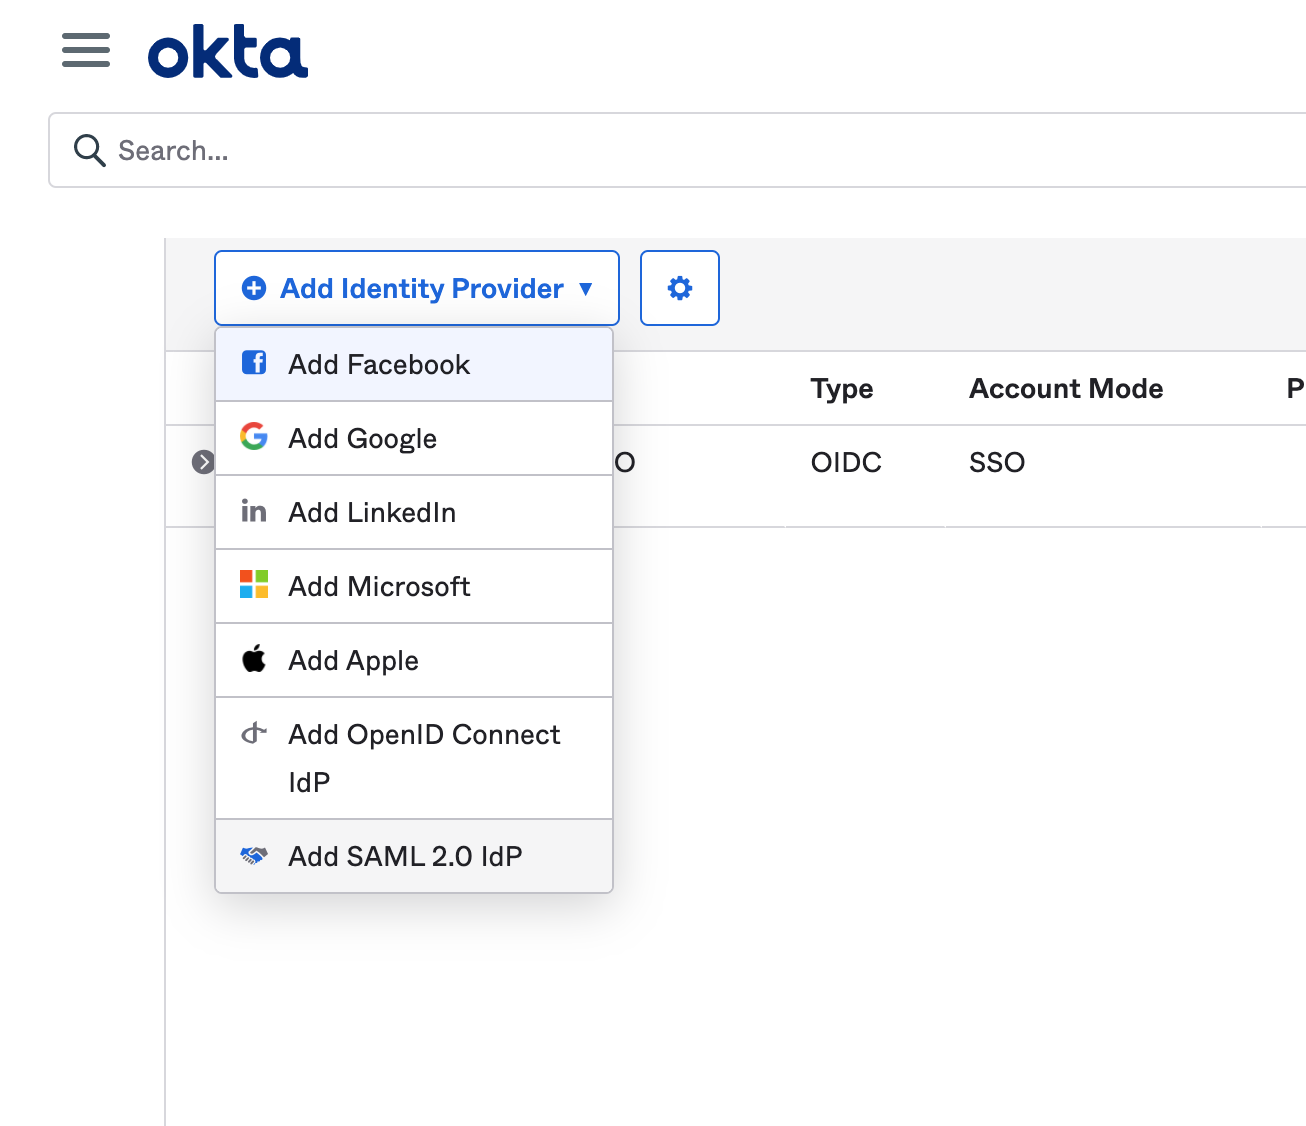
Select Add SAML 2.0 IdP.
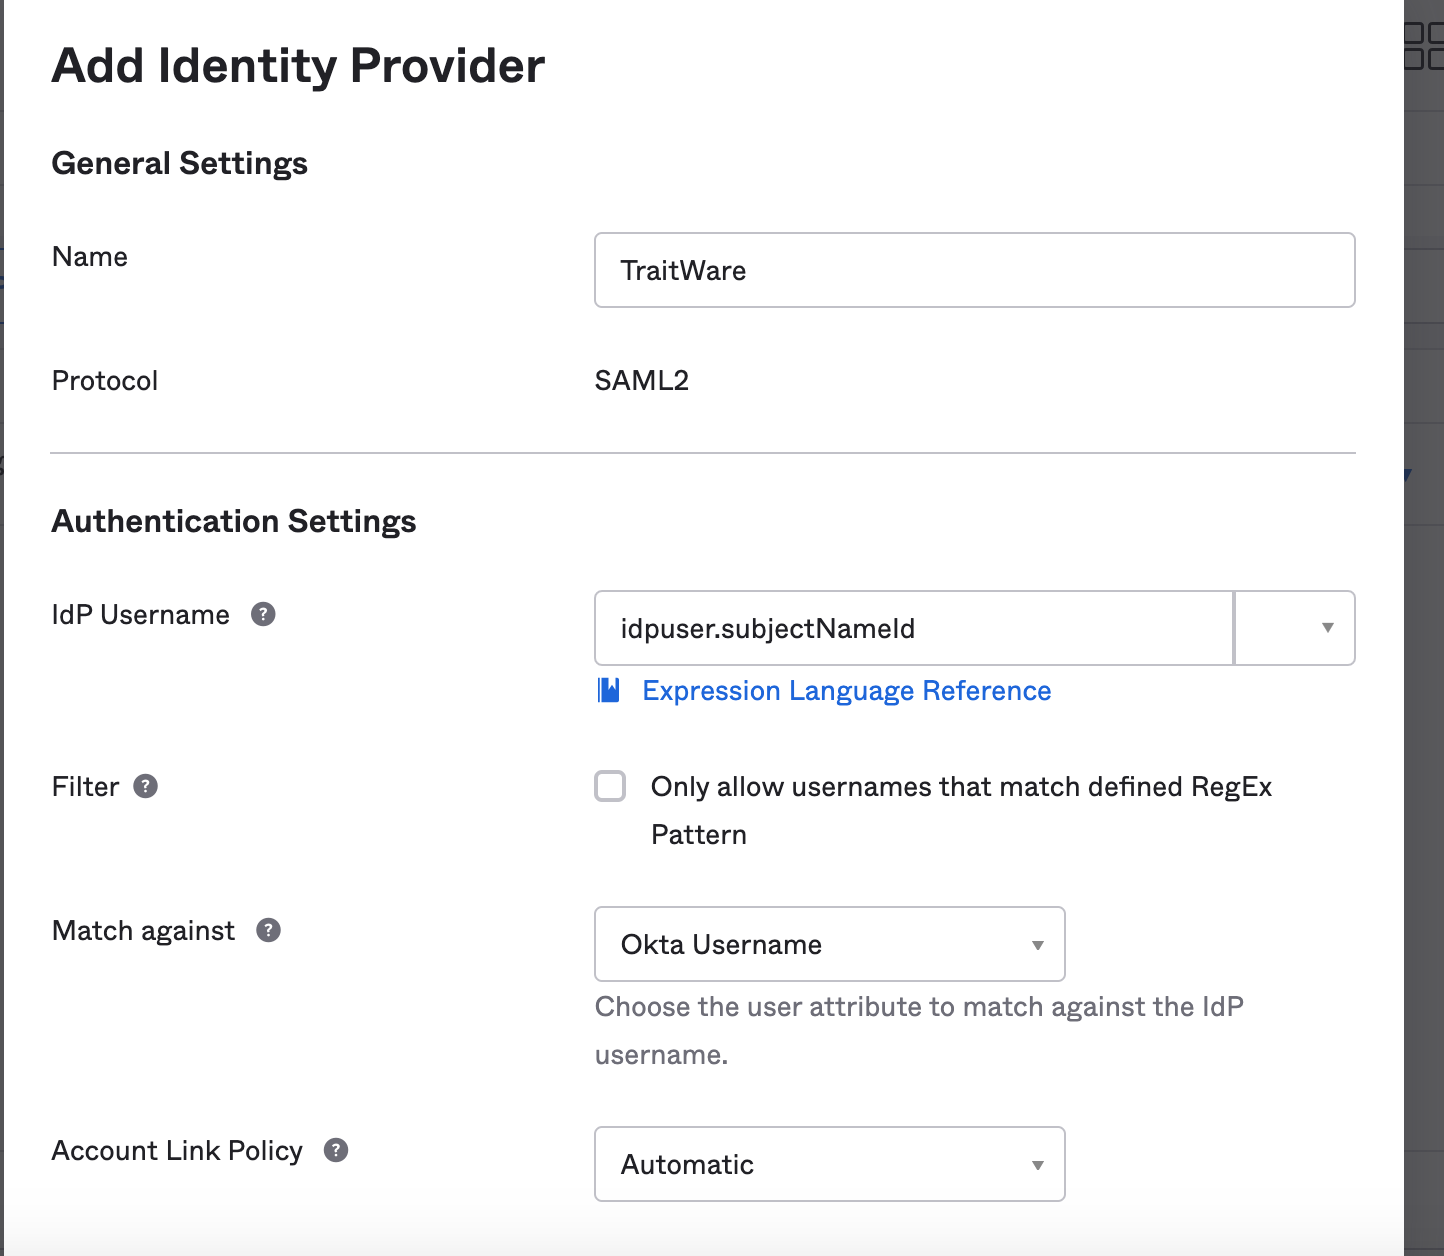
Fill in the name
Select idpuser.subjectNameId in the IdP Username dropdown
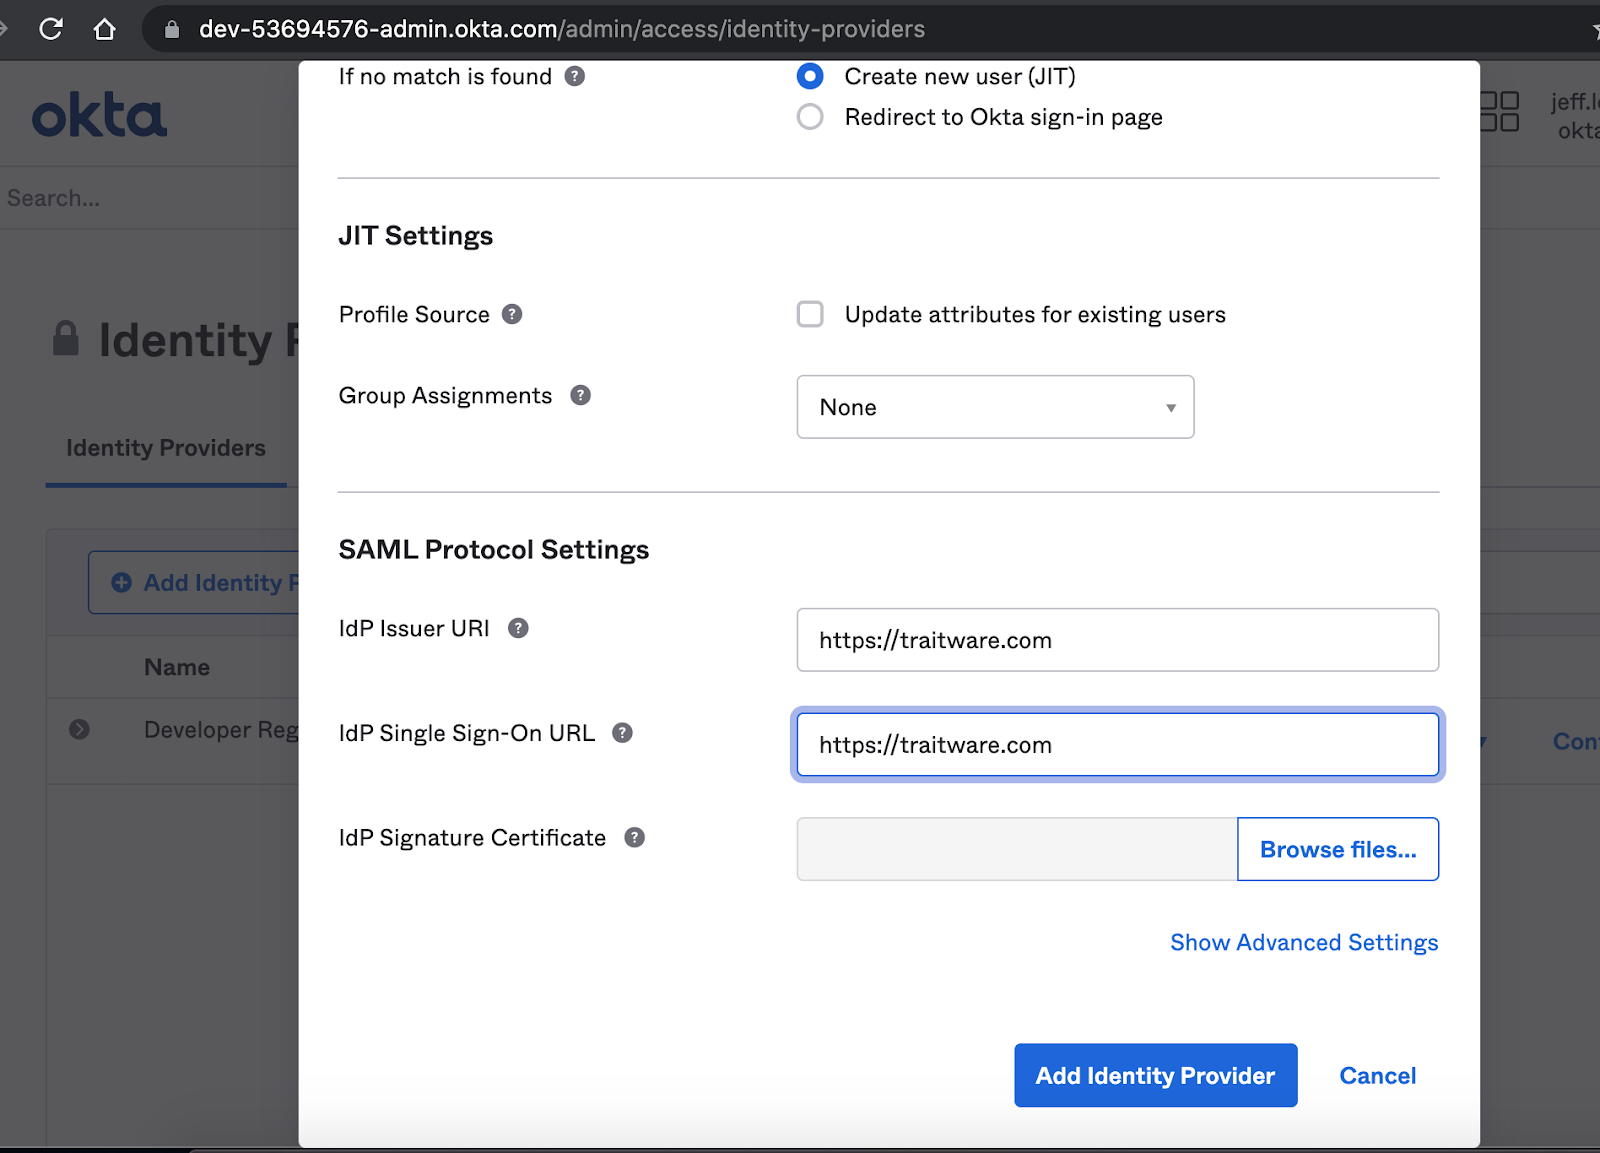
Under SAML protocol settings, enter “https://traitware.com” – you will have a chance to change these settings later.
Select the Browse files button in IdP Signature Certificate.
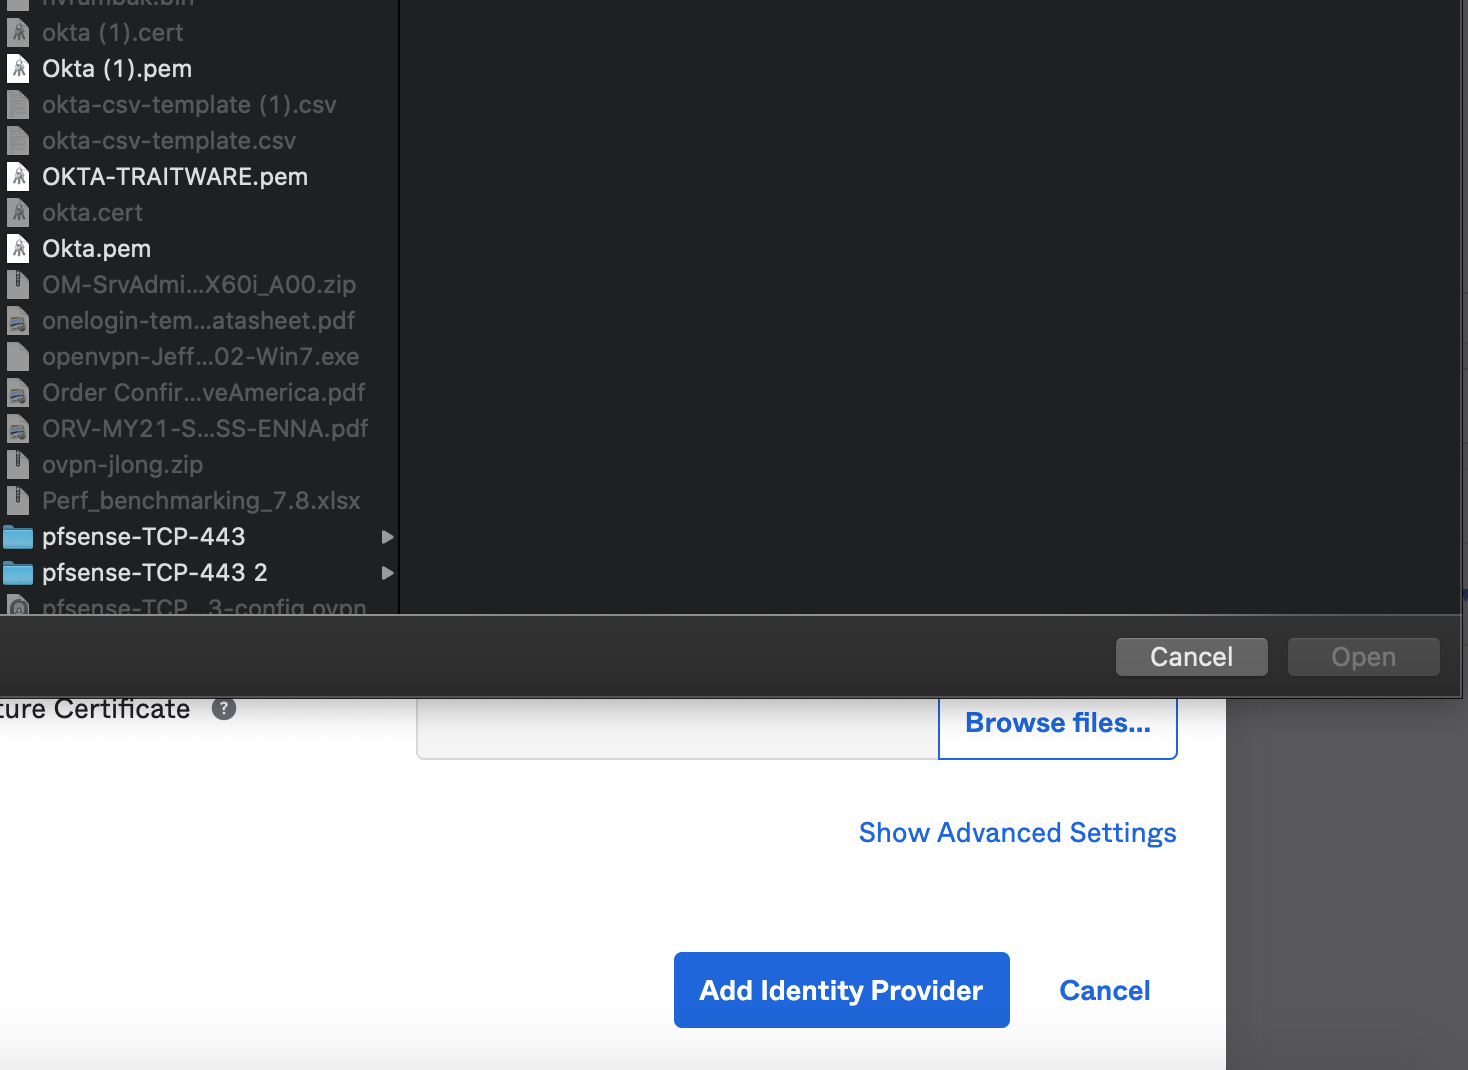
Upload the TraitWare Signing Key .pem file to Okta.
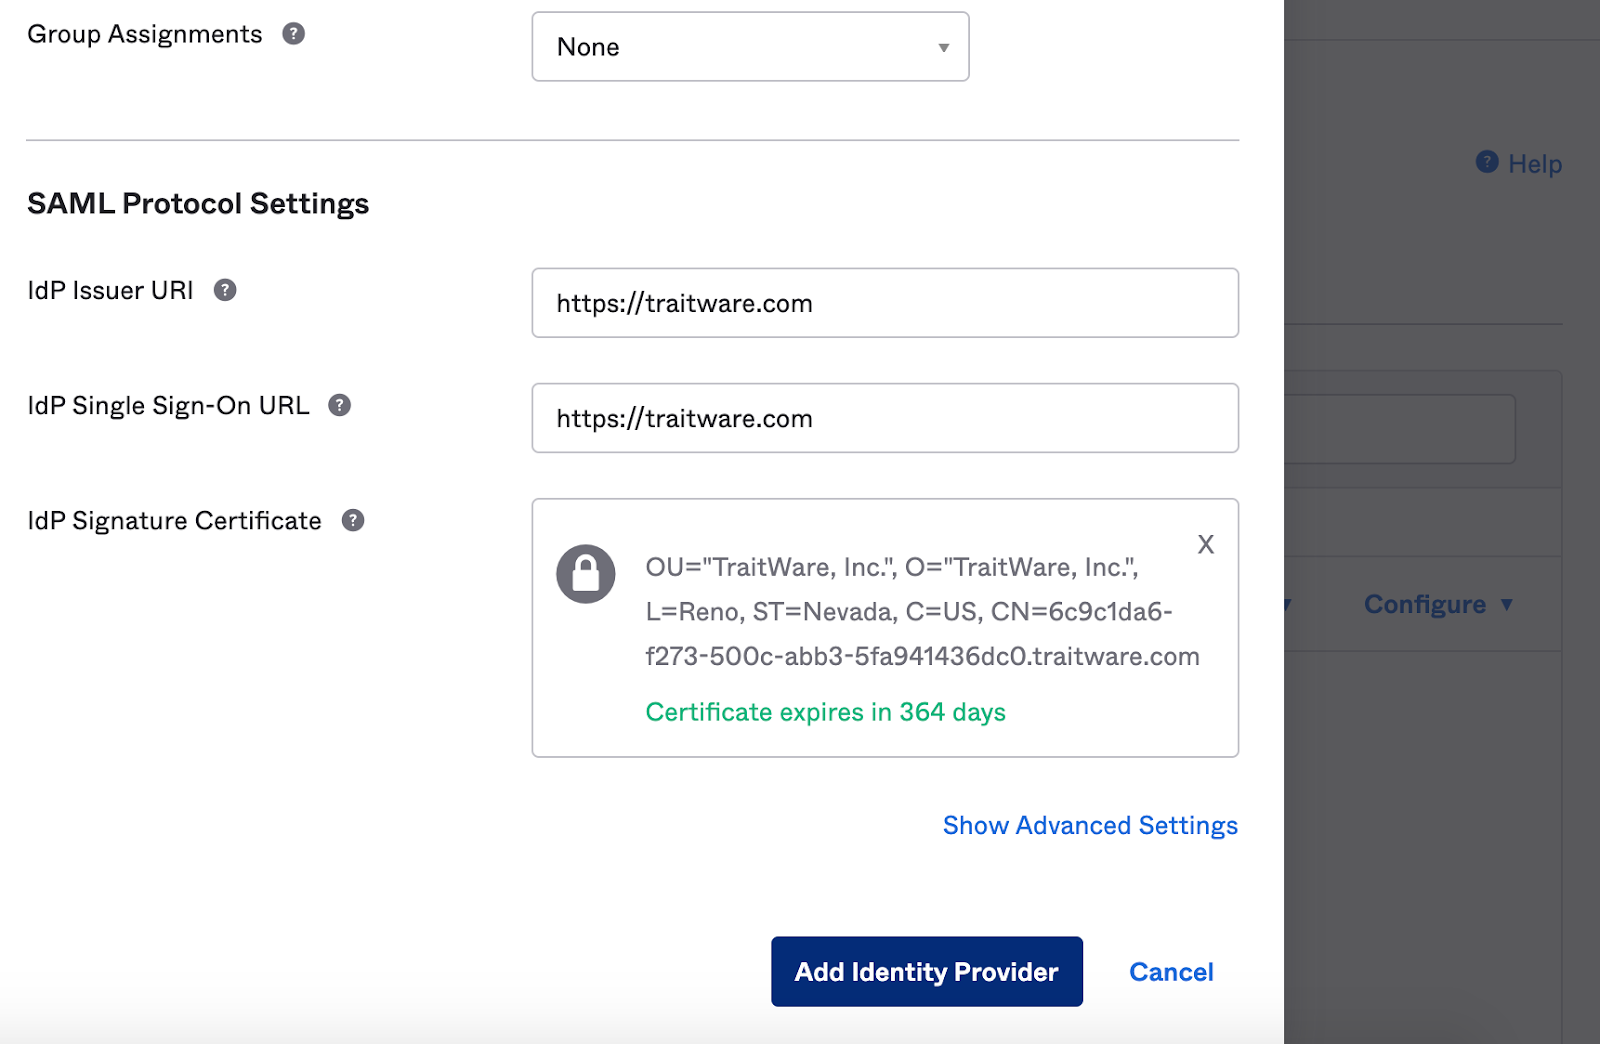
Select Add Identity Provider.
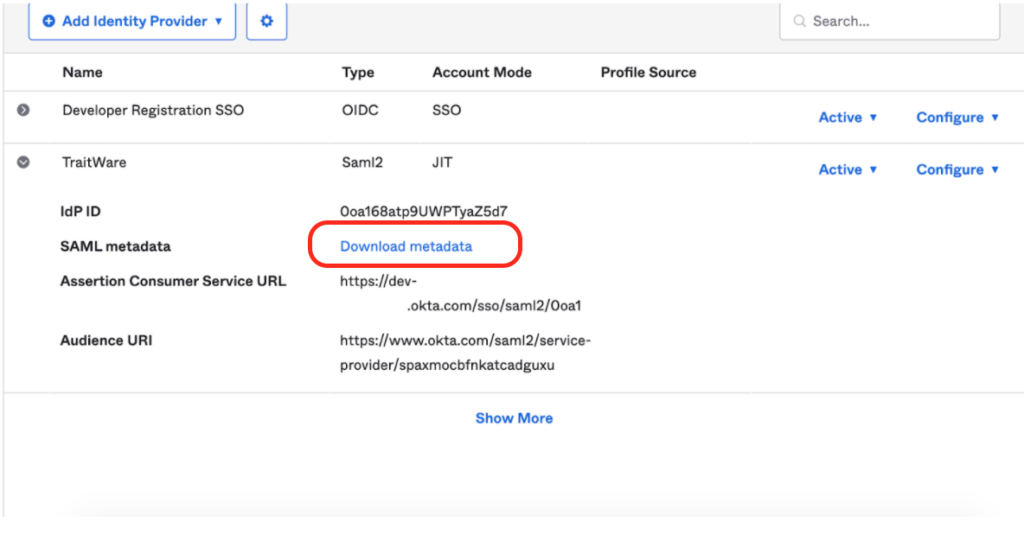
Select Download Metadata. This will be the XML file that will be uploaded to the TraitWare Admin console.
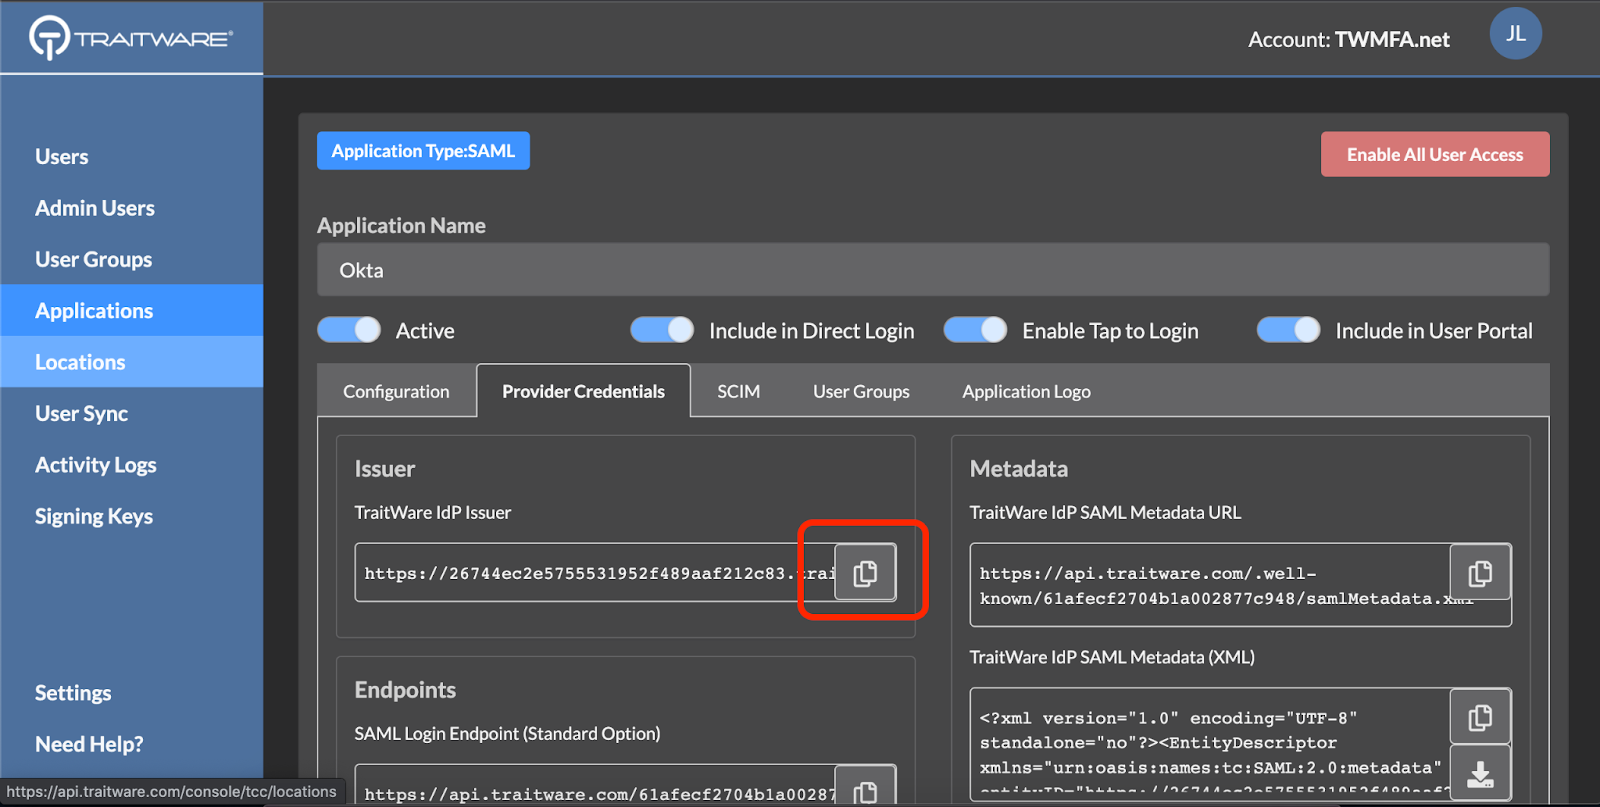
TraitWare Console
Create Application
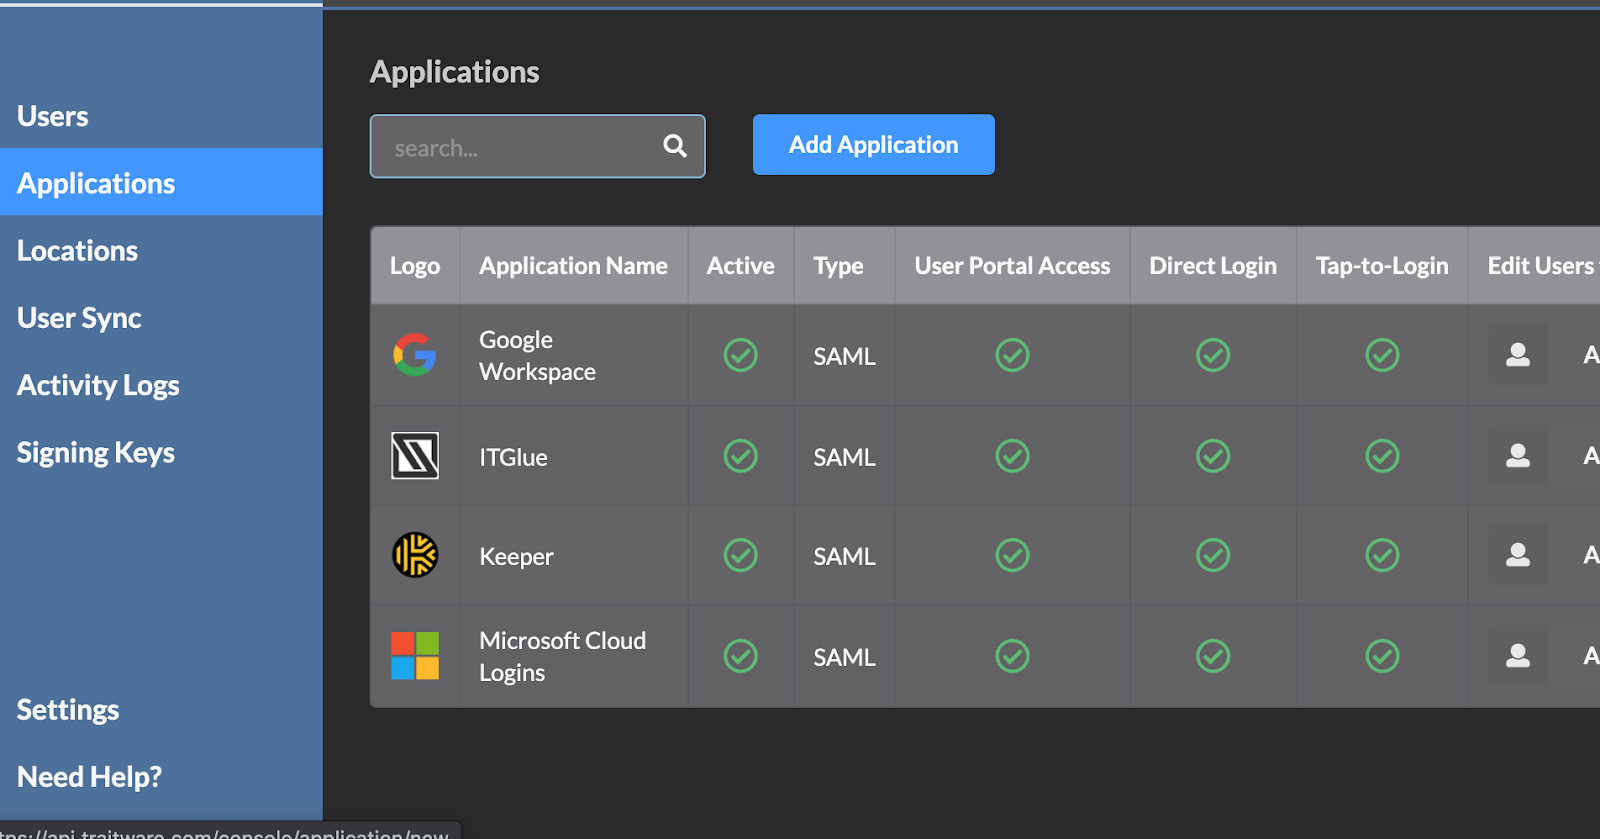
Select Add Application.
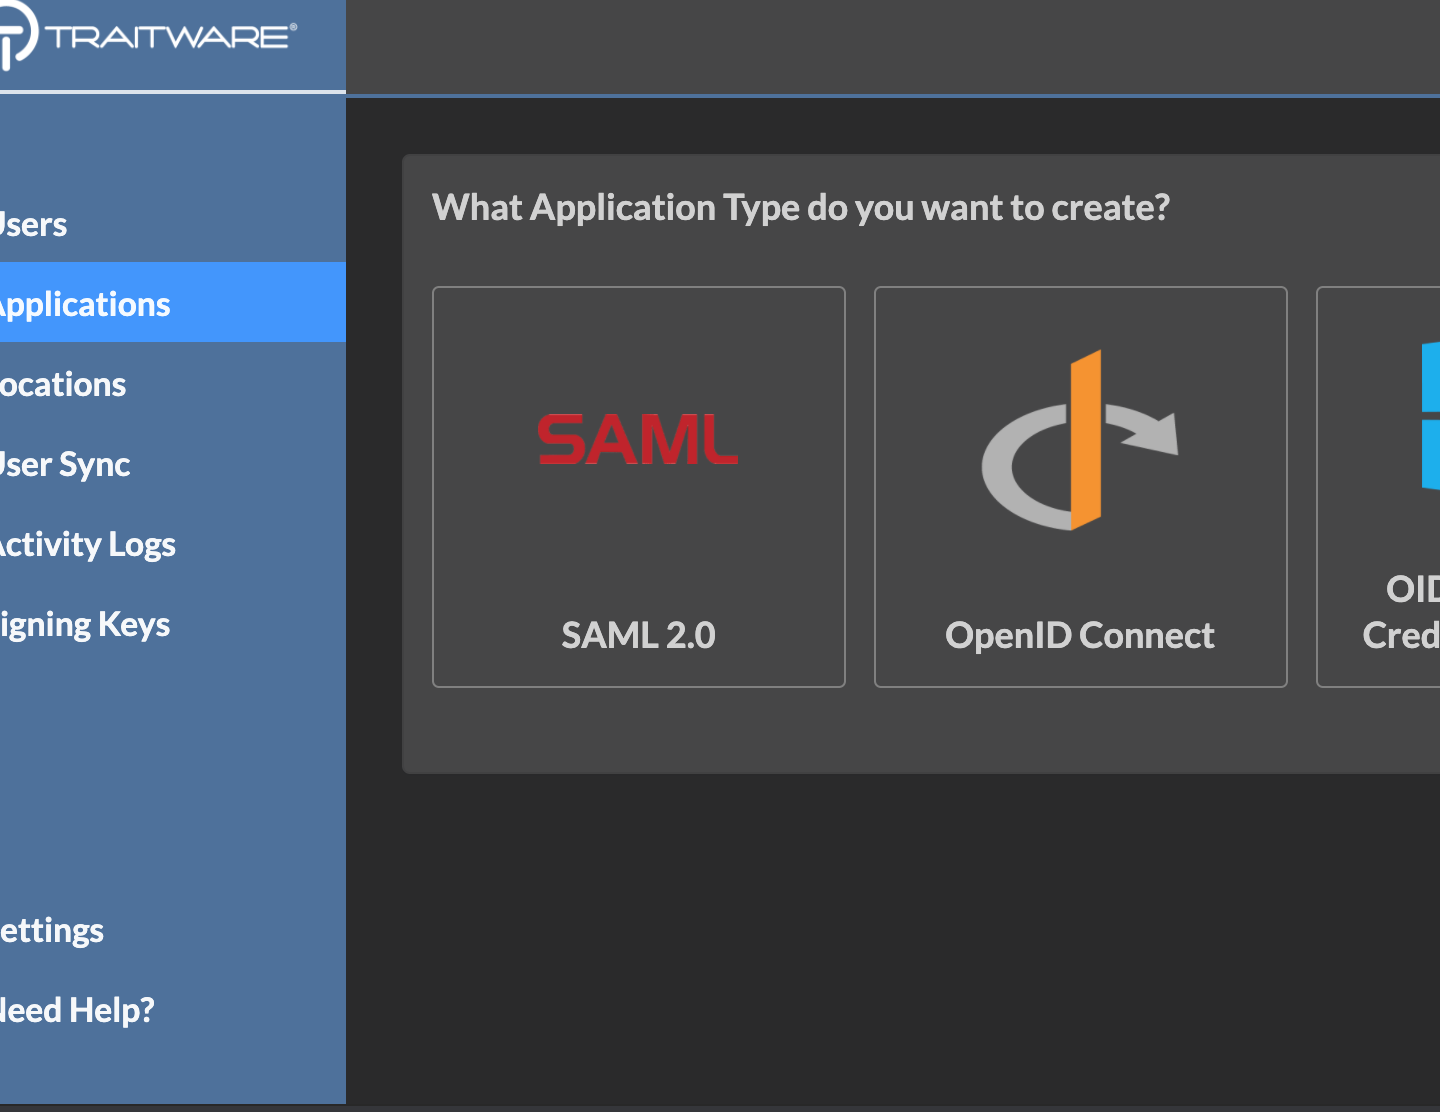
Select SAML 2.0.
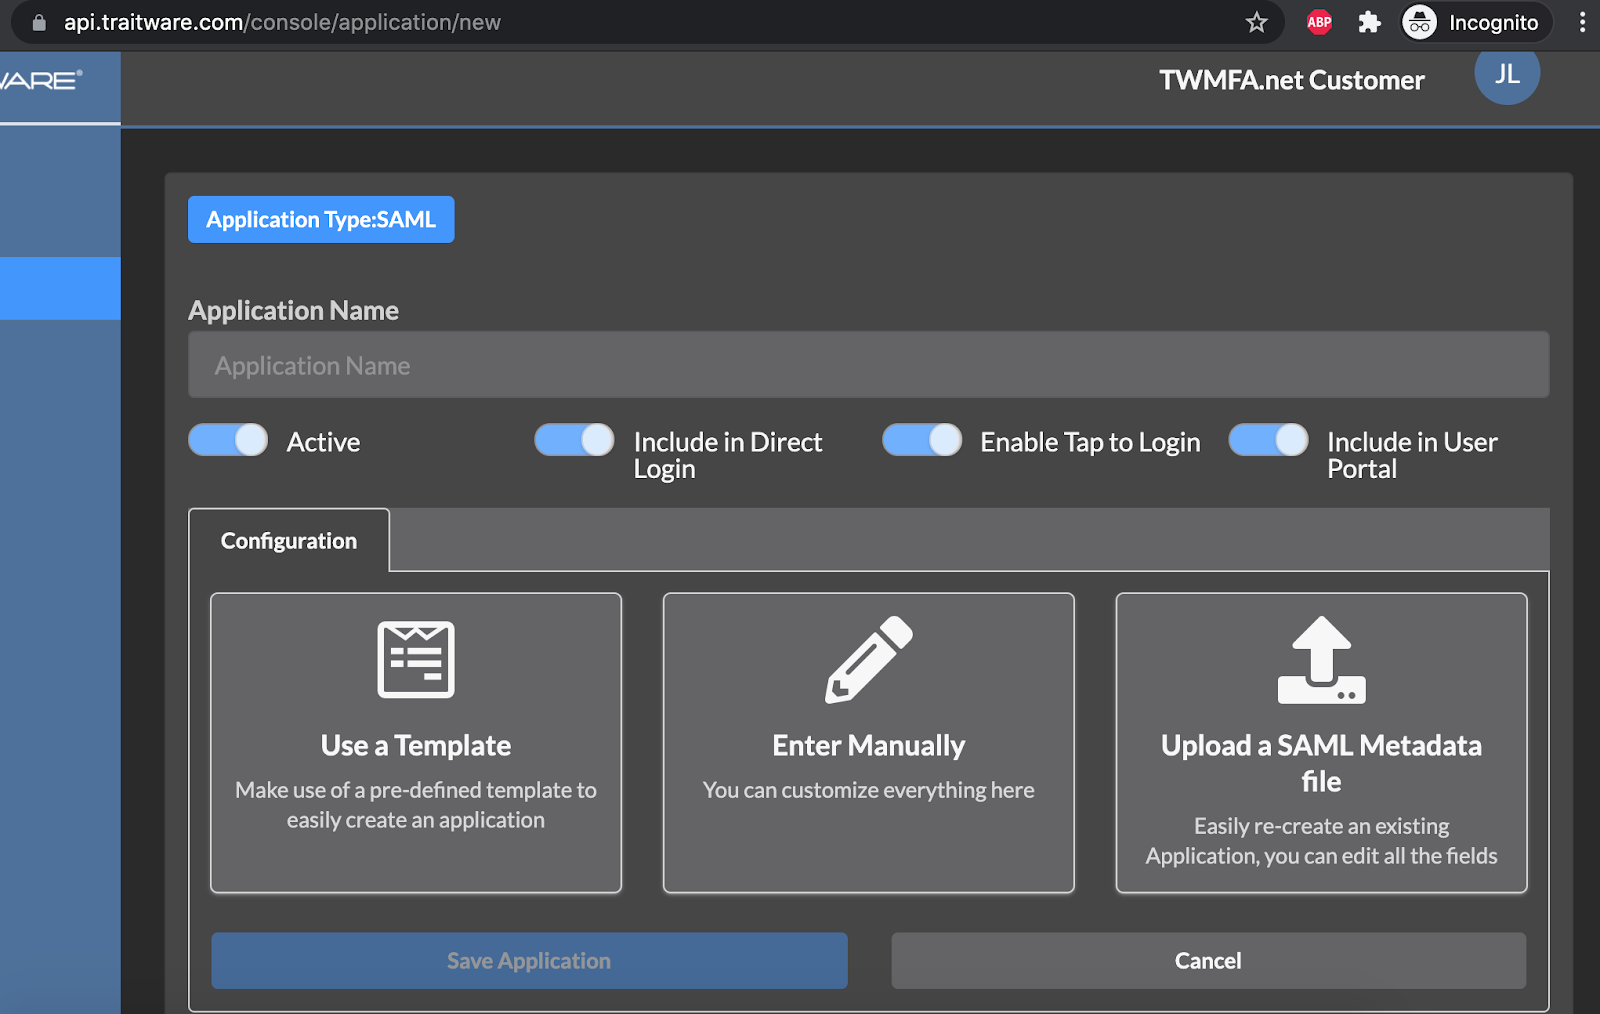
Select Upload a SAML Metadata file.
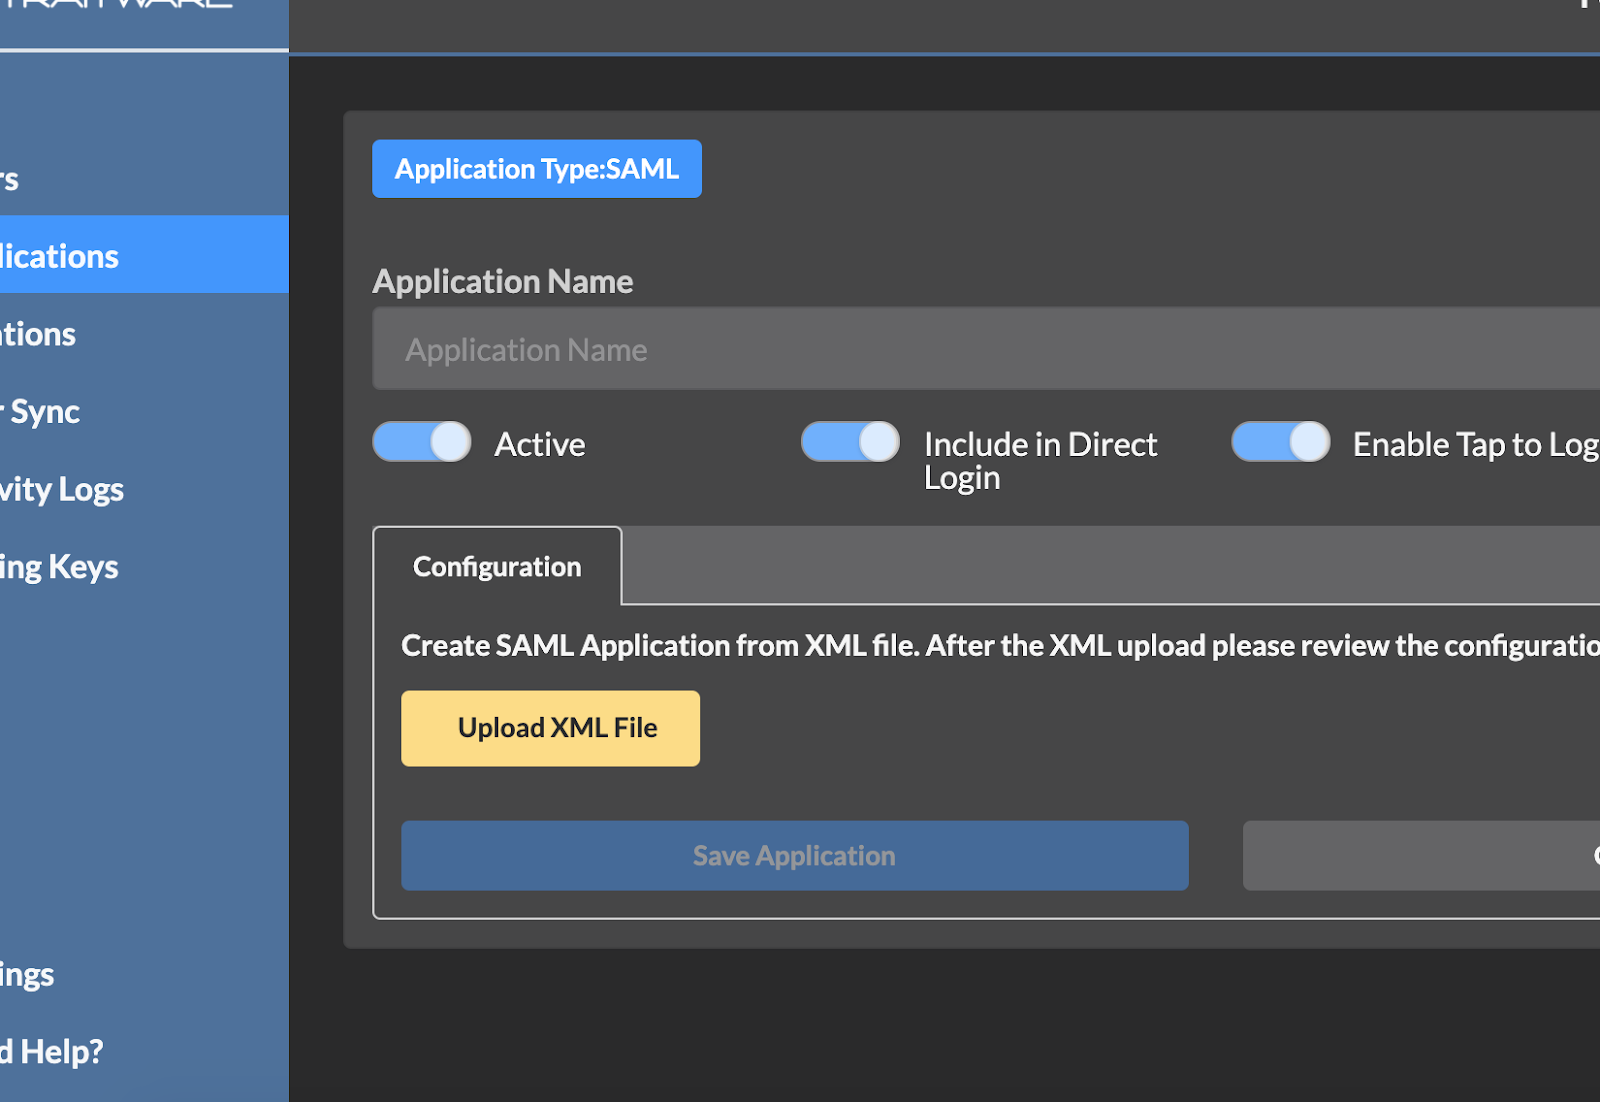
Select Upload XML File.
Select the metadata.xml file.
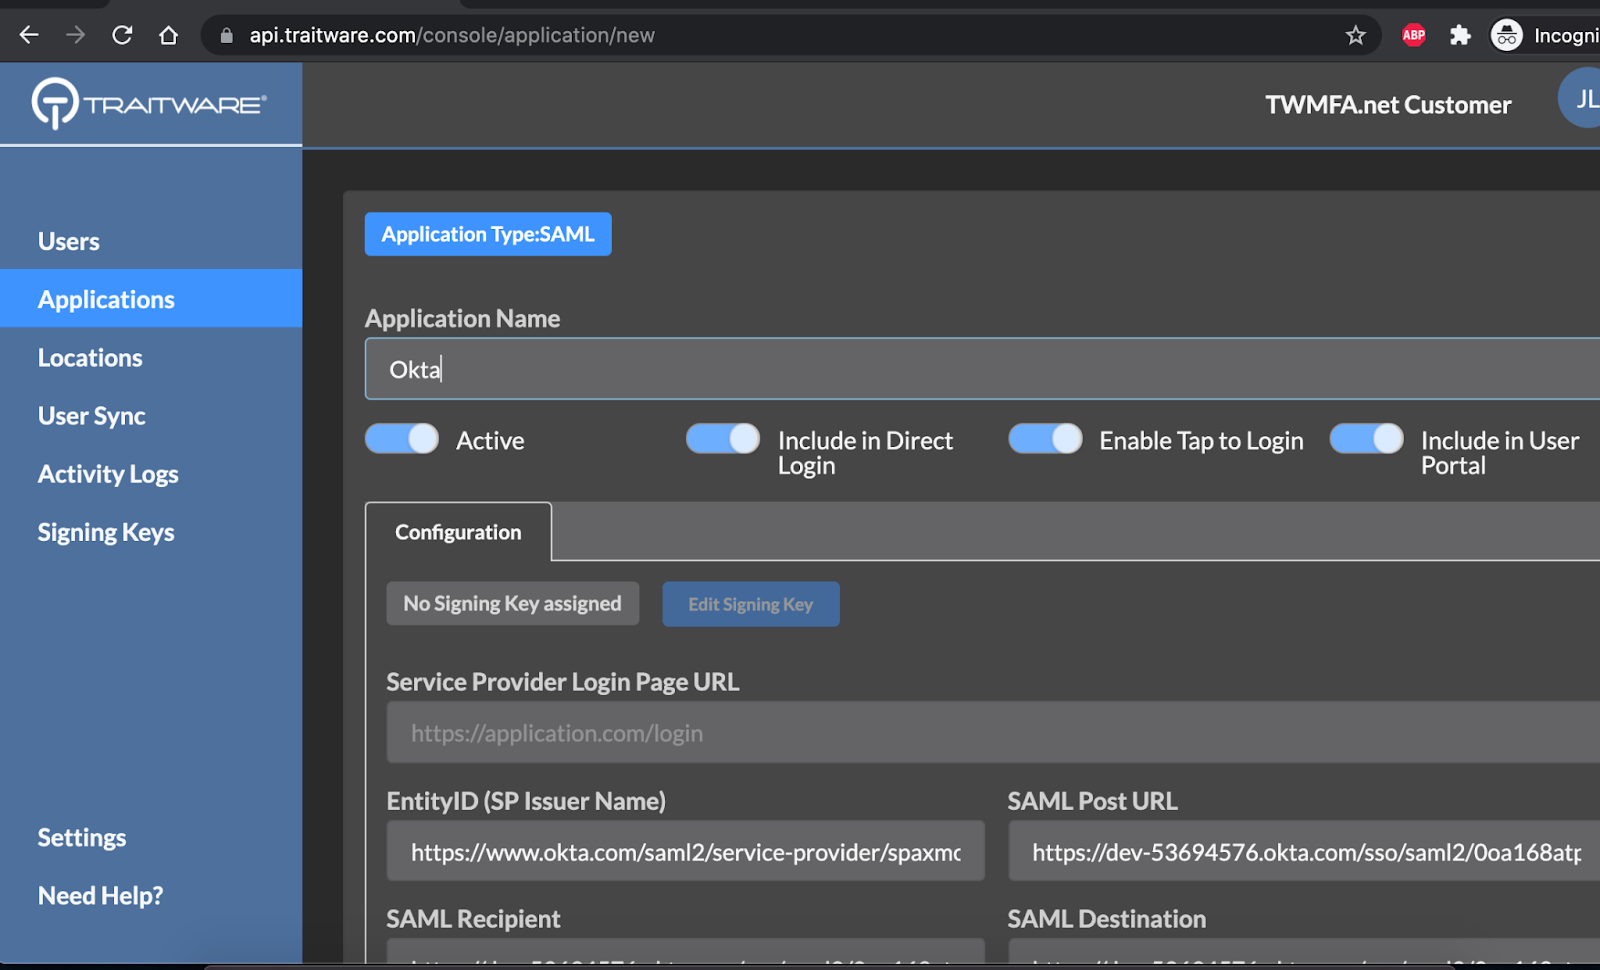
Enter a name for the application and select Save Application.
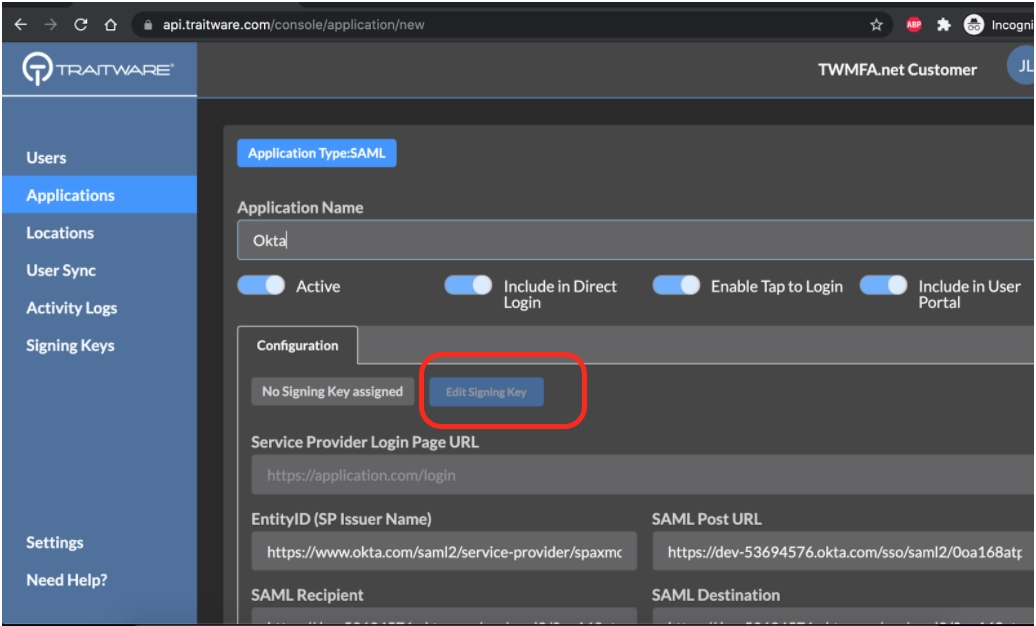
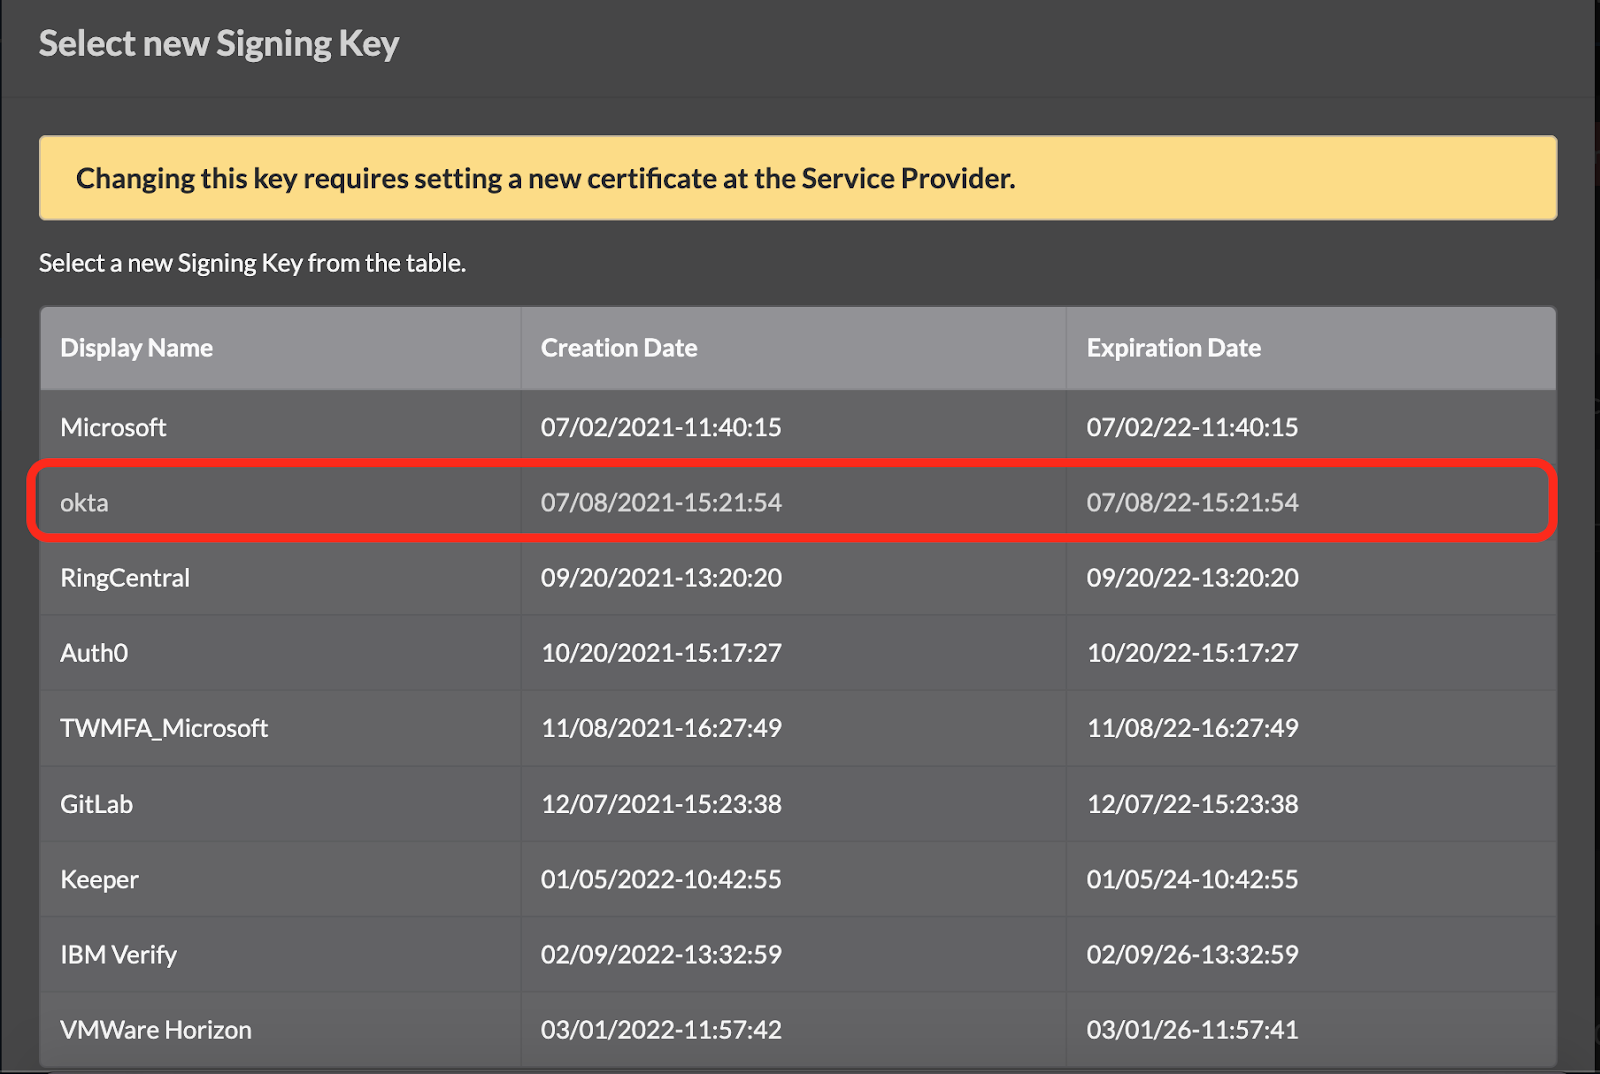
Select the Okta signing key.
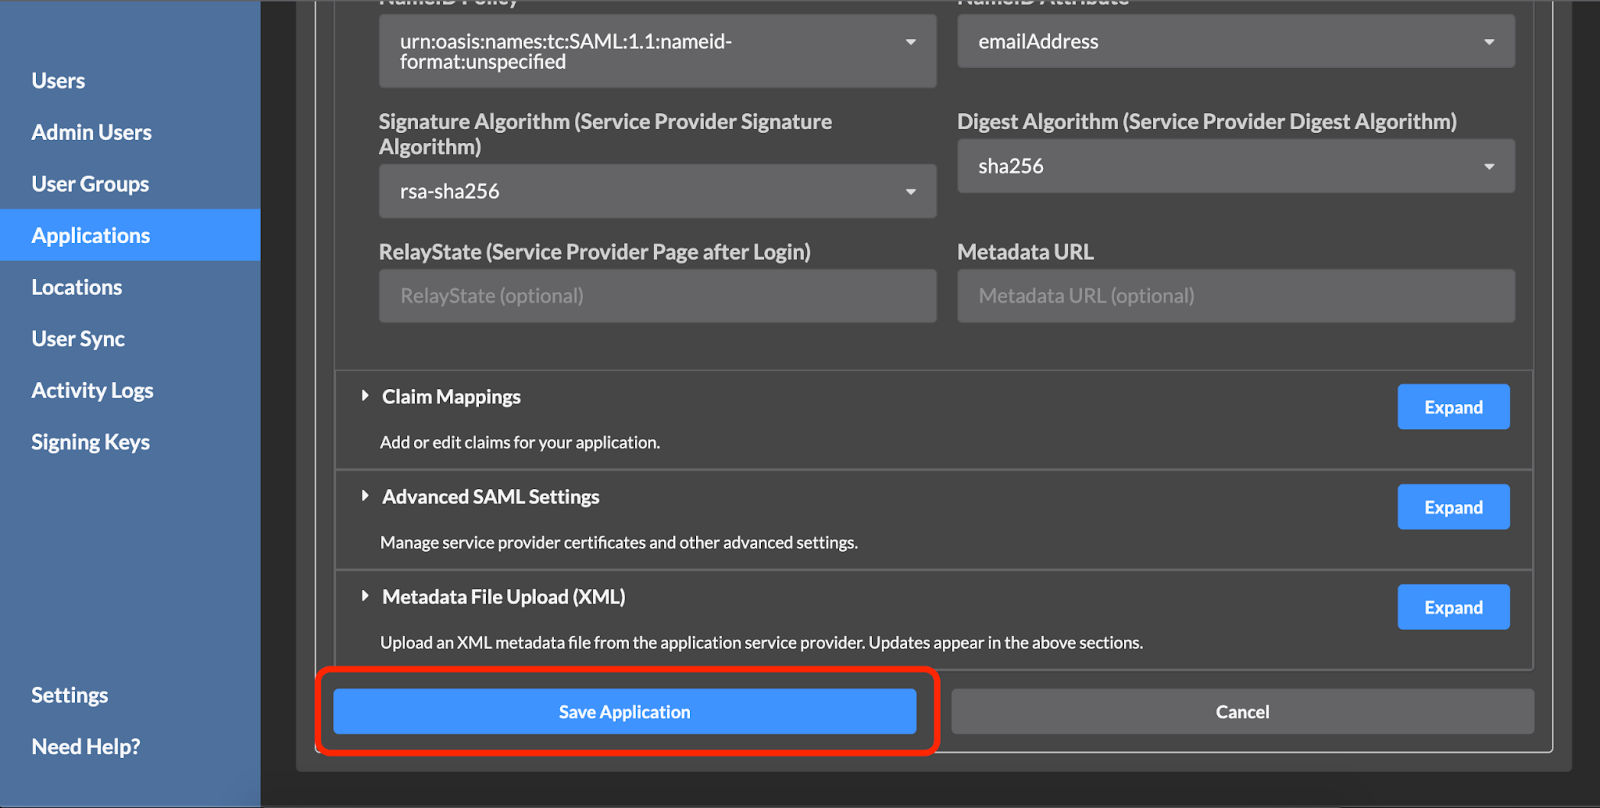
Click Save Application.
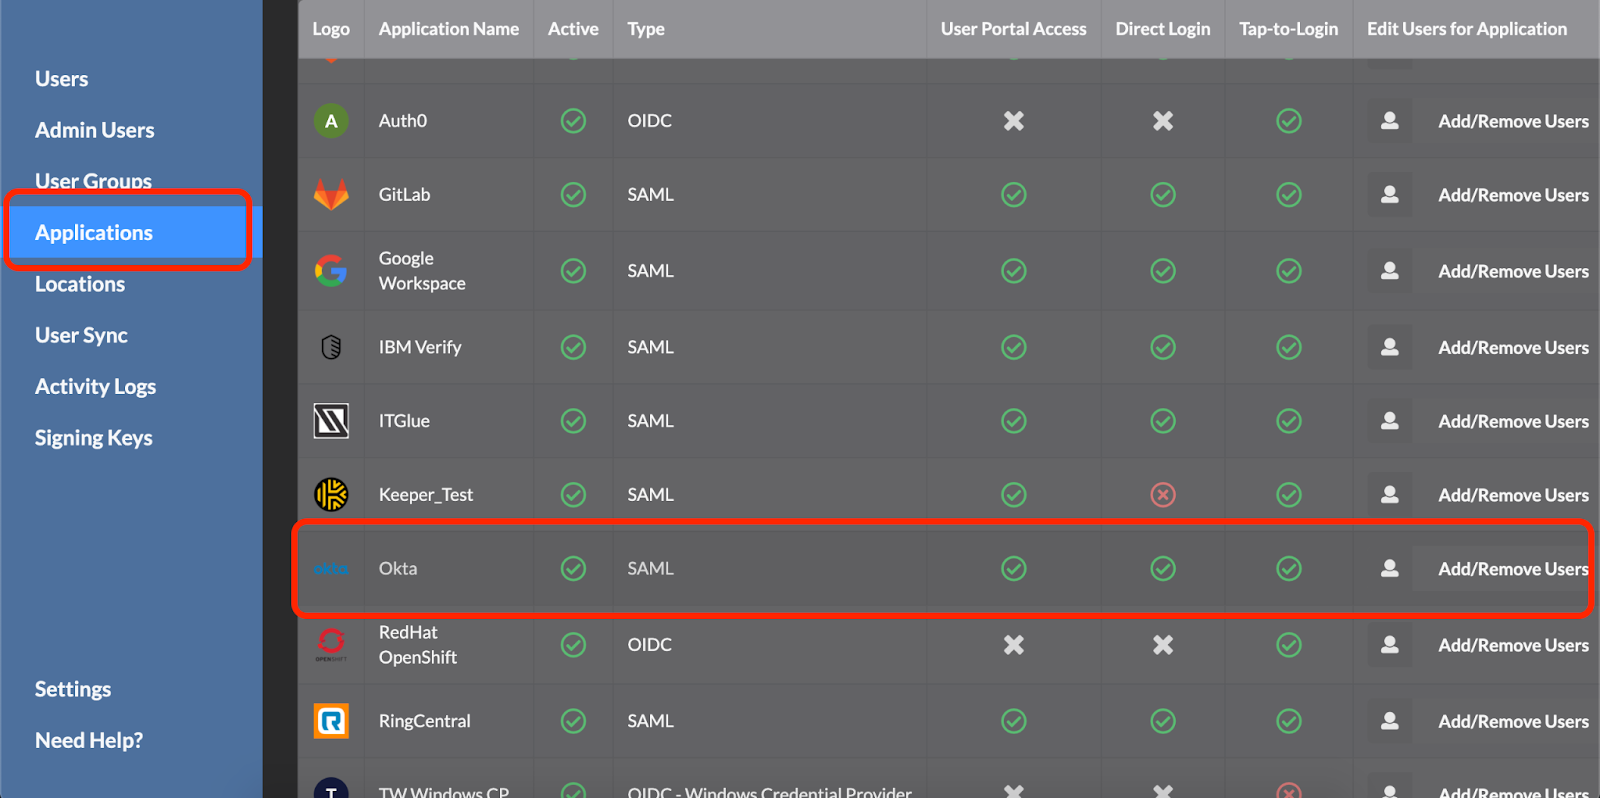
Add Users
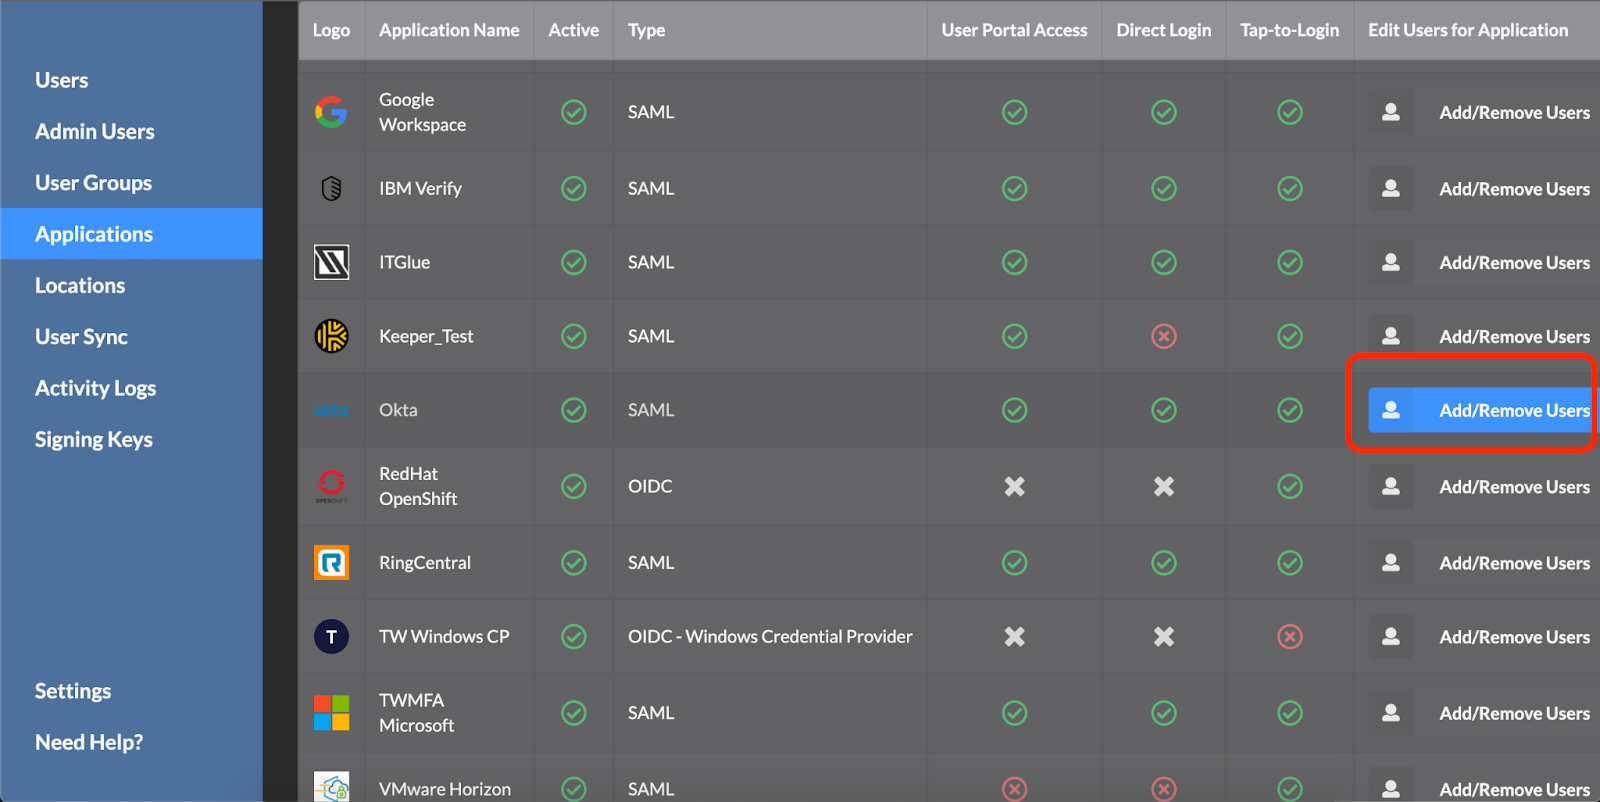
Under Applications, select Add/Remove Users in the Okta application.
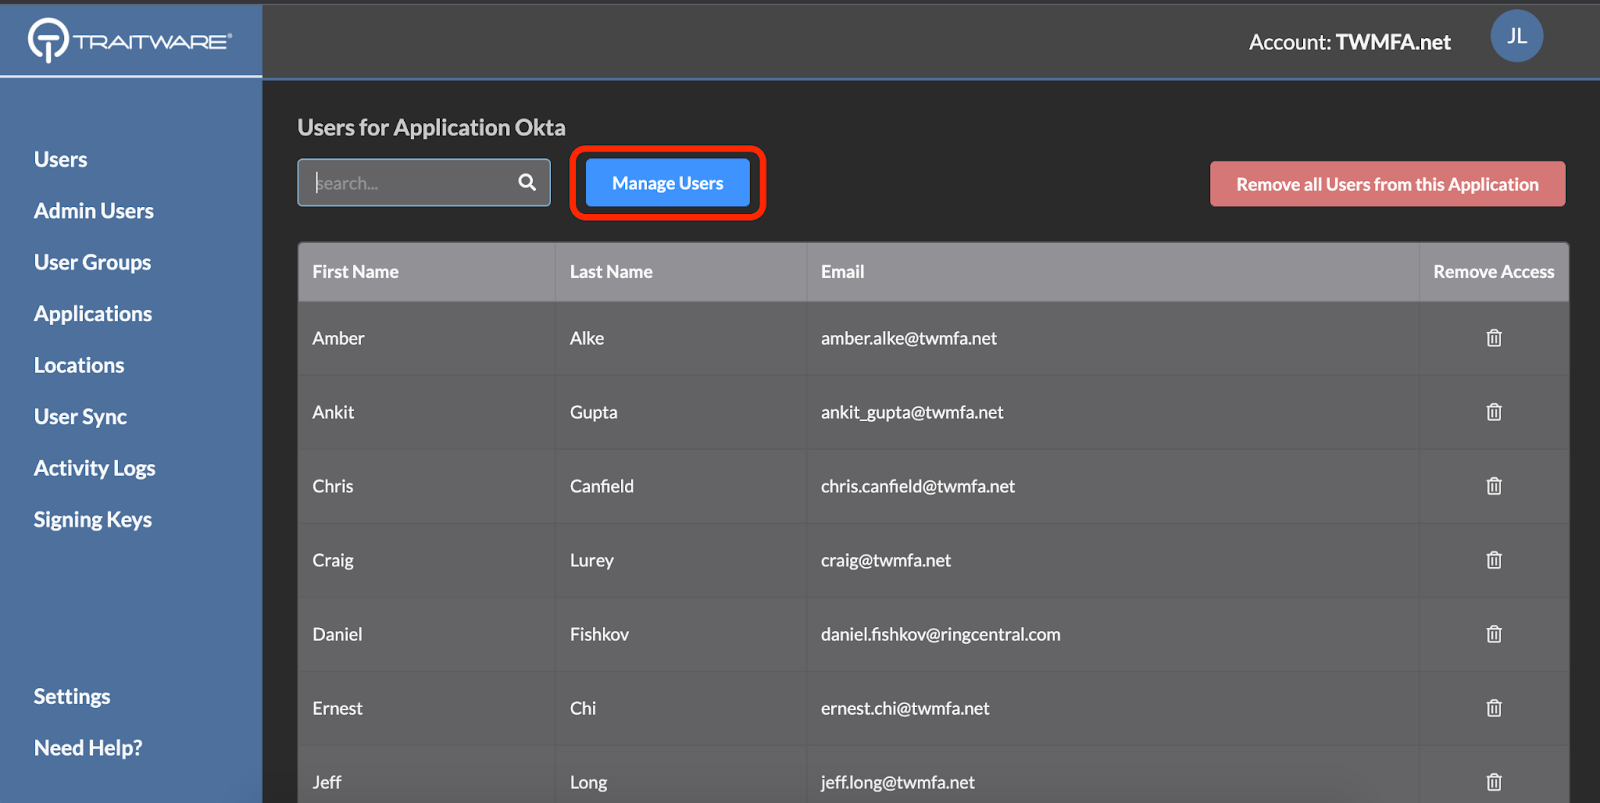
Select Manager Users.
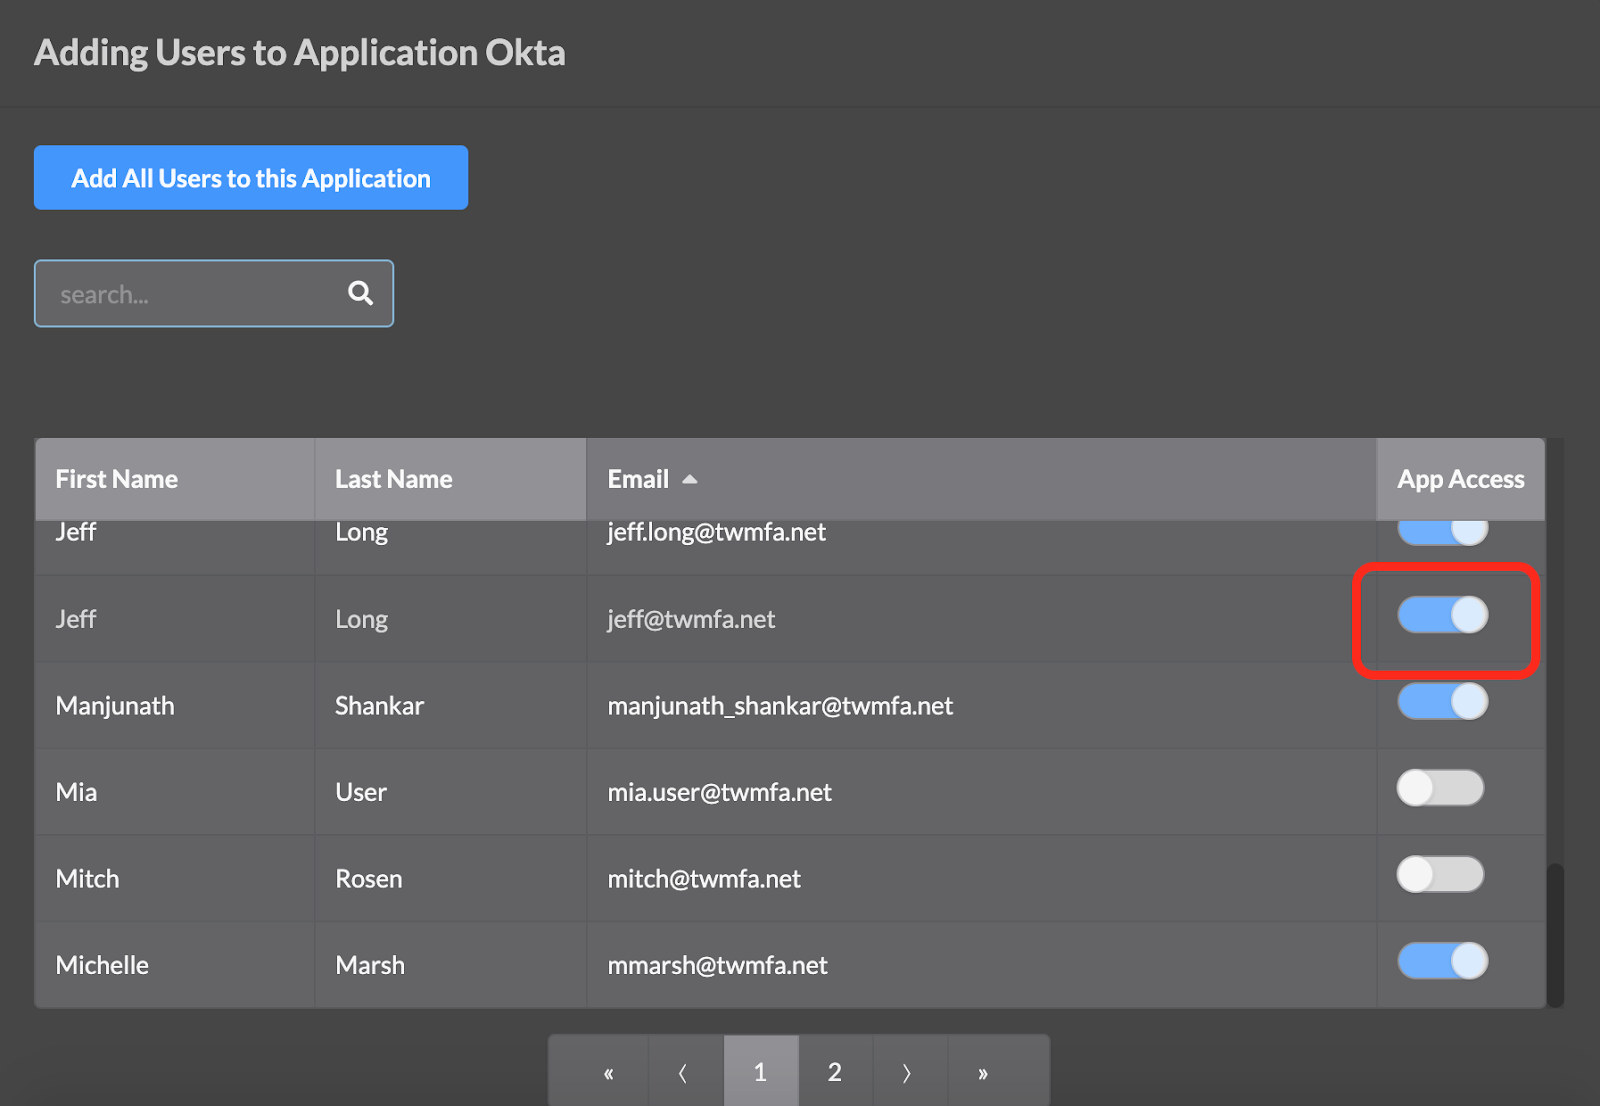
Enable App Access for users. When finished click Exit.
Okta Console
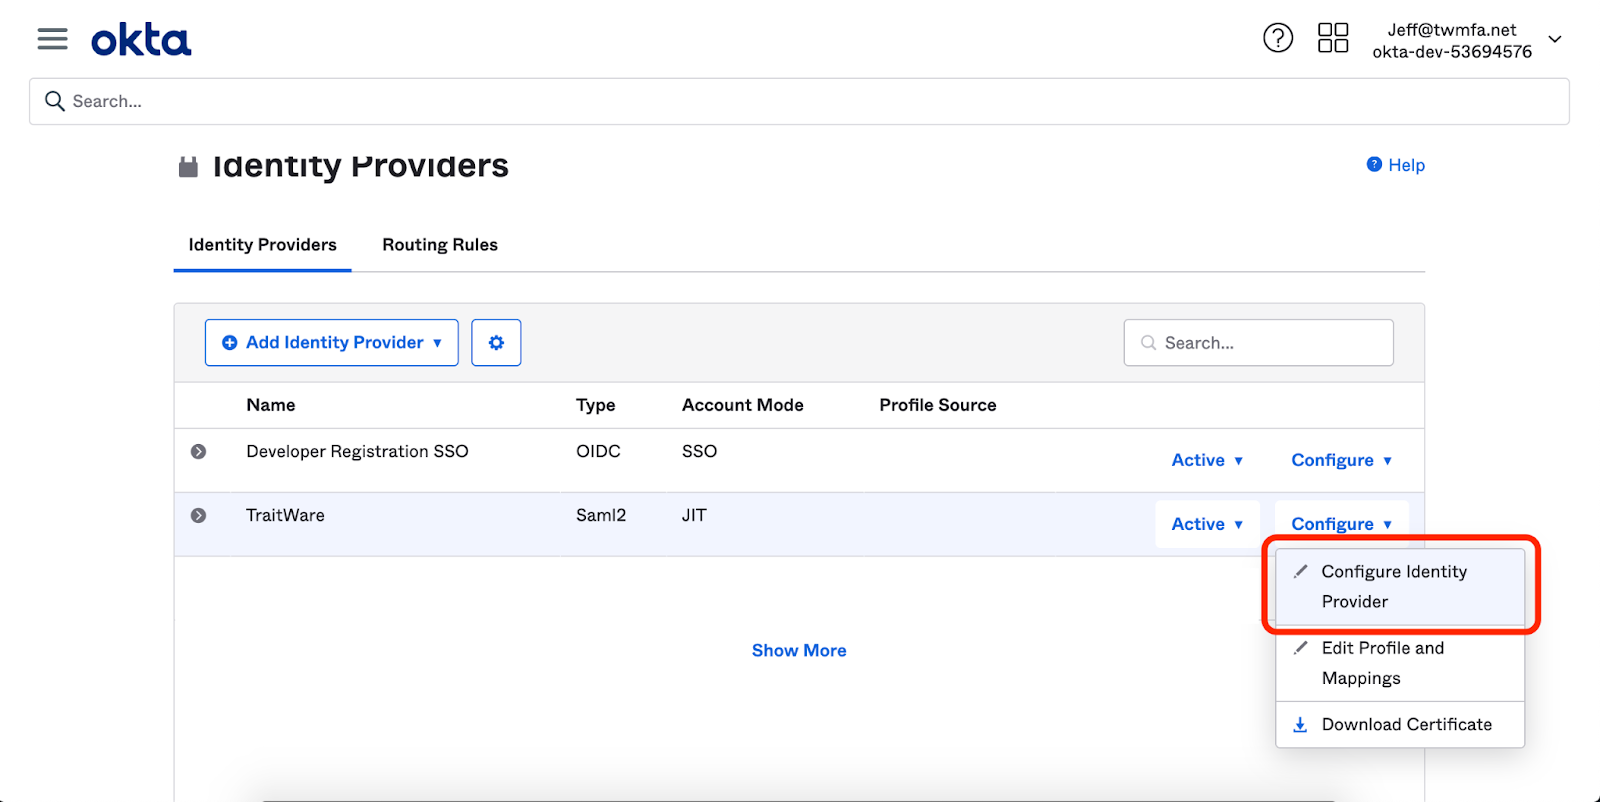
Select Configure Identity Provider under the TraitWare IdP.
IdP Issuer URI
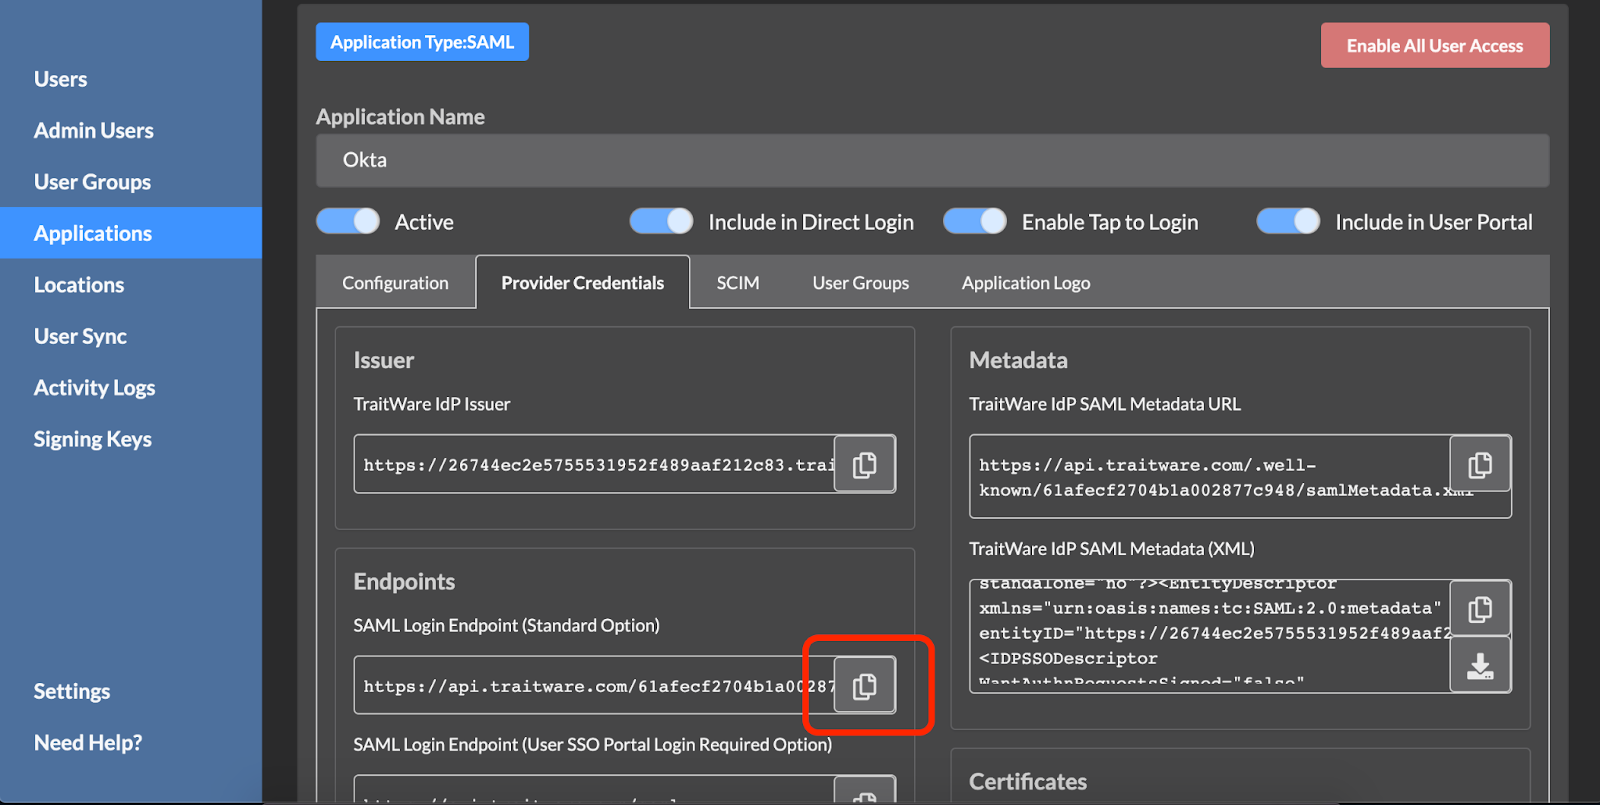
IdP Single Sign-On URI
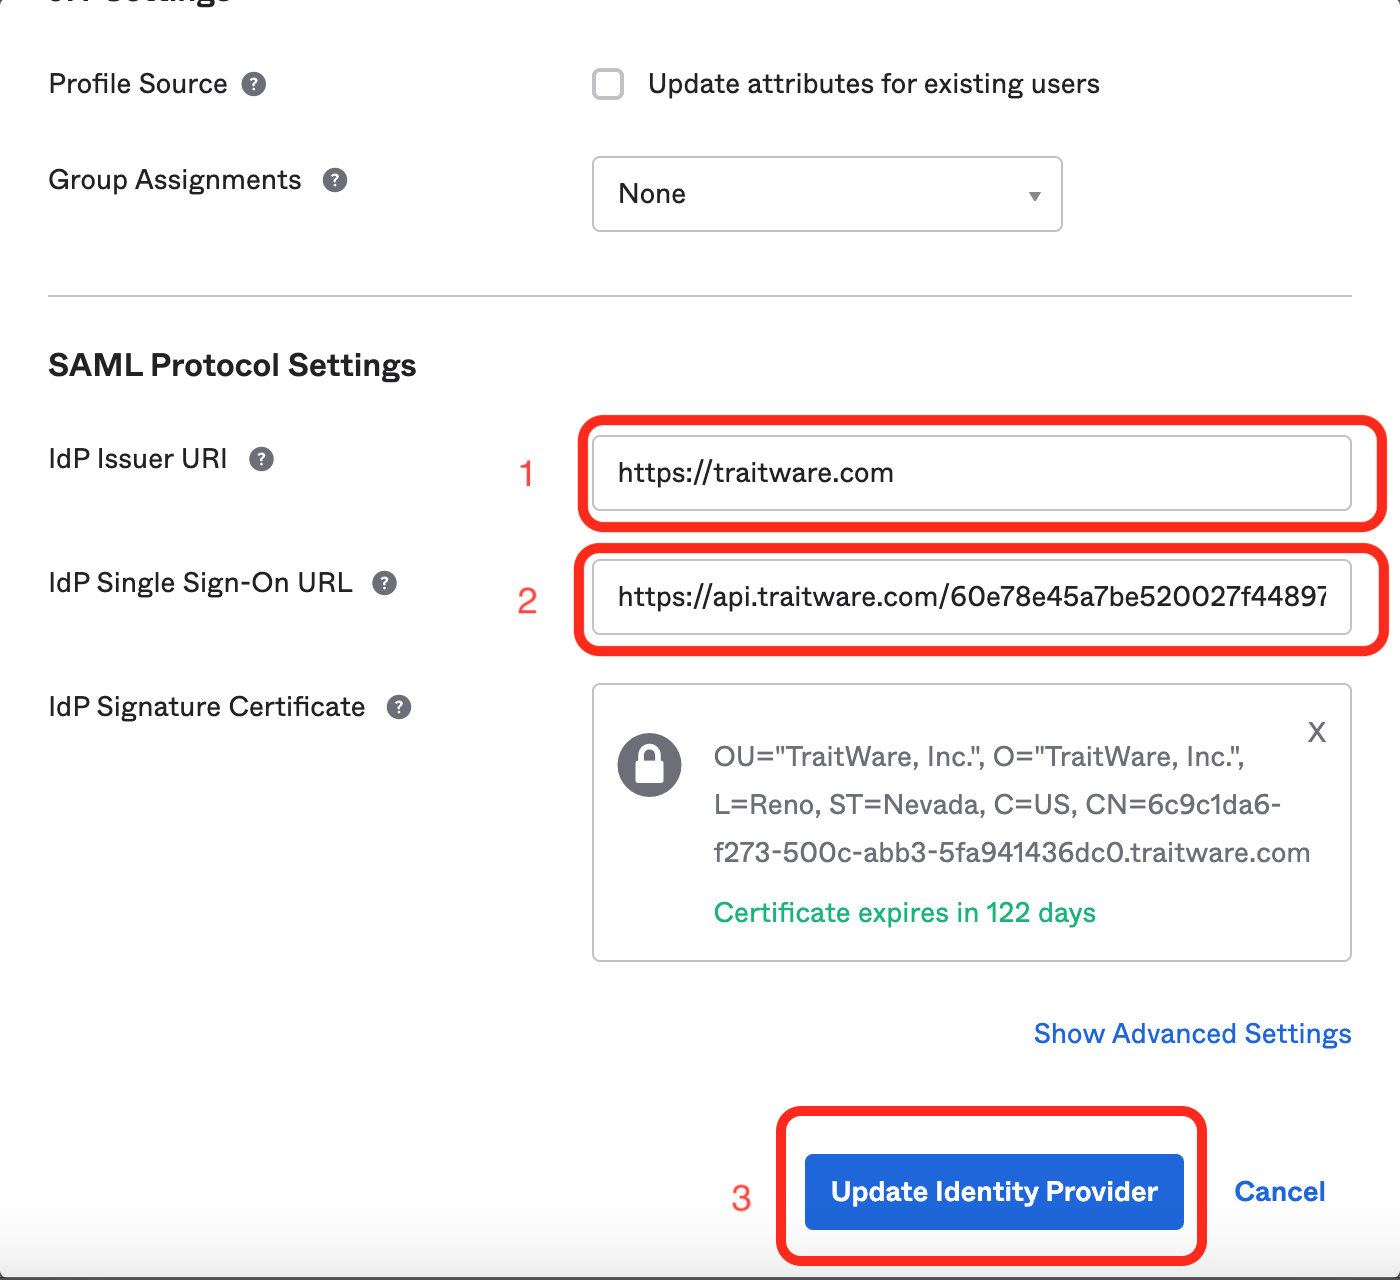
- Paste TraitWare IdP Issuer to Okta IdP Issuer URI line.
- Paste the TraitWare SAML Login Endpoint to Okta IdP Single Sign-On URL line.
- Select Update Identity Provider.
TraitWare is now configured as an Identity Provider for Okta.
Okta Routing Rules
More detail can be found Okta’s documentation site: https://help.okta.com/en/prod/Content/Topics/Security/Identity_Provider_Discovery.htm
TraitWare is configured as an IdP in Okta, it’s time to designate TraitWare as the IdP for users.
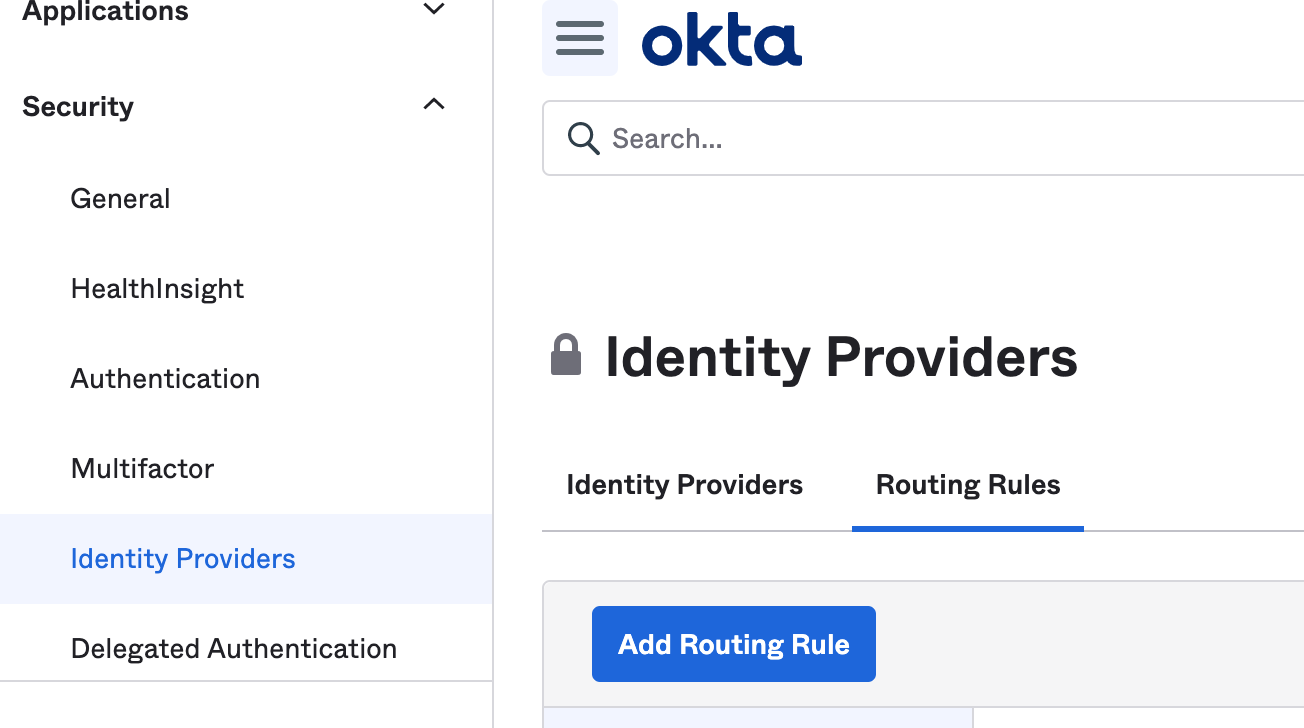
Under Security, select Identity Providers. Next to Identity Providers, select Routing Rules.
Select Add Rule.
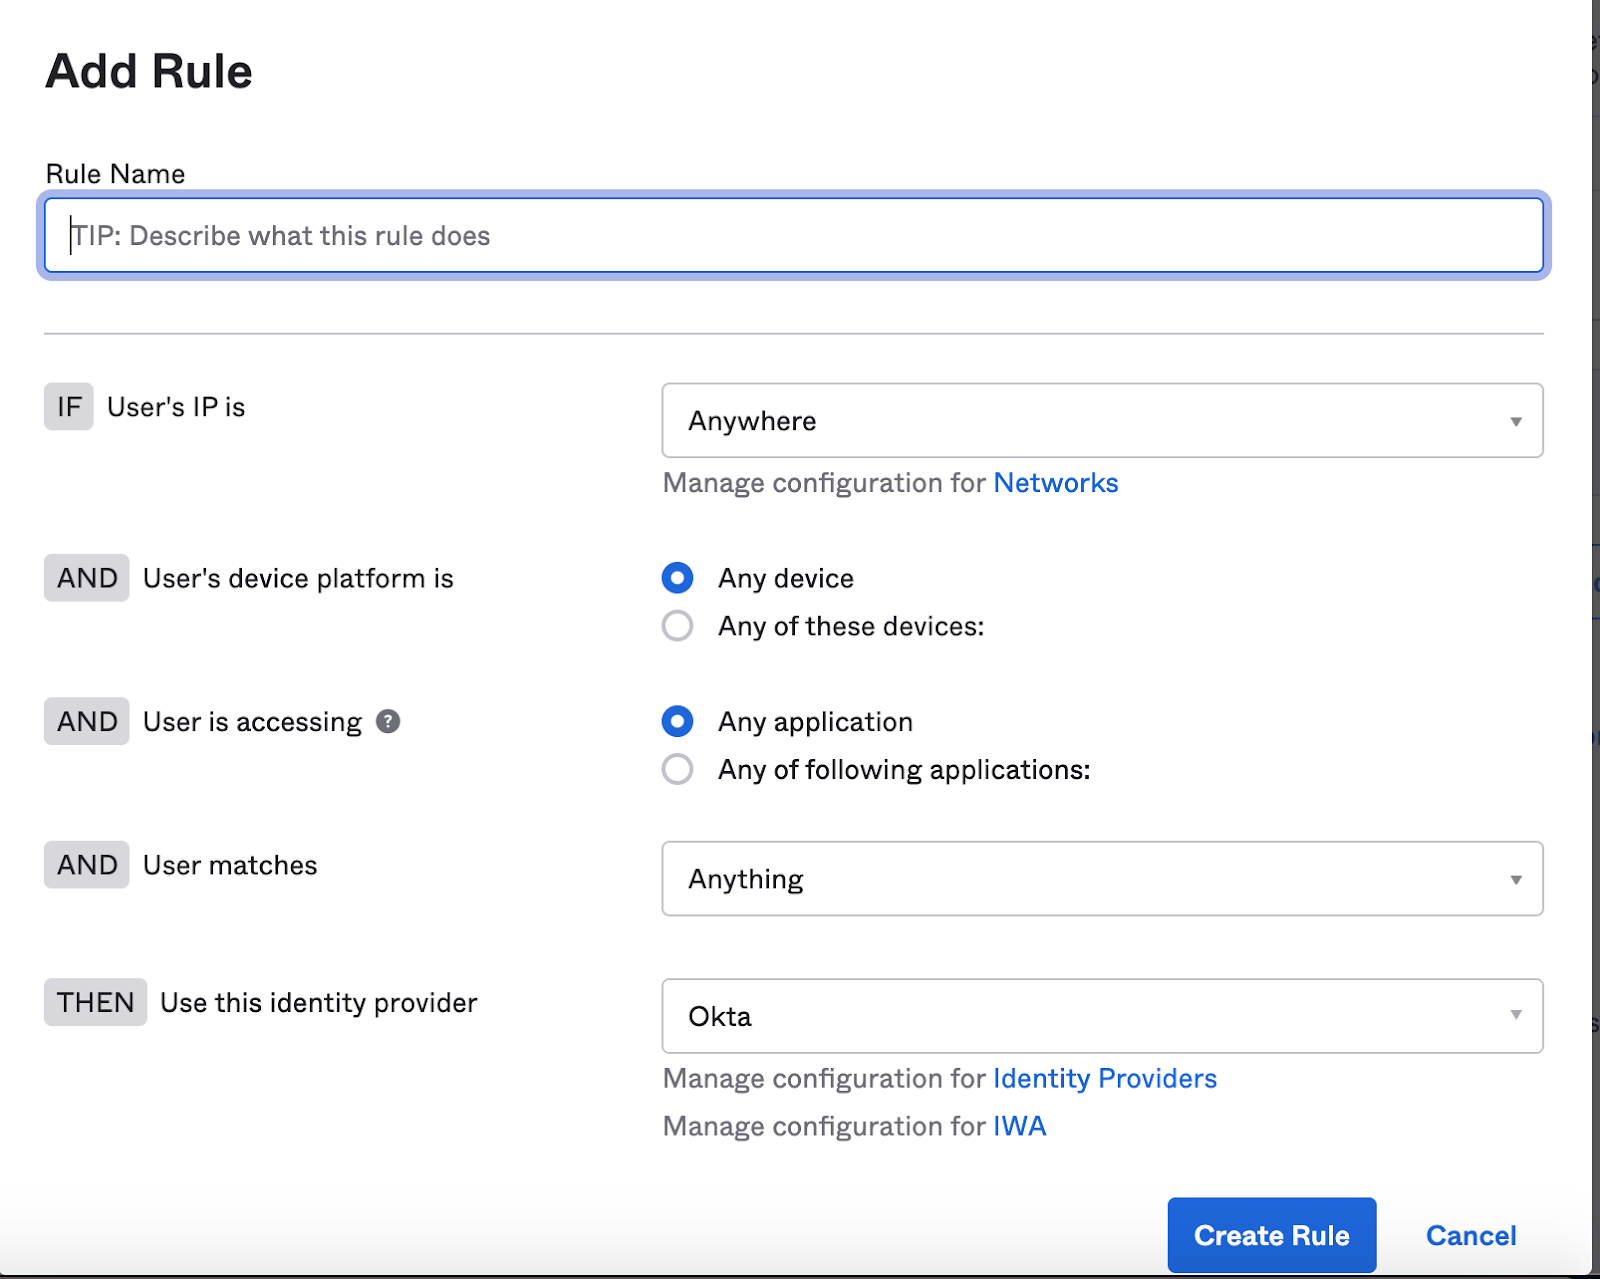
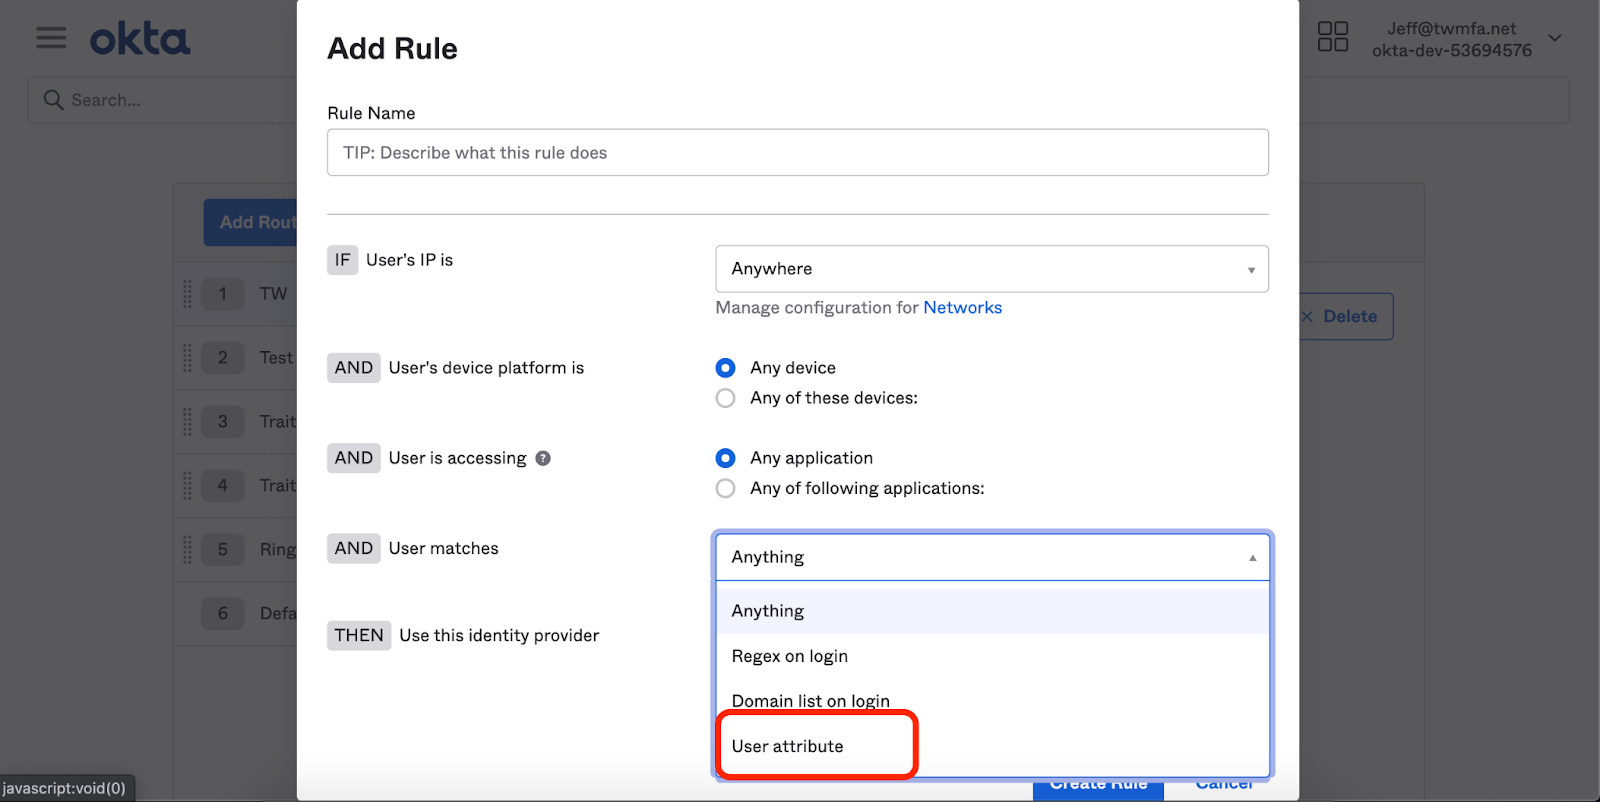
Under the Rule area, select User Attribute
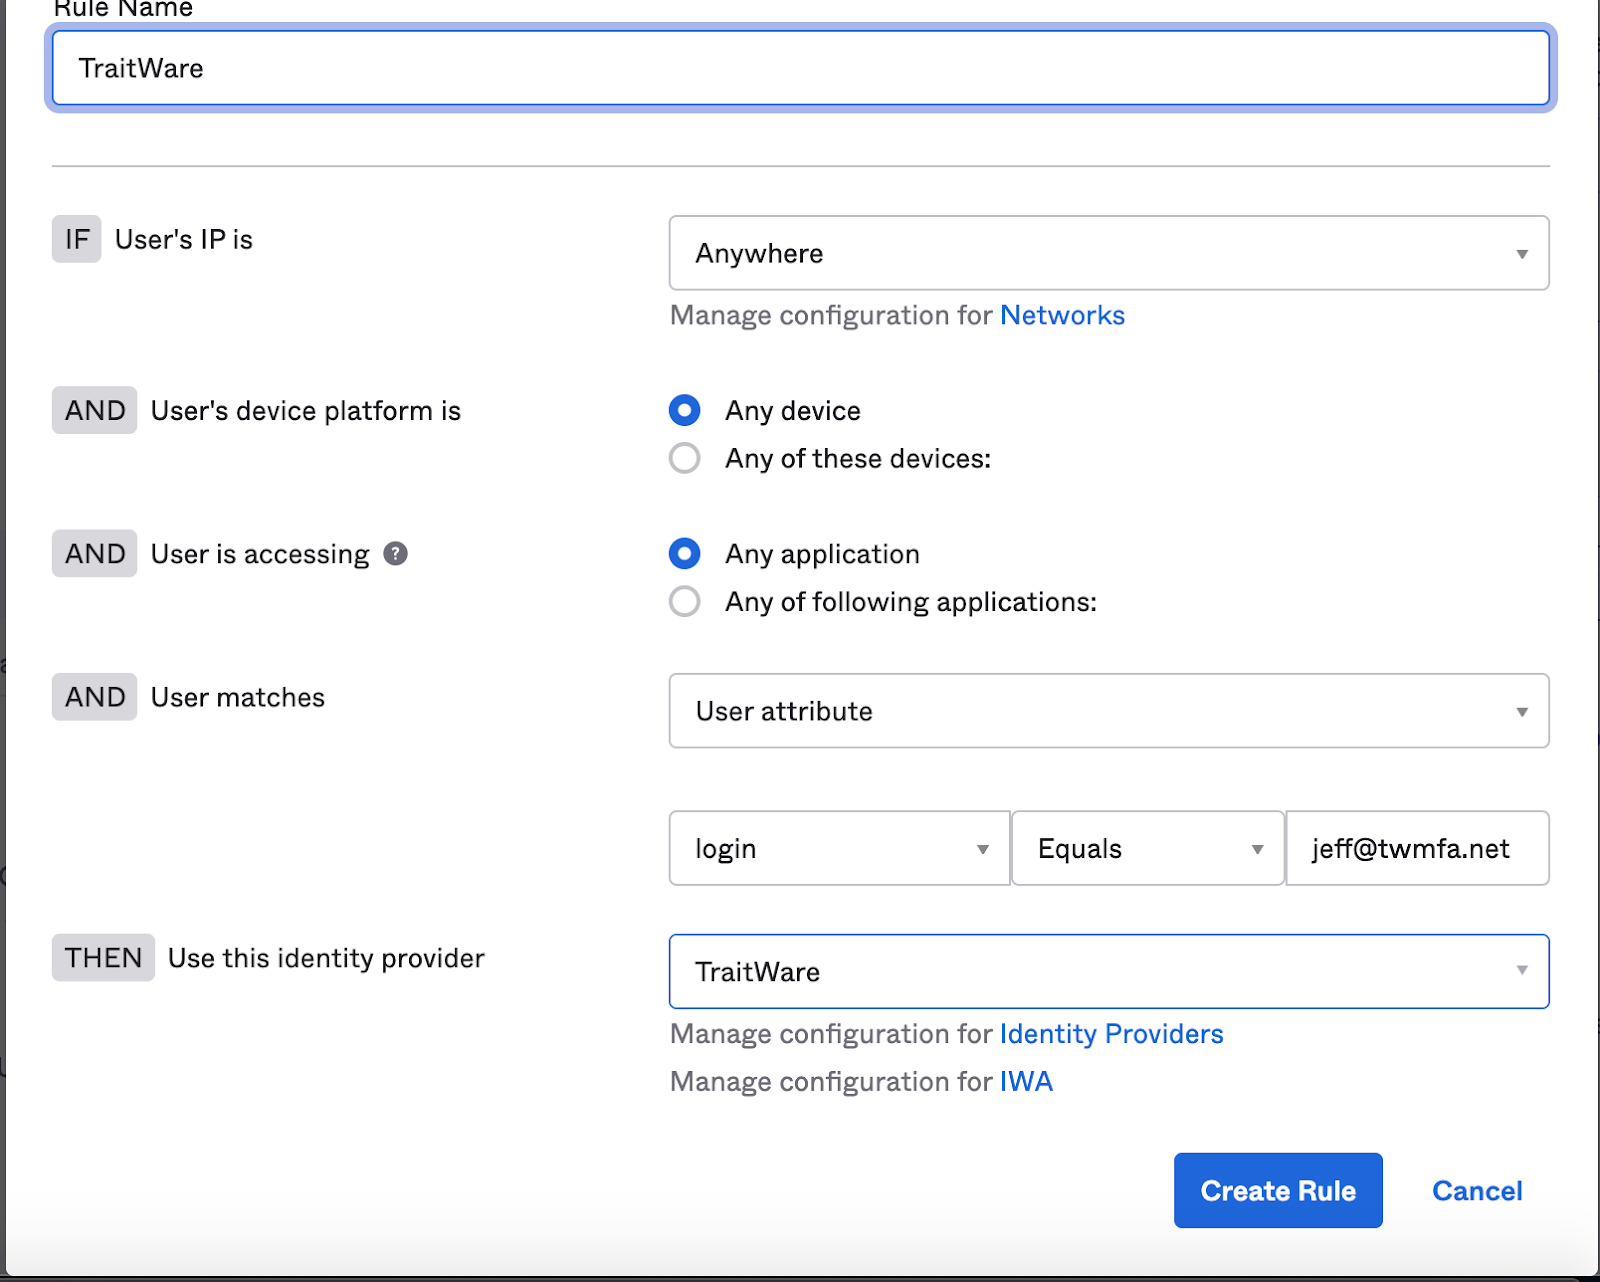
For this demonstration, we will select login, equals Jeff@twmfa.net.
Under Identity Provider select TraitWare.
Click Create Rule.
Note: The user attribute field can be customized to parse organizations, domain name, user group, etc. …

Navigate to the Okta domain. Enter Username and select Next.
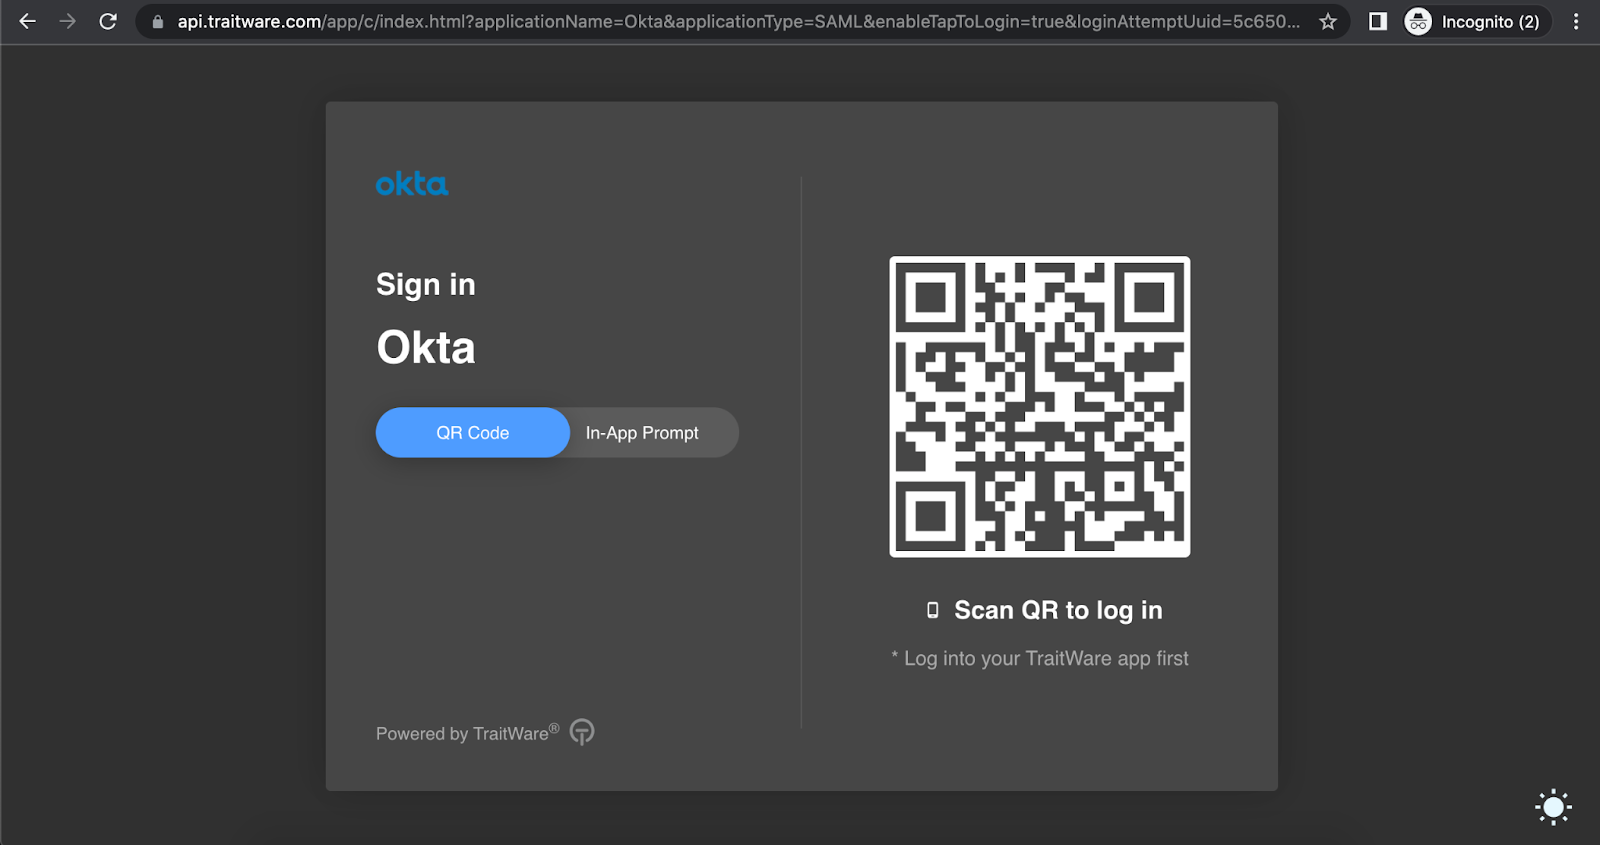
The user will be redirected to the TraitWare login screen. Scan the QR code with the TraitWare app on your mobile device.
Additional Information
If you do not see an application in the dropdown list during the Application setup, you can fill in the fields with your generic information. If you have issues, please contact us at support@traitware.com, and we will work with you to see if the application can be added.