- Getting Started
- Recommended Integration & Registration Flow
- Admin Console Overview
- User Onboarding and Management
- User Registration and Login
- Enterprise Applications
- Microsoft Integration
- Installing TraitWare PAM Module for SSH and SFTP
Zendesk SAML Integration
Posted on April 3, 2019
Contents
- What you need from TraitWare
- Setting up TraitWare
- Adding SAML Application
- Turning on application access for a user
- Setting up your service
Getting Started
Both TraitWare and Zendesk require certain information to be able to communicate securely with each other.
What You Need From Zendesk
- A paid Professional or Enterprise plan ($89-$149/agent/month)
- Your Organization/Custom login (the
login created by the owner ex: business.zendesk.com)
What You Need From TraitWare
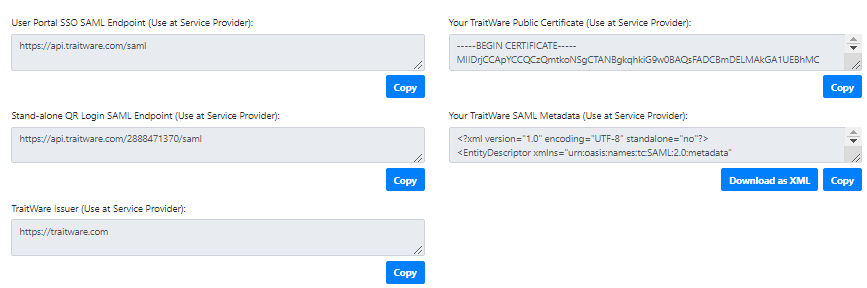
- SAML Endpoint/Sign-in URL
- Public Verification Certificate Fingerprint
Setting Up TraitWare
In order for TraitWare to communicate with Zendesk, an application will need to be created. Once you have access from TraitWare, navigate to https://admin.traitware.com and use your TraitWare app to sign in.
If you do not have access to login to https://admin.traitware.com, please setup a trial account, or contact us at support@traitware.com
Adding a SAML Application
- Select Applications in the upper left.
- Select +Add Applications in the top right of the box to add a new application.
- Enter an Application Name that will make sense when you see it (ex: Zendesk TraitWare).
- SAML from the dropdown Application Type. A new section will appear upon choosing SAML.

- In the SAML Applications dropdown list, select Zendesk. The fields following will auto-fill with generic information.
- Replace YOURORG in each field with the Organziation that you collected above. Ex: https://YOURORG.zendesk.com/access/saml/ becomes https://business.zendesk.com/access/saml/
- For Relay State, you can leave the field empty.
- For Metadata URL put n/a.
- You won’t need to add anything for the Claims Mapping.
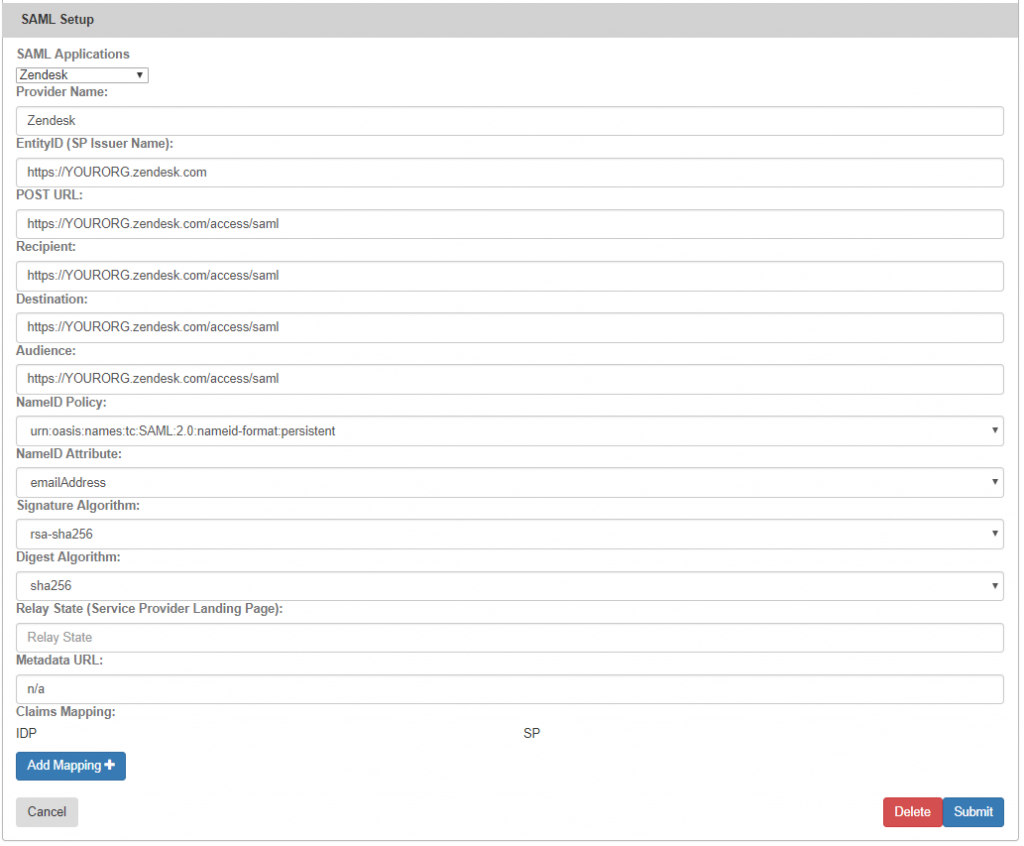
- Select Submit.
- Once your application is submitted, it will populate the information required by your service provider
- Open the appropriate application, you will then be able to copy the information required
Turning on Application Access for User
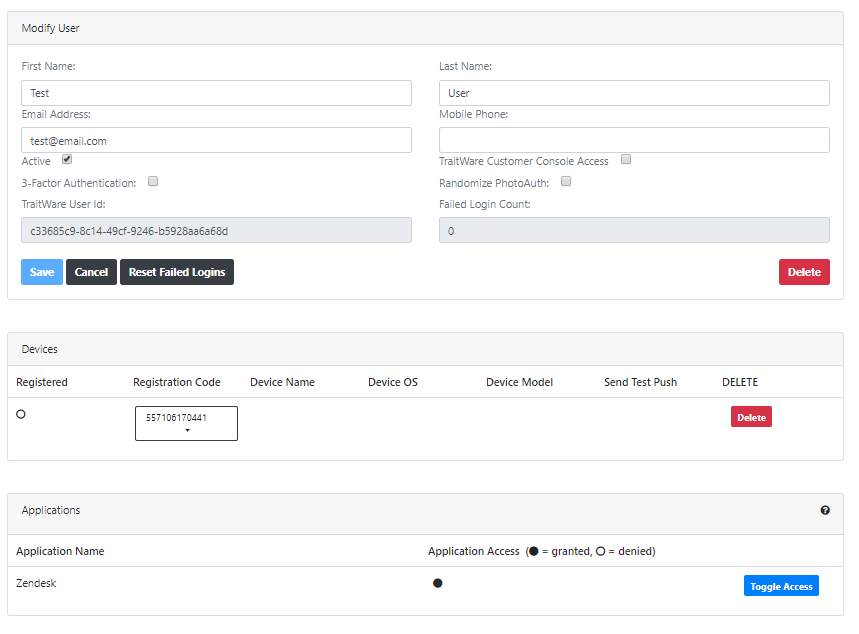
- Select Users from the menu in the upper left.
- Select a user. Their User Profile will open.
- Find the Zendesk Application name under Applications, and select the application to enable access for that user.
Setting Up Zendesk
- Navigate to https://YOURORG.zendesk.com/agent/admin/security and sign in using an Admin account.
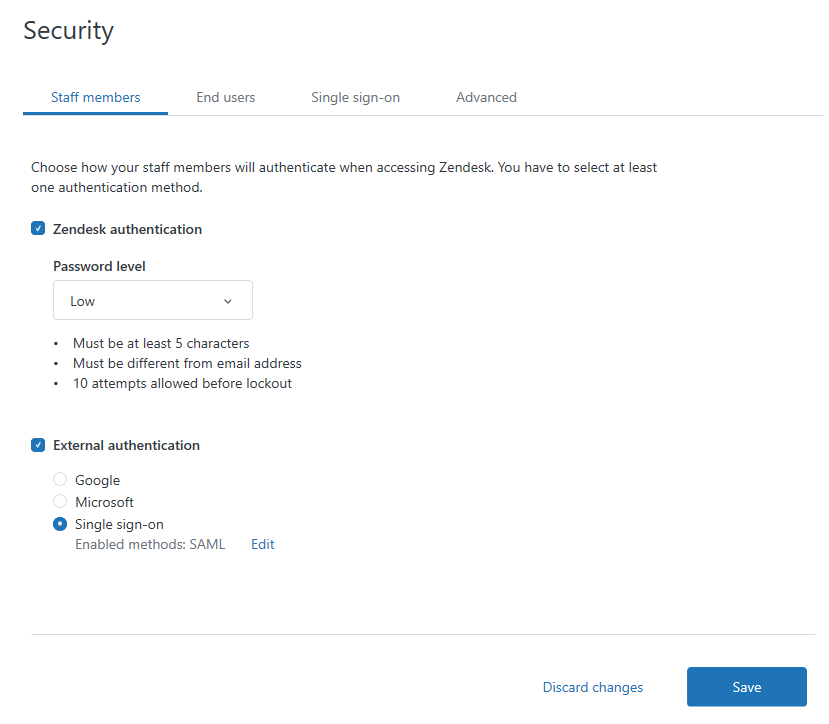
- If you plan to require Single sign-on for both Admins & Agents and End-users, the setup only needs to be completed once. The instructions following will show the initial setup for Admins & Agents followed by adding the End-users.
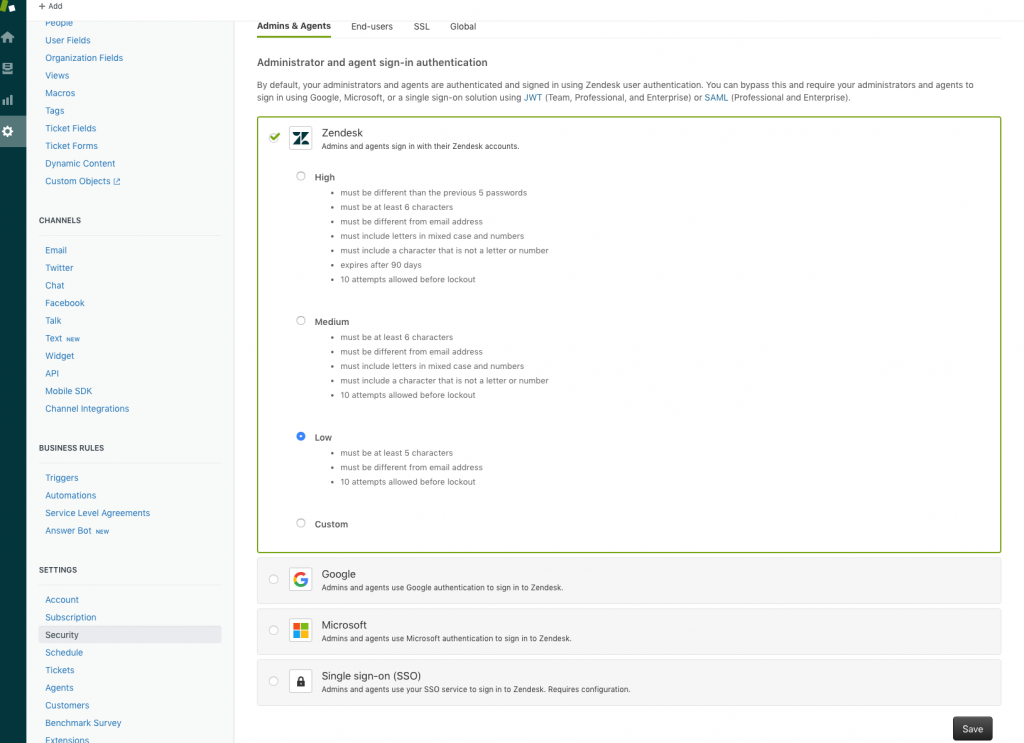
- Select Single sign-on (SSO) from the Security options list.
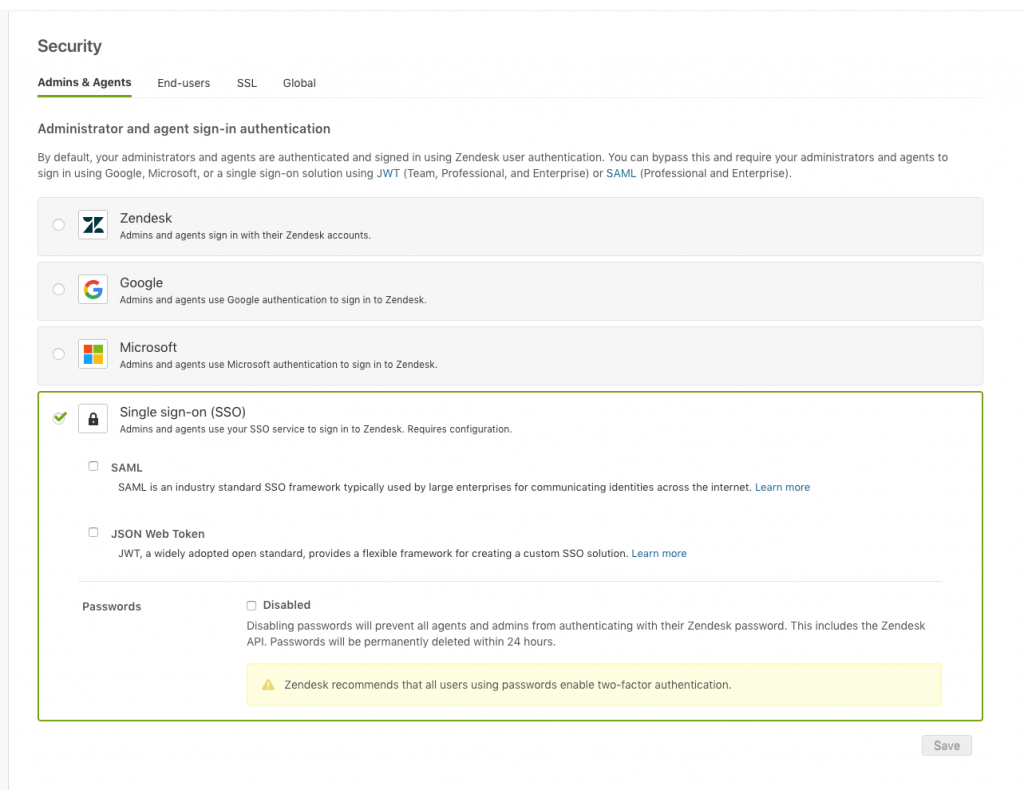
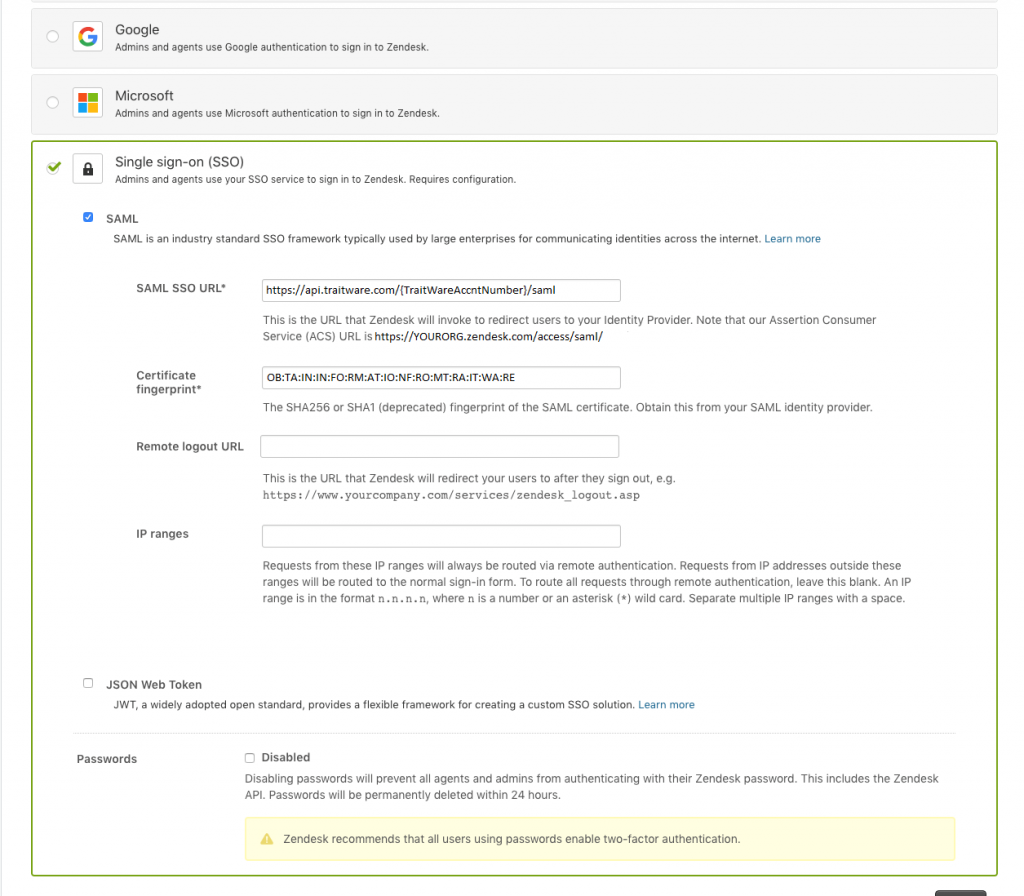
- Select the SAML box to enable SAML.
- Enter the information provided by TraitWare into the SAML SSO URL and Certificate fingerprint. The Remote logout URL and IP ranges can optionally be set to desired values.
- TraitWare strongly suggests checking the Disabled Passwords option. However, please make sure that you do not enable this option until you have successfully tested SAML.
- Select Save once you are satisfied with your information. You can go back and disable passwords at any time.
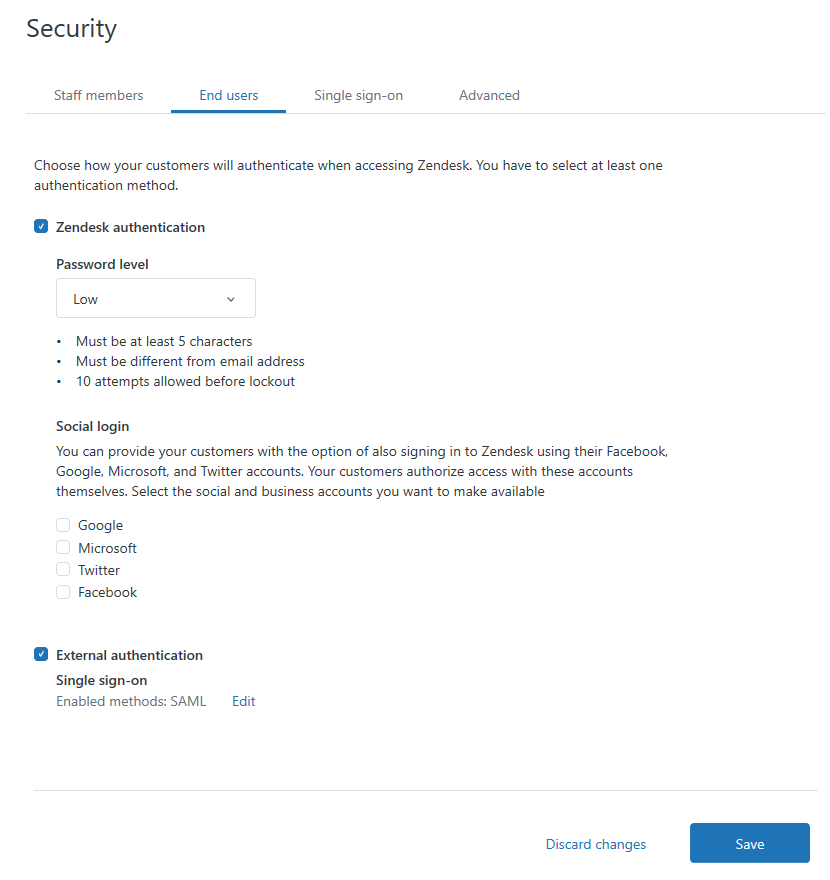
- If you wish to apply SSO to your End-users as well, select the End-users tab.
- Select Single sign-on (SSO). Once you check the SAML box, the information for SAML should already be filled in based on the information applied to Admins & Agents.

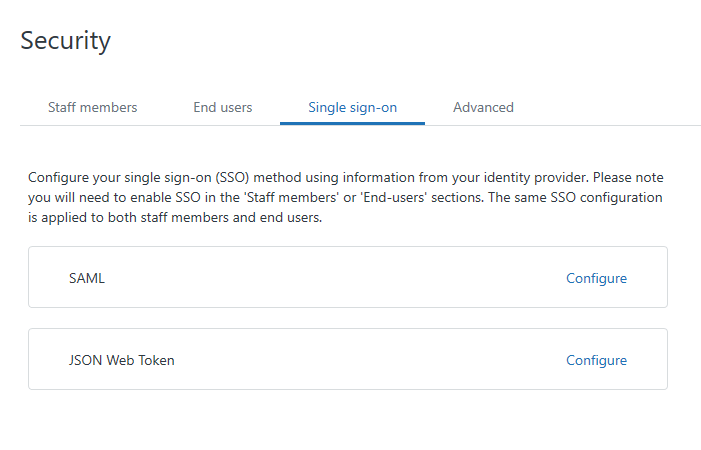
- Once you have tested SAML for your existing users, you can choose to setup SSO for new users as well. Navigate to https://YOURORG.zendesk.com/admin/security#security-sso Choose Configure in the box with SAML.
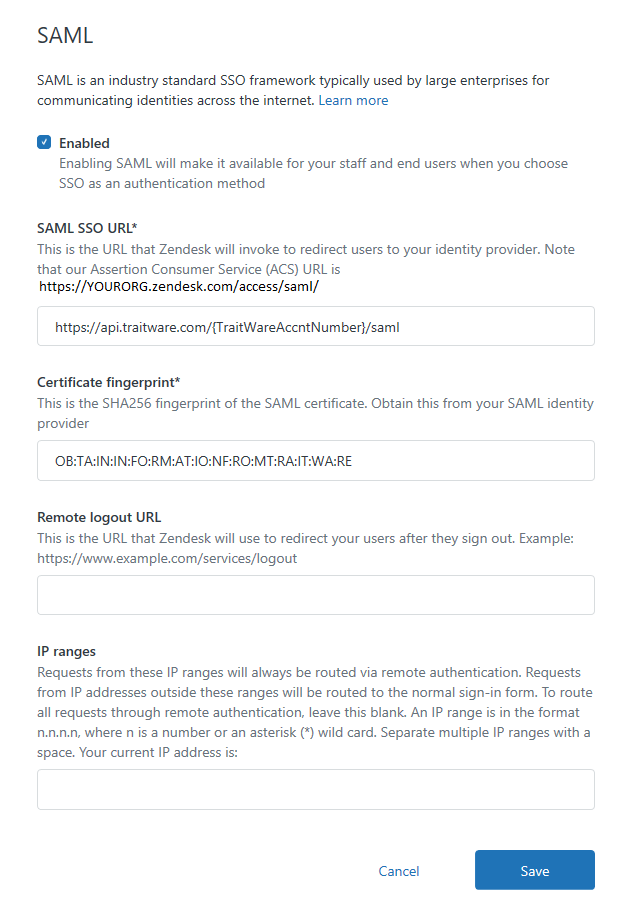
- Select Enabled and fill in the SAML SSO URL and the Certificate fingerprint with the same information used previously. Again, the Remote logout URL and IP ranges are optional. Select Save when information is filled in.
- If you previously turned on SSO for End-users in the Agent settings, then it will automatically be turned on in this dashboard once SAML is setup. If End users SSO was not already turned on previously, it can be done so by navigating to the End users tab, selecting External authentication, and then selecting Save.
- Turning on SSO for Staff memebers will require you to navigate to the appropriate tab, select External authentication, selecting Single sign-on, and then selecting Save.
- If you would like to limit the network which SSO is required, fill in the Network masks, otherwise, all networks will be required to use SSO.
- Select SAVE once you have completed the above
Additional Information
If you do not see an application in the dropdown list during the Application setup, you can fill in the fields with your generic information. If you have issues, please contact us at support@traitware.com, and we will work with you to see if the application can be added.