- Getting Started
- Recommended Integration & Registration Flow
- Admin Console Overview
- User Onboarding and Management
- User Registration and Login
- Enterprise Applications
- Microsoft Integration
- Installing TraitWare PAM Module for SSH and SFTP
OIDC Web Application Integration
Posted on April 24, 2019
Integrating a Web Application to TraitWare Using the OpenID Connect Identity Standard
If you currently have a custom-built web application protected with a username and password, using the OpenID Connect identity standard and integrating with TraitWare as your identity provider can greatly secure and simplify logins for your users. After you have completed the integration, your users will be able to log into your service without a username or password.
Steps that are needed:
- Build in the necessary OpenID Connect (OIDC) library to your web application dependent on your underlying server framework.
- Set up the OIDC integration with TraitWare (about 5-10 minutes).
- Test the integration.
- Sync your current web application user base to TraitWare (RESTful APIs/AD Sync/List Import/Manual).
- Send out TraitWare activation emails to your users (automated feature in your TraitWare Admin Console).
- Keep your user base up to date with TraitWare (RESTFUL APIs/AD Sync/List Import/Manual).
- Remove the username and password option from your web application for the greatest security.
Integrating OpenID Connect to Your Web Application
There are many OIDC certified libraries available for most frameworks. This link provides you with a list of those libraries: https://openid.net/developers/certified/.
Each implementation can be different depending on how your users are managed, your desired login user experience, and how you choose to onboard new users to your service. But there are also similarities in the decisions you will need to make along the way and we’ve outlined some of these below.
Onboarding Users
During the design phase of your OIDC implementation, you will need to decide how you would like to onboard your new and existing users to TraitWare. Depending on how you store your existing users, you can use one of four ways to onboard those users. You can use our
RESTful APIs, our LDAP/AD Sync, an import via a CSV file, or manually. For new users, again depending on how you onboard new users and where they are stored, you can use one of the same four methods. TraitWare needs at a minimum the first name, last name, and email address of your users to allow for authentications.
One common approach for on-boarding new users is to register them with your service and immediately send out an API request to TraitWare to also create a new user. The user will be sent an activation email from TraitWare that will set up an account for your service in the TraitWare app. The TraitWare activation is a very seamless approach and requires only a few clicks from a user without any typing. They will then be able to use the TraitWare app to log into your service without a password.
Your Login Screen
You will need to decide on your preferred user experience for logins. There are two typical options you can choose to implement. Ultimately, your users will be scanning a QR code or entering their email address to log into your service. You can either choose to display that QR code and email field directly on your website login page or redirect your users to a generic TraitWare login screen. If you are interested in displaying the login QR directly on your login page, please refer to the TraitWare Login APIs (OIDC) documentation.
Authentications and Authorizations
At the end of the login process, you will receive a signed ID Token from TraitWare which contains information about the user logging in. Once your OIDC client verifies the signature on the token, you can inspect the token for the user identity (typically the email address the user has registered with your service). The verified ID token is proof of their authentication with TraitWare. These steps are usually handled automatically by the OIDC client and you will end up with a set of user claims, one of which will be the email address of the authenticated user. You can then grant the authenticated user the authorizations they need to access your service(s). This could include directing them to their user account page, issuing a JWT for use in accessing your protected APIs, or any other use that requires authentication.
Additional Considerations
There may be other decision points that need to be addressed and TraitWare can help provide you guidance on integrating the OIDC standard into your web application. Please feel free to contact us for more information.
Set Up the OIDC integration with TraitWare
Configure Your OIDC Client With TraitWare as the OIDC Provider
Once you have integrated the OIDC library you can establish TraitWare as the provider for the OIDC client on your web application. You may use the TraitWare OIDC /.well-known discovery endpoint with your OIDC client. This should provide your client with much of the needed information to allow the TraitWare/OIDC login to proceed.
https://api.traitware.com/.well-known/openid-configuration
Set Up the OIDC Application in TraitWare
You will also need to set up an OIDC application in your TraitWare Admin Console to obtain the needed client_id and client_secret for your OIDC client. Log into your TraitWare Admin Console by visiting https://admin.traitware.com and go through the following steps.
1. In the Application menu and click ‘Add Application’.

2. Select OIDC as the ‘Application Type’

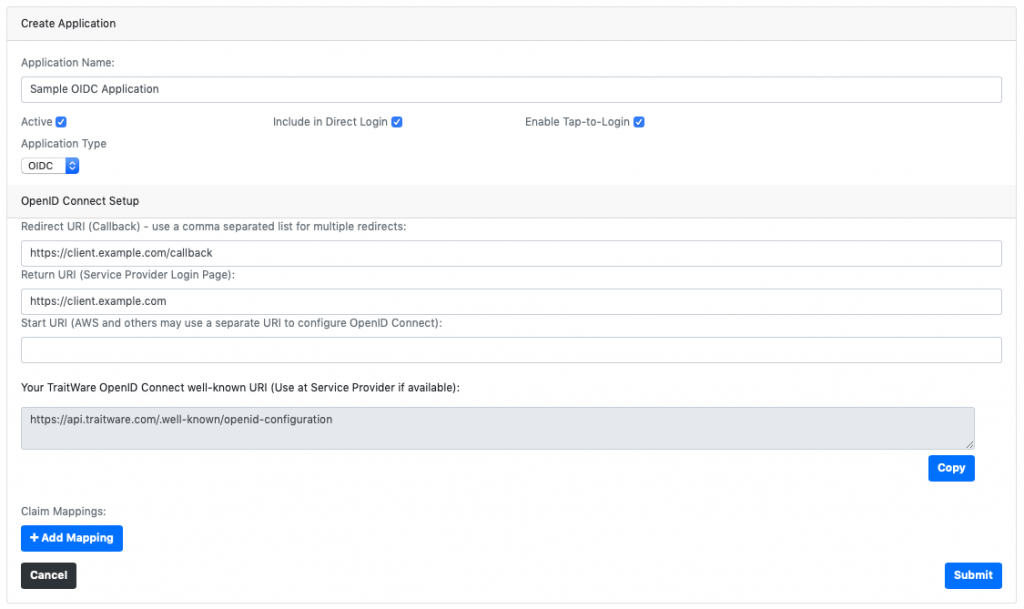
3. Fill in the Redirect/Callback URI endpoint you chose during the integration of the OIDC library to your web application (https://client.example.com/callback). Additionally, fill in the Return URI, which is the login page of your web application (https://client.example.com/login). Click ‘Submit’.
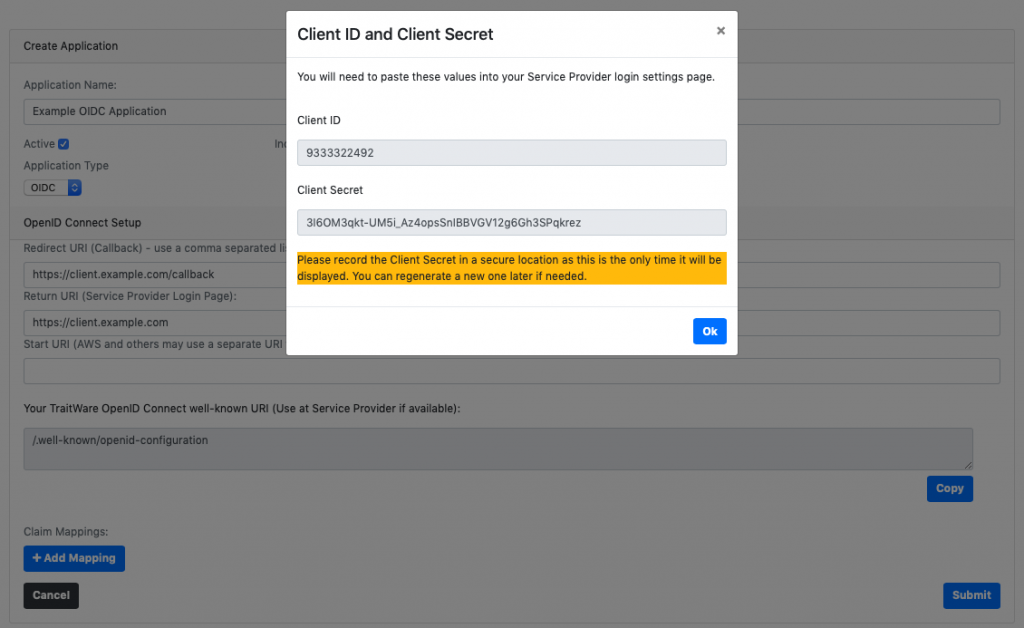
4. Copy your Client ID and Client Secret. You will need these for your OIDC web application client setup. You can always regenerate your Client Secret if needed.
TraitWare OIDC Login Button
If you choose to redirect to TraitWare for the login screen, you will need to add a ‘Login with TraitWare’ button somewhere on your login page which will contain information about the login attempt needed for the OIDC authentication. This is used to redirect the user to the TraitWare login screen. You can optionally embed the login process directly into your web client. Please refer to the TraitWare Login APIs (OIDC) document for more information.
The following is an example of what you would need to embed into your login button. The client_id is static and is found in your TraitWare OIDC application, mentioned above. The state value should be created dynamically by your OIDC client. The callback_uriis your OIDC callback endpoint.
Login Button:
https://api.traitware.com/oidc/authorization?client_id={your-oidc-client-id}&response_type=code&state={your-oidc-generated-state-value}&callback={callback-uri}
Test the Integration
Now that you have created a connection between your web application OIDC client and TraitWare you can test the integration.
First, create a user in your TraitWare Admin Console. This should be a user who already exists in your web application user database. You can create the user manually on the TraitWare console or use the provided APIs to create the user from your user store.

In the Users’ menu list, select ‘+ Add Users’.
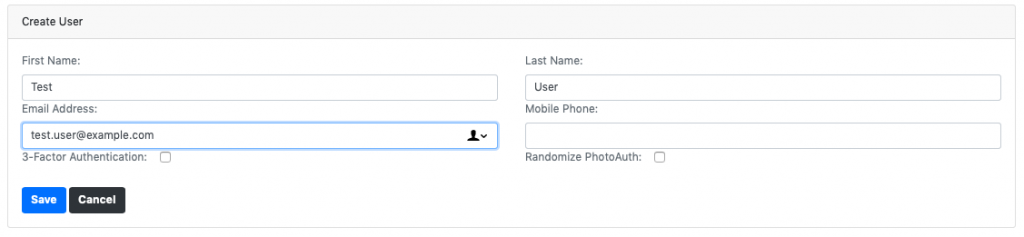
Fill in the information about the user and click ‘Save’.
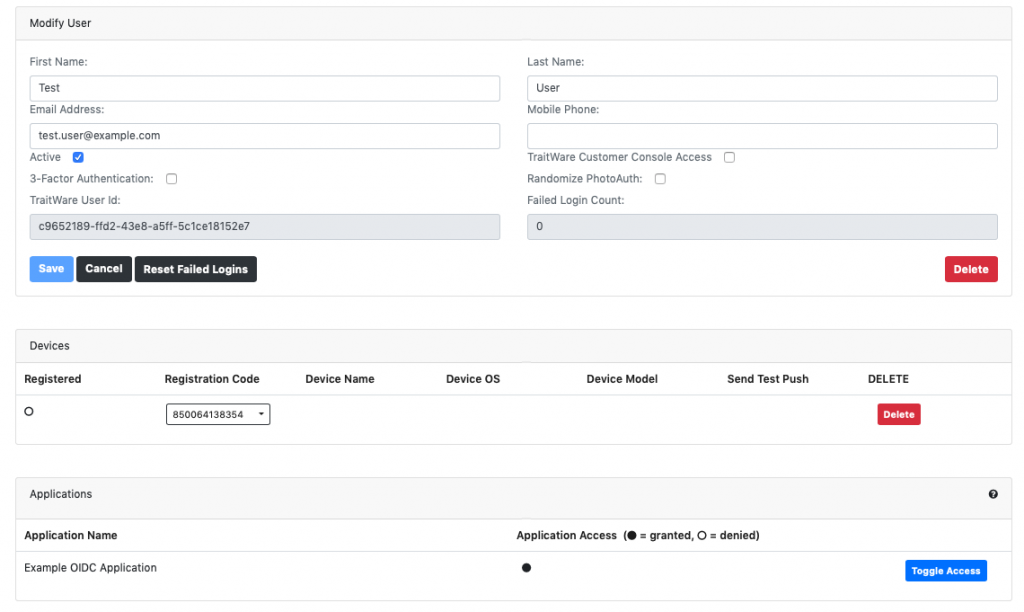
Toggle user access to your OIDC application to grant them access.
Logging in to your Web Application with TraitWare
When users click on the new Login button, they will be directed to the TraitWare login screen. Here they will use their authenticated TraitWare mobile app to scan the QR displayed or enter their email address to receive a Tap-To-Login confirmation message. Upon scanning the QR or confirming via Tap, the user will be directed back to your web application and granted the allowed authorizations.
You can optionally build the QR display and the email submittal field directly into your client login page as explained in the TraitWare Login APIs (OIDC) documentation.
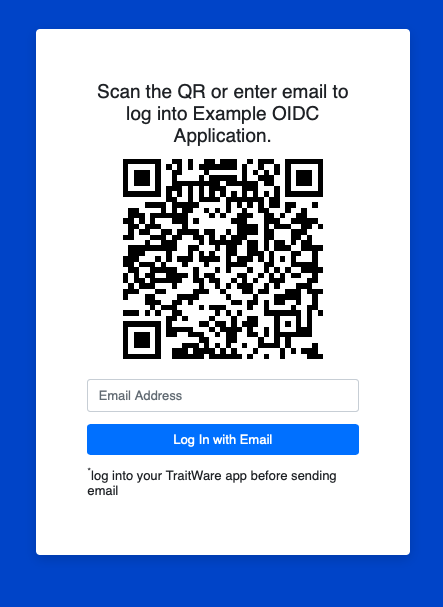
Example QR and optional email field for an OIDC login.
Onboard Your Users to TraitWare
After you have successfully tested your OIDC integration, you can onboard all of your users to TraitWare. You can also use the same options to onboard new users and keep existing one up to date as things change. There are currently four different ways to create and maintain users.
TraitWare Customer APIs
You can create users dynamically using TraitWare’s published list of Customer APIs. You can also perform other operations on users via the APIs, such as updating them, turning on or off their specific application permissions, and even sending out notifications. Please contact TraitWare for access to the Customer API documents.
Active Directory/LDAP Sync
For those who are maintaining their user base in AD or LDAP directories, TraitWare offers the option to sync your user’s to the TraitWare platform. TraitWare can also use Groups you create in your AD/LDAP to sync specific users you add to your Groups. Please contact TraitWare for more information on using the AD/LDAP sync and Groups sync feature.
CSV Import
In situations where you would prefer to import your users via an exported CSV file, TraitWare can import your users in the Users’ menu of the TraitWare Admin Console (https://admin.traitware.com). Please refer to the Admin Console documentation for more information on importing your users using a CSV file.
Manually Add Users
You can manually add users to the console in the Users’ section of your TraitWare Admin Console (https://admin.traitware.com). Please refer to the Admin Console documentation for more information on adding users manually.