- Getting Started
- Recommended Integration & Registration Flow
- Admin Console Overview
- User Onboarding and Management
- User Registration and Login
- Enterprise Applications
- Microsoft Integration
- Installing TraitWare PAM Module for SSH and SFTP
Microsoft/Entra ID – Initial Setup
Posted on April 18, 2024
Contents
- Creating the Azure Application and Secret
- Setting the GraphAPI Permissions
- Create Group in Azure
- Setting Up TraitWare User Sync
Create Azure Application for TraitWare GraphAPI Use
Overview:
This will allow Microsoft Entra ID users to sync to the TraitWare Admin Console. This step is a pre-requisite for using TraitWare to authenticate to Microsoft Office 365 and other Microsoft cloud applications.
Creating the Azure Application and Secret:
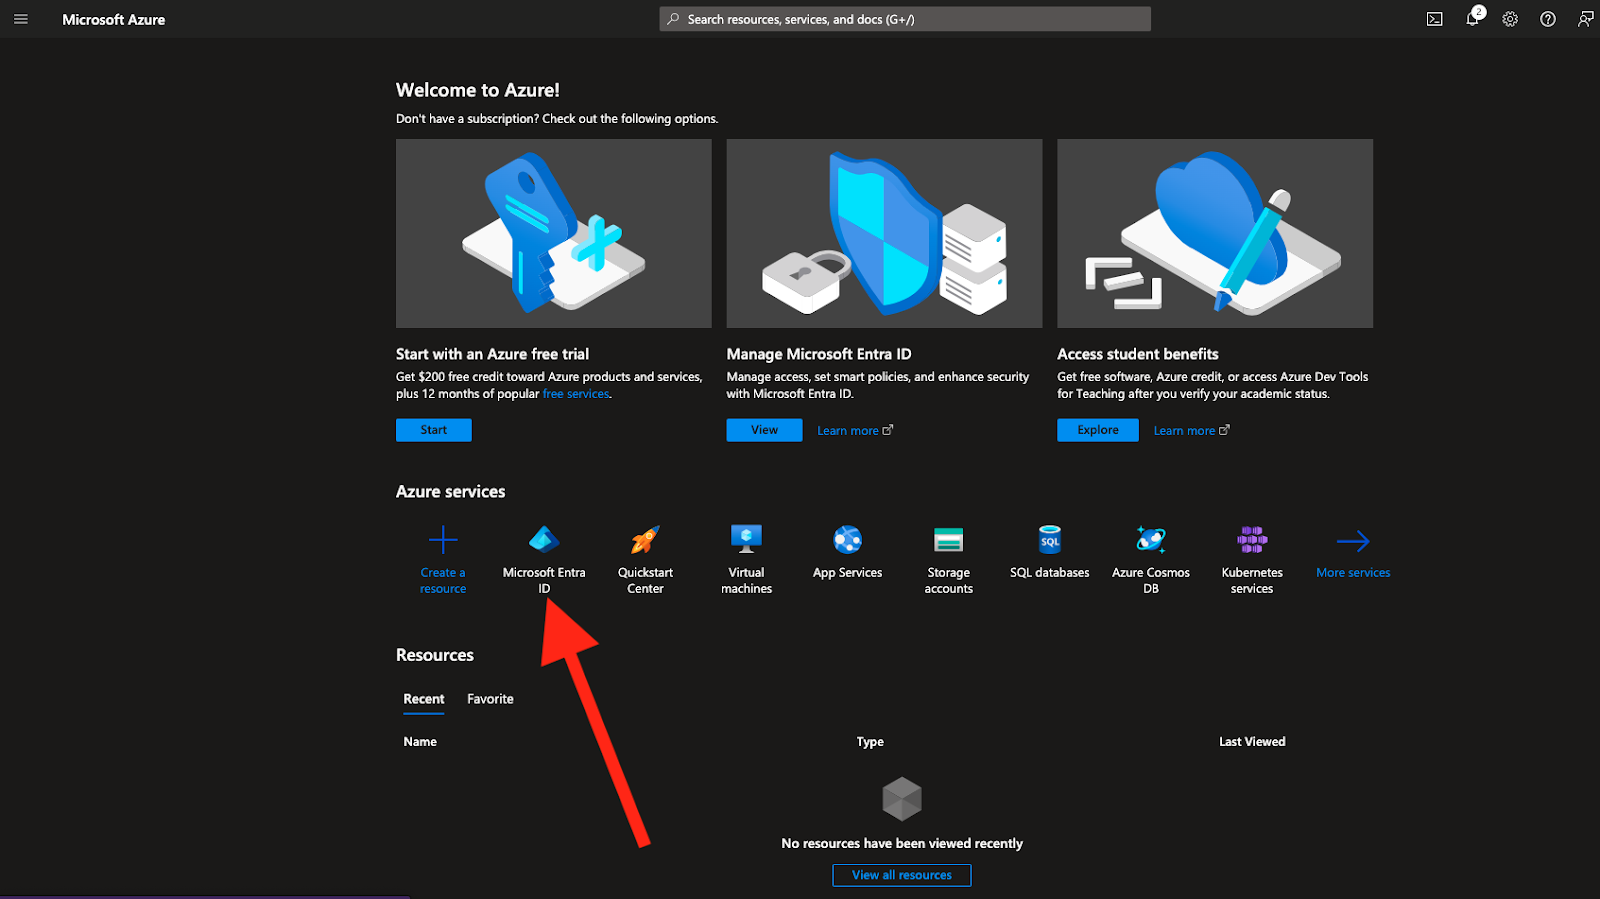
- Navigate to the Microsoft Azure Portal. Sign in using the credentials provided. Under Azure Services, click on Entra ID.
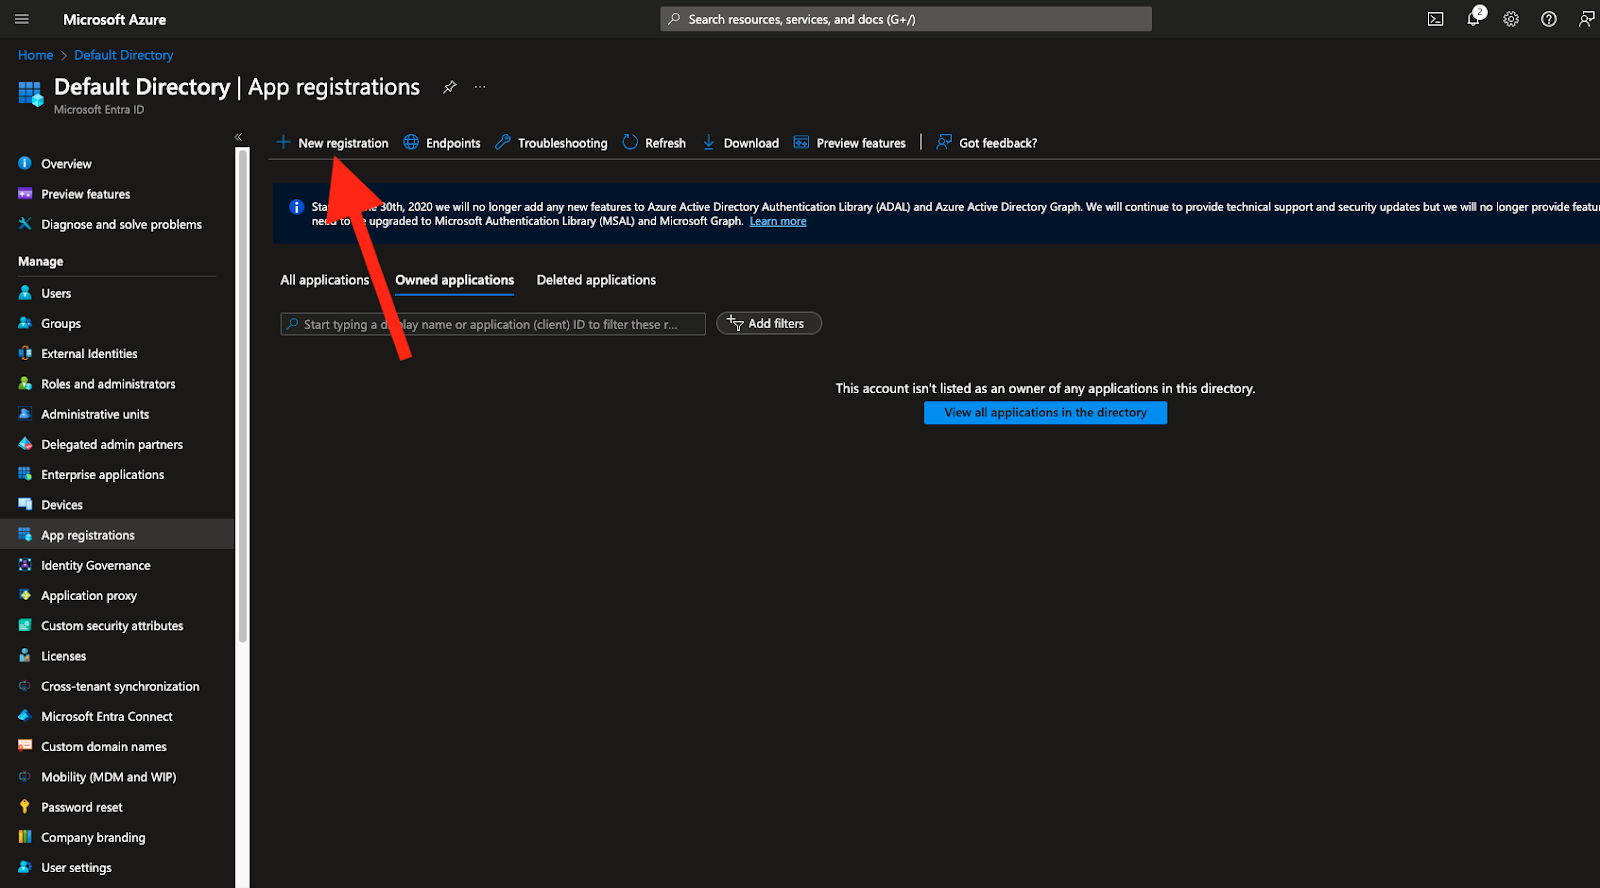
- Under Manage on the left column, click App registrations. Then click New Registration to create a new application.
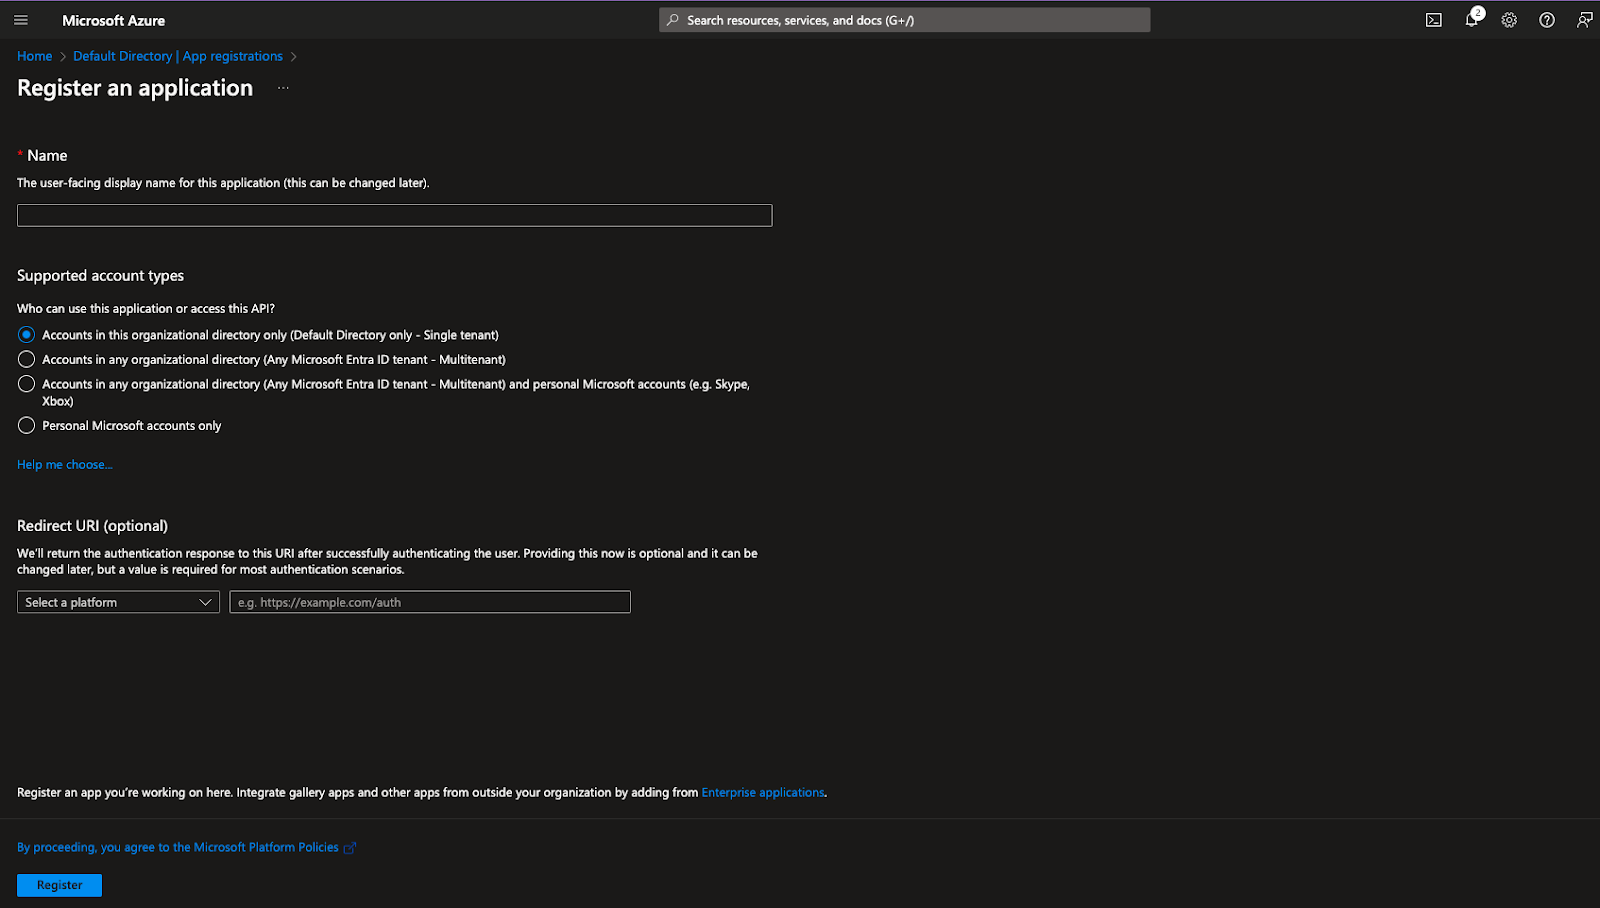
- Create a name that’ll identify this new application, such as a “TraitWare graphAPI”. Leave other settings as default, select register at the bottom.
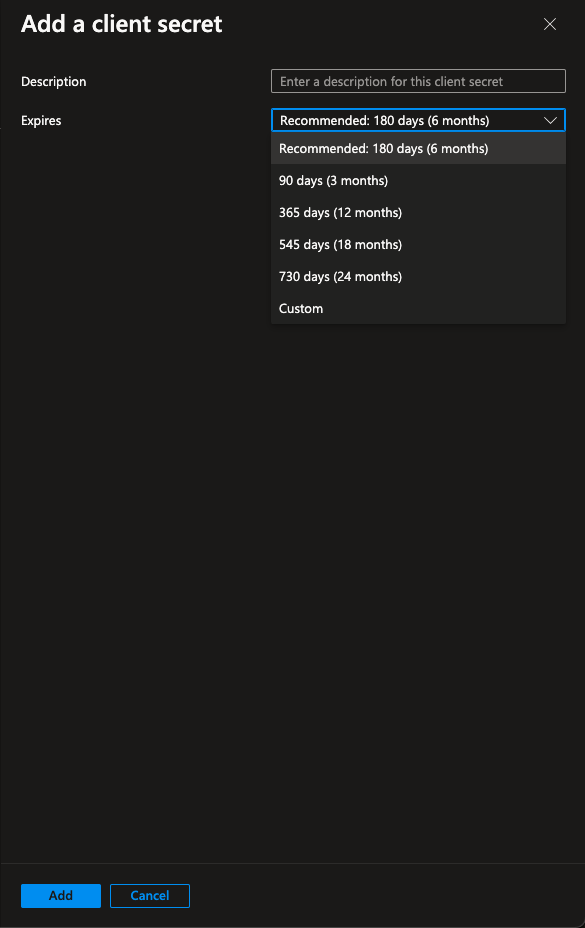
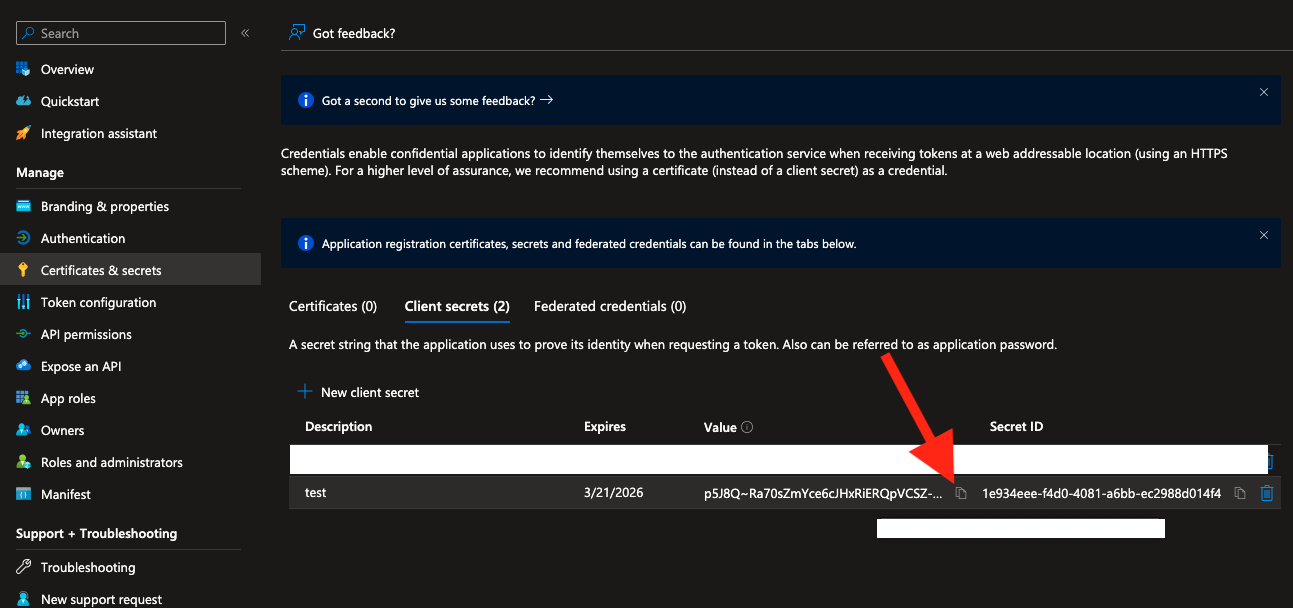
- Once the application appears, click on the newly created application name. This will change the options under Manage on the left column. Select Certificates & secrets. Then select New client secret, write a description for the new secret and change the expiration date to 730 days (2 years). Click add at the bottom.
- The new secret will be temporarily displayed. Copy that value into the TraitWare Console User settings page or else the secret will not be displayed again. A new secret can always be regenerated if needed but it will require redoing the previous step.

Setting the GraphAPI Permissions:
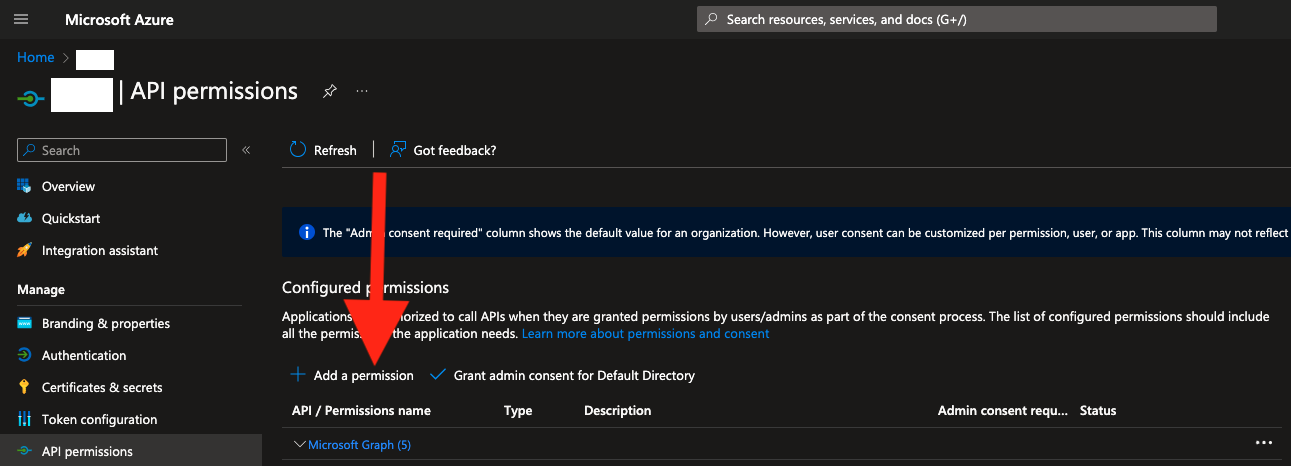
- In the left column under Manage select API permissions. Then select + Add a permission.
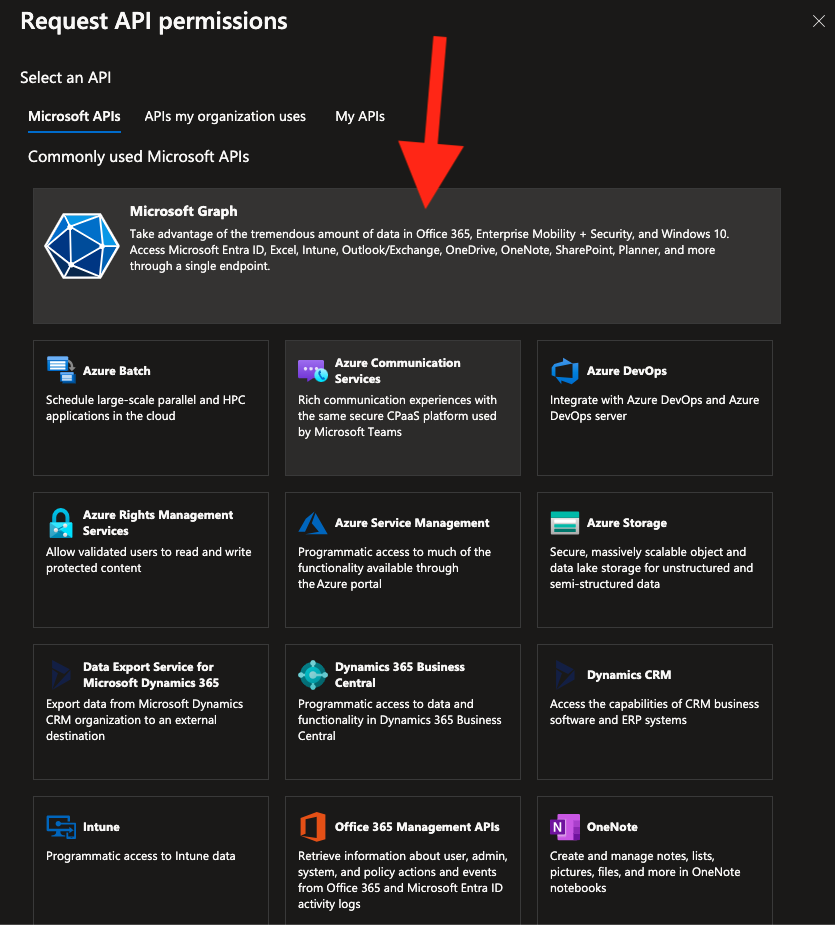
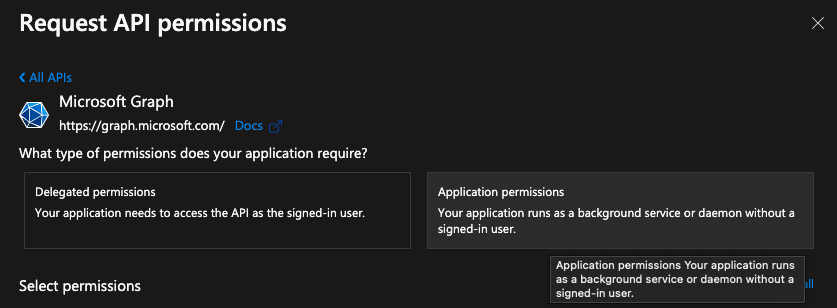
- Select Microsoft Graph, then click Application permissions
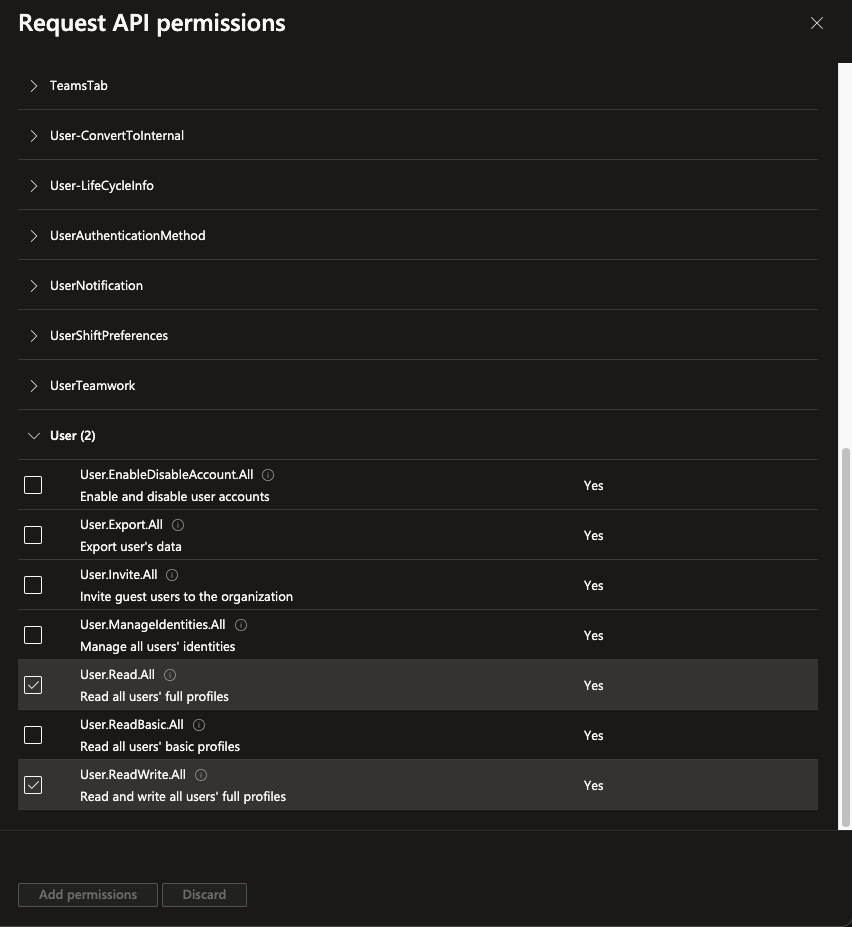
- Scroll down to ‘user’ or type ‘user’ into the search field. Click on the drop down arrow and select User.ReadWrite.All and User.Read.All and select add permissions.
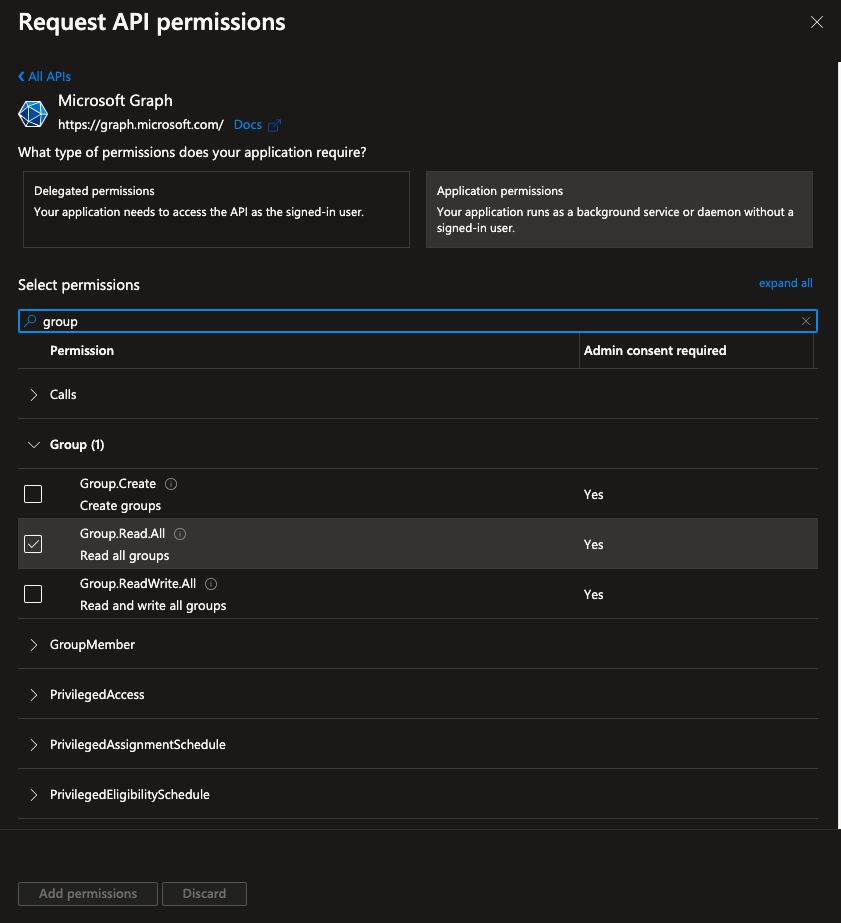
- Scroll down to ‘group’ or type ‘group’ into the search field. Click on the drop down arrow and select Group.Read.All and select add permission.
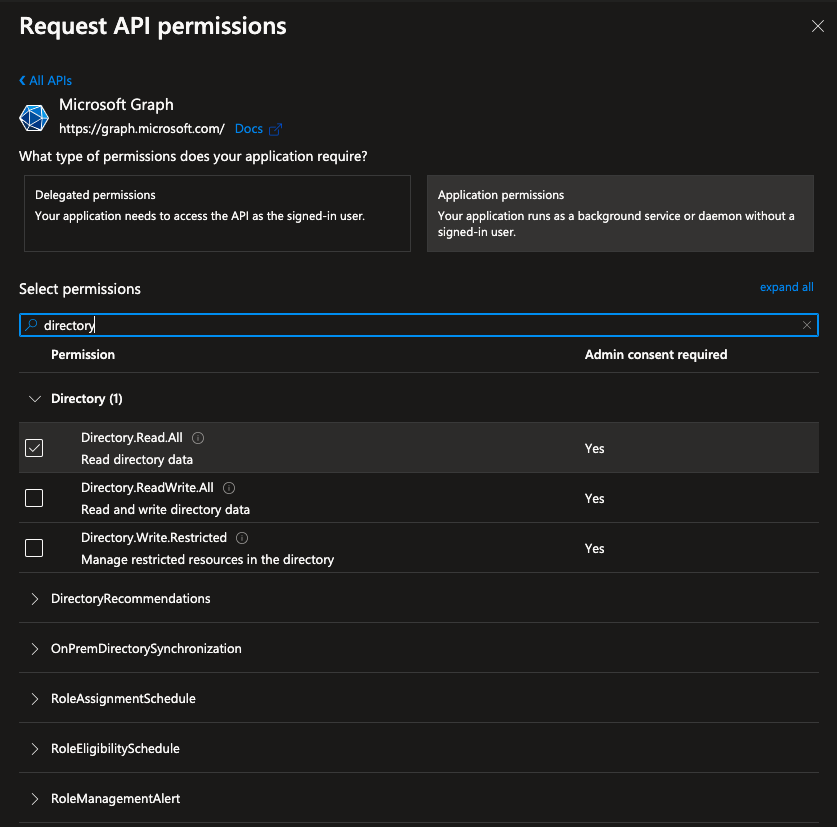
- Scroll down to ‘directory’ or type ‘directory’ into the search field. Click on the drop down arrow and select Directory.Read.All and add permission
- Consent must be granted in order to use the API. Select Grant admin consent for
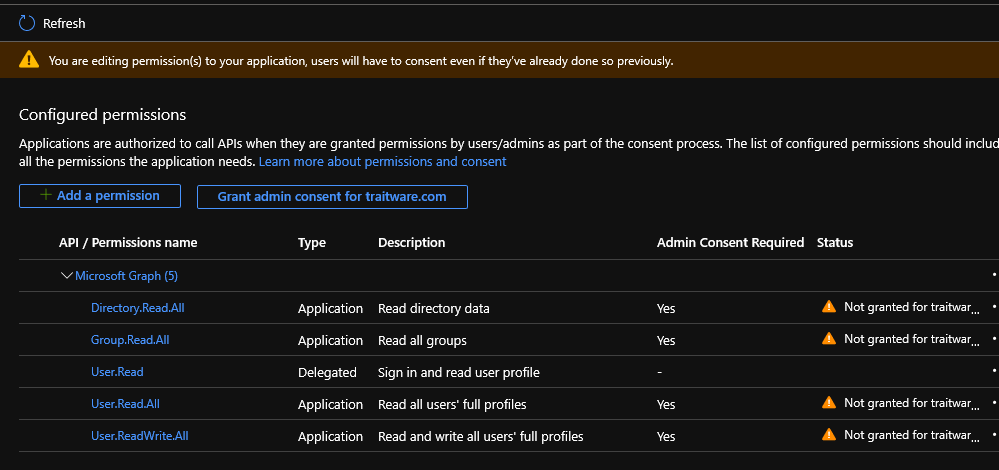
- Confirm consent by selecting Yes. A confirmation message should appear, indicating successfully granted permissions.


- Green check marks should appear in the Status column.
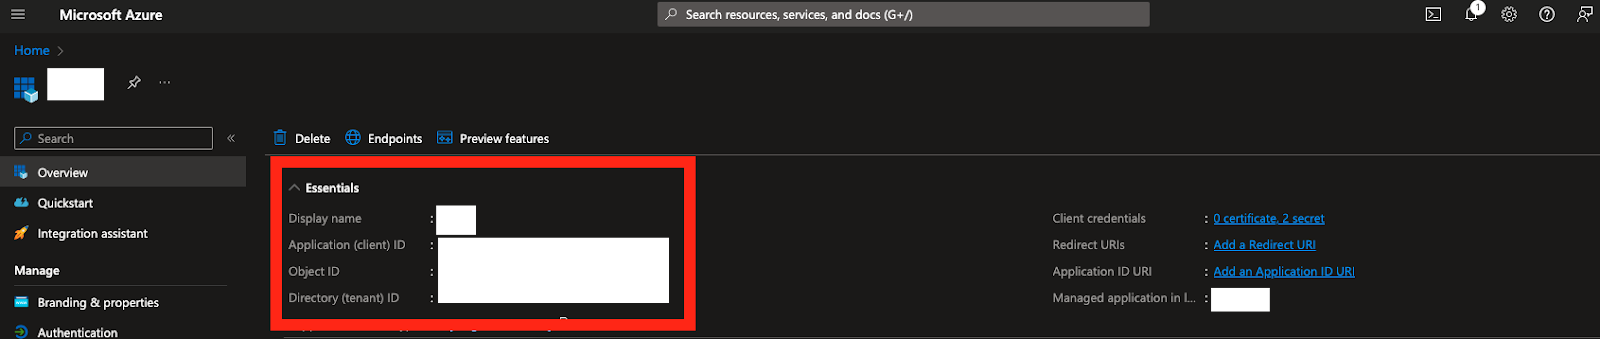
- Select Overview on the left to see the application Overview. TraitWare will need some of the information provided below the display name. Application (client) ID and Directory (tenant) ID will need to be copied to the TraitWare Console User Sync screen, along with the Secret generated earlier.
Create Group in Azure:
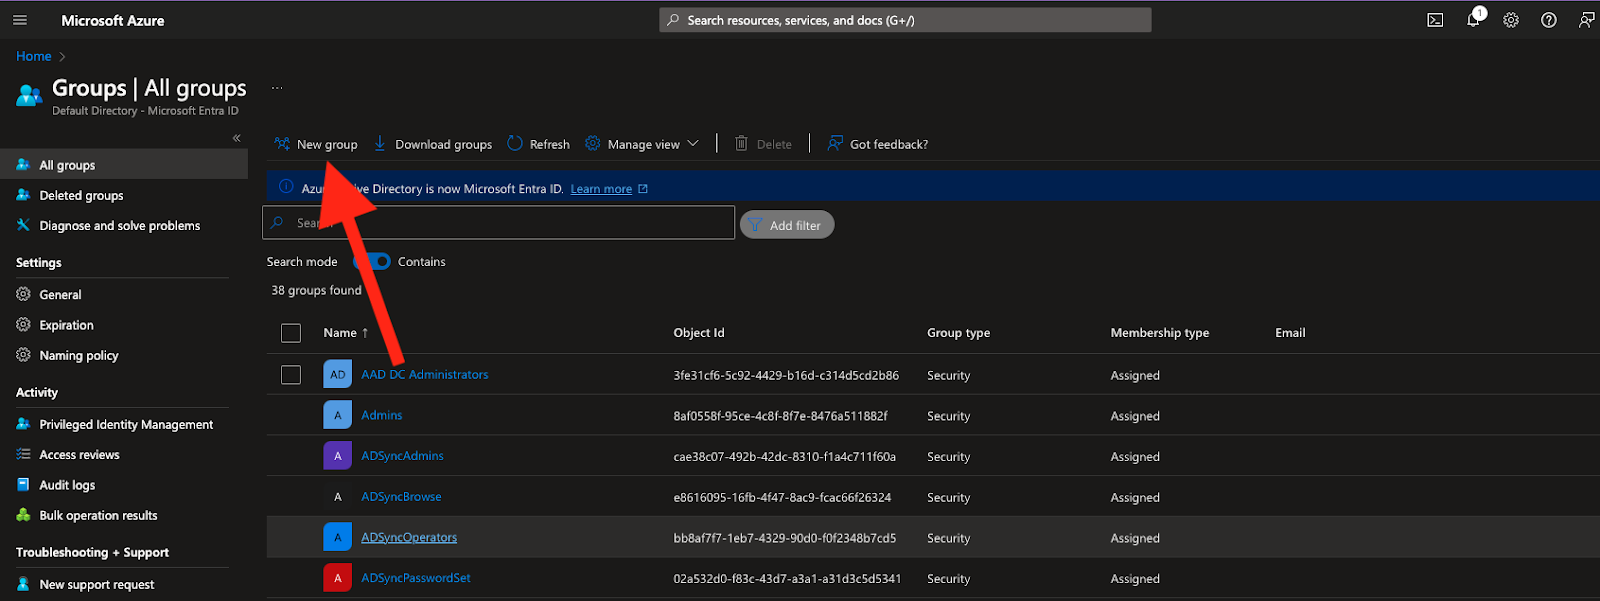
- Navigate to Azure directory by selecting ‘default directory’ in the top left. Select groups from the left column, then select ‘new group’ from the taskbar.
- Select Security under Group type. Enter the name of the group and description. When finished click Create.

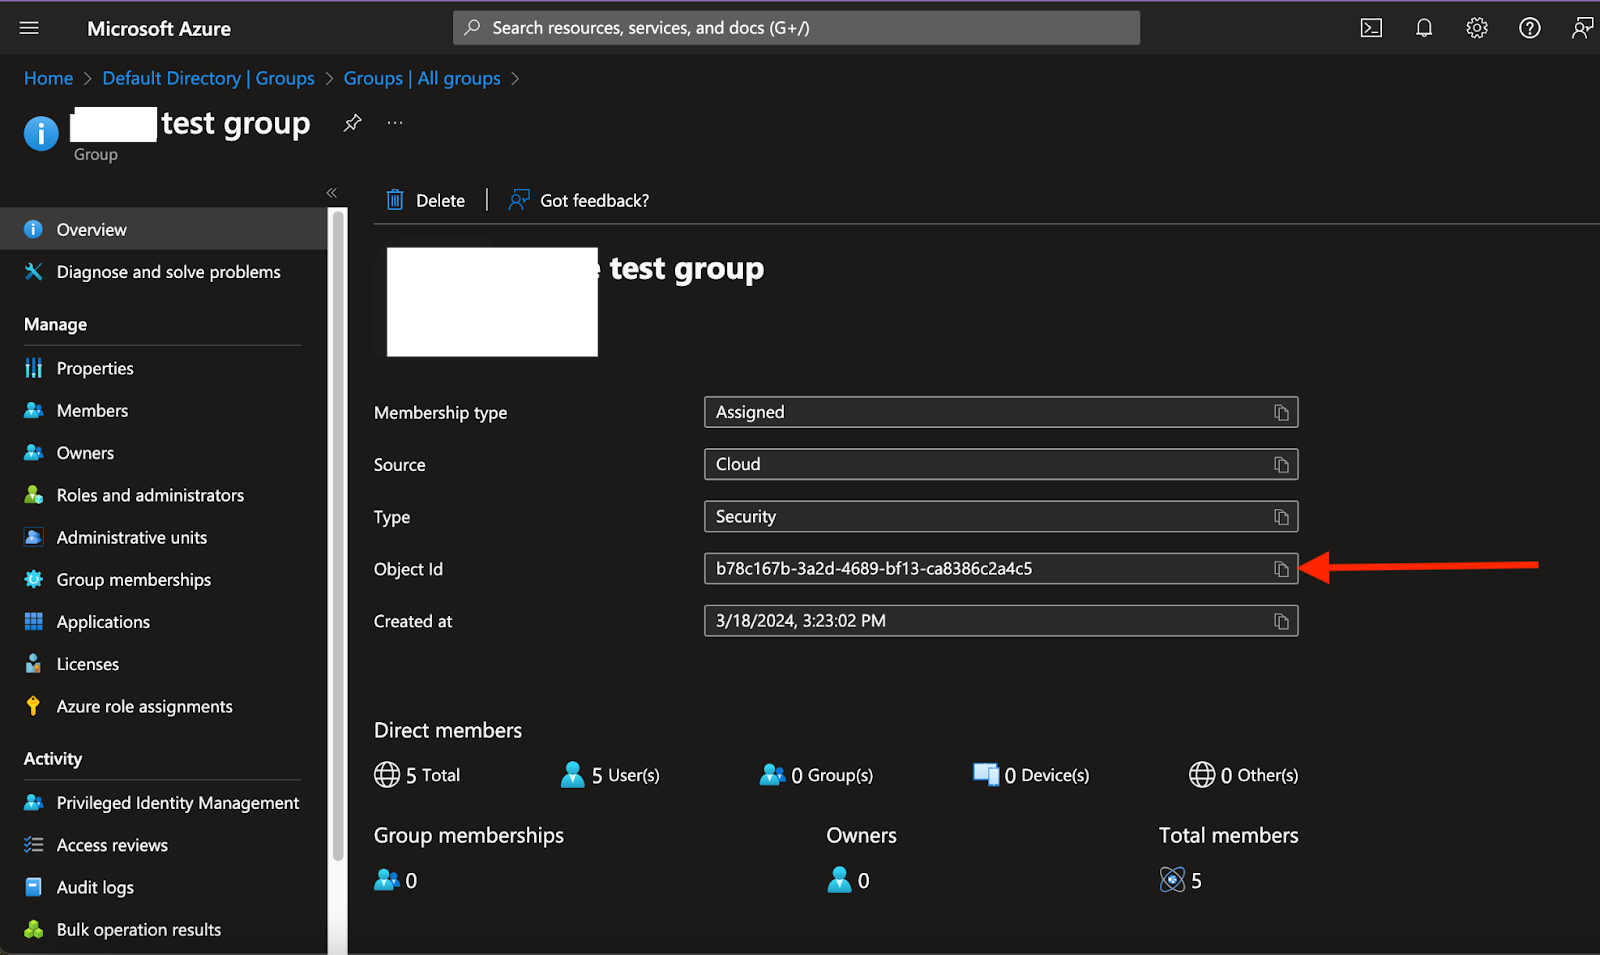
- Once created, the page will return to Groups. New groups take approximately 2 minutes to populate. Enter the newly created group name in the search bar. Click on the newly created group and click the copy button on the right side of the Object Id field.
- Click on Members on the left side of the browser window. Click on Add members. Search for users to add to the group. When finished click Select. The users will be added to the group.

Setting Up TraitWare User Sync:
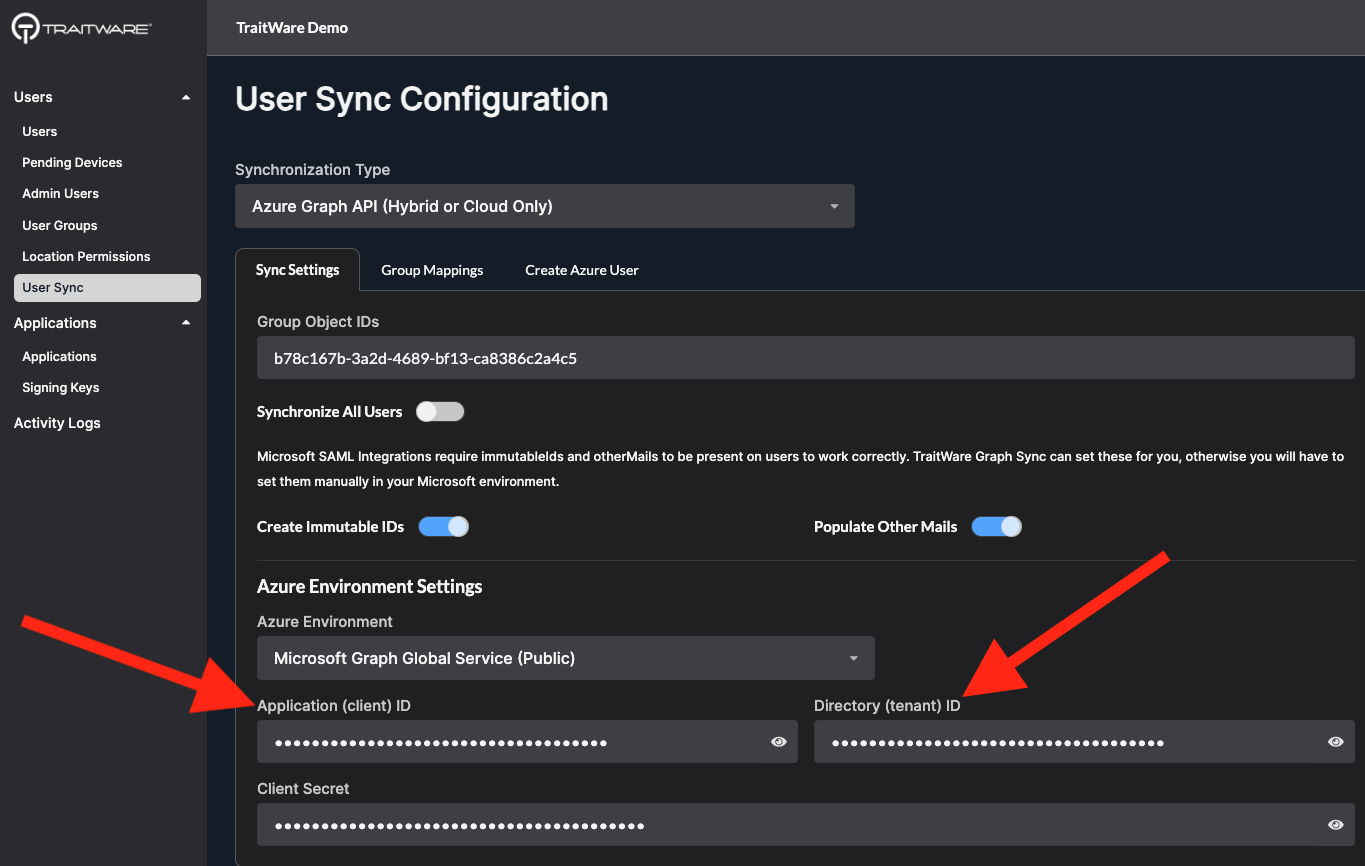
- Navigate to the TraitWare console, click on User Sync on the left menu column. Select Azure Graph API from the sync type dropdown. Paste the Application (client) ID, Directory (tenant) ID, and Client Secret generated earlier into the corresponding fields. Select Save Changes when done.
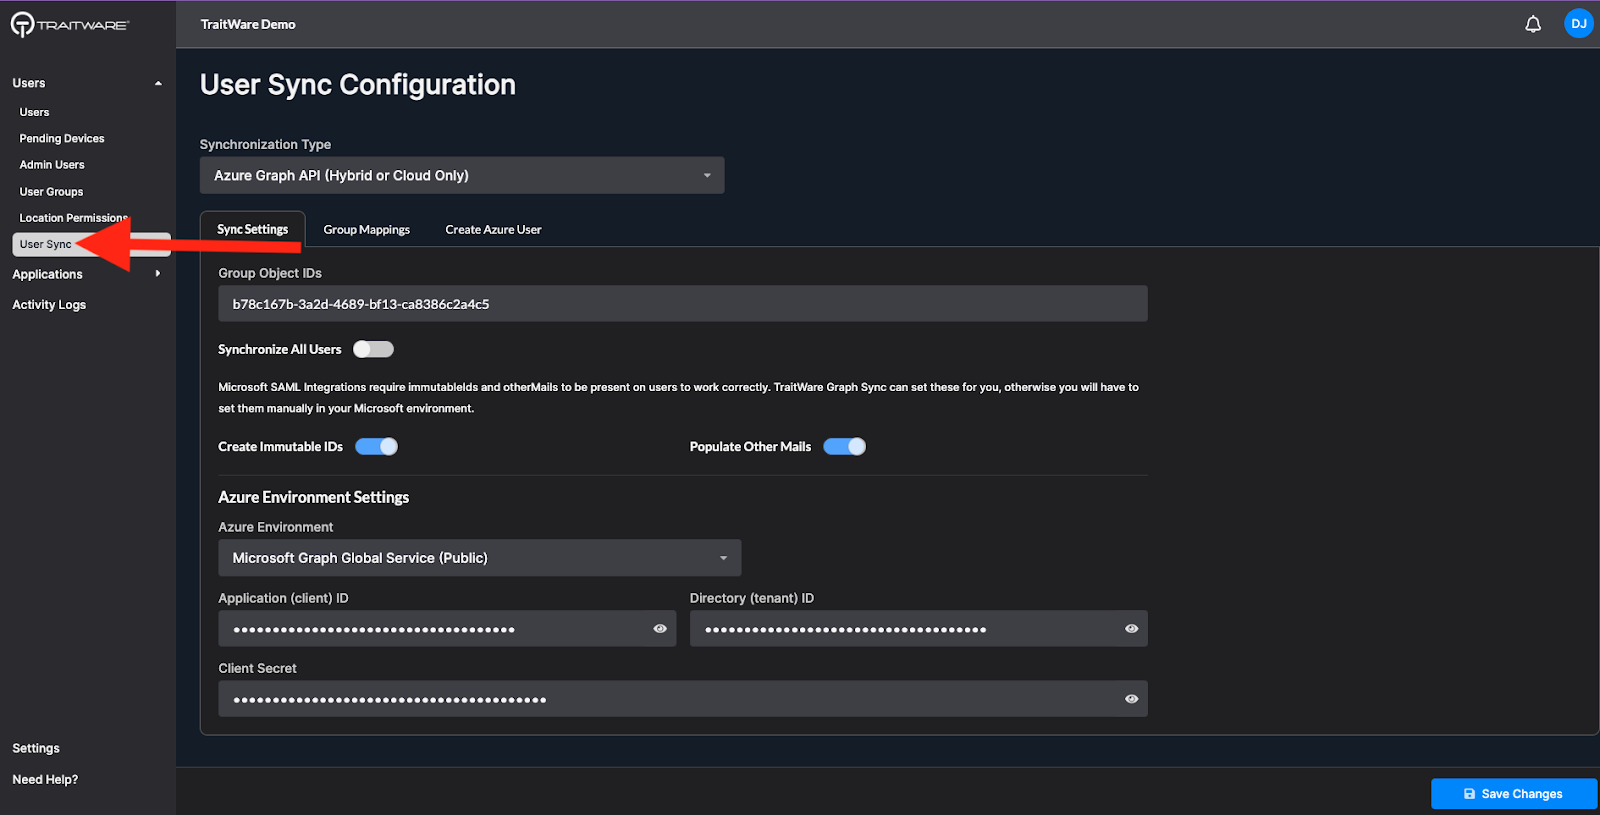
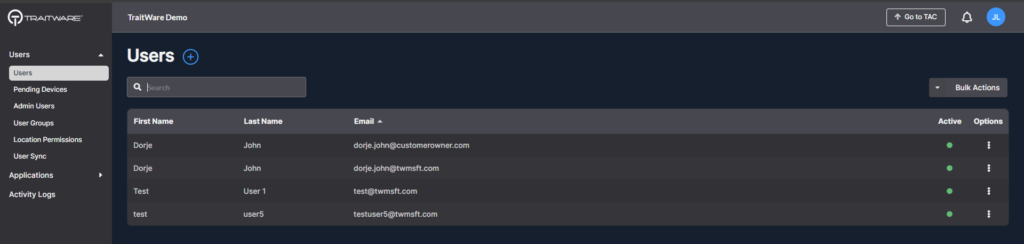
- Azure groups individually sync by default. Wait approximately 5 minutes for the users to sync from Azure AD to TraitWare. The users should populate in the TraitWare Console by refreshing the User page.
Note: Synchronize All Users toggle will synchronize all users in the tenant to the TraitWare console. Do not enable unless syncing all users is desired.
Additional Information
- If you do not see an application in the dropdown list during the Application setup, you can fill in the fields with your generic information. If you have issues, please contact us at support@traitware.com, and we will work with you to see if the application can be added.
- For steps on how to federate your domain using Powershell, go here.