- Getting Started
- Recommended Integration & Registration Flow
- Admin Console Overview
- User Onboarding and Management
- User Registration and Login
- Enterprise Applications
- Microsoft Integration
- Installing TraitWare PAM Module for SSH and SFTP
- cPanel OIDC Integration
- Browser Extension
TraitWare Admin Console
Posted on April 27, 2019
Content Navigation
- Admin Console
- TraitWare Account Console
- TraitWare Customer Console
- Adding Applications
- Create Location Geo-Fencing
- Modify Location(s) and Users
- Create and Register User(s)
- Modify Existing User
- Users Import/Export
- Batch Device Create/Send Email
- Edit Customer Settings
- View Activity
- User Portal
Admin Console
- If you don’t already have an active TraitWare account, Sign up for a fully Automated Free 30-day Trial (Admin Account Level)
- Alternately, you can contact us at support@traitware.com
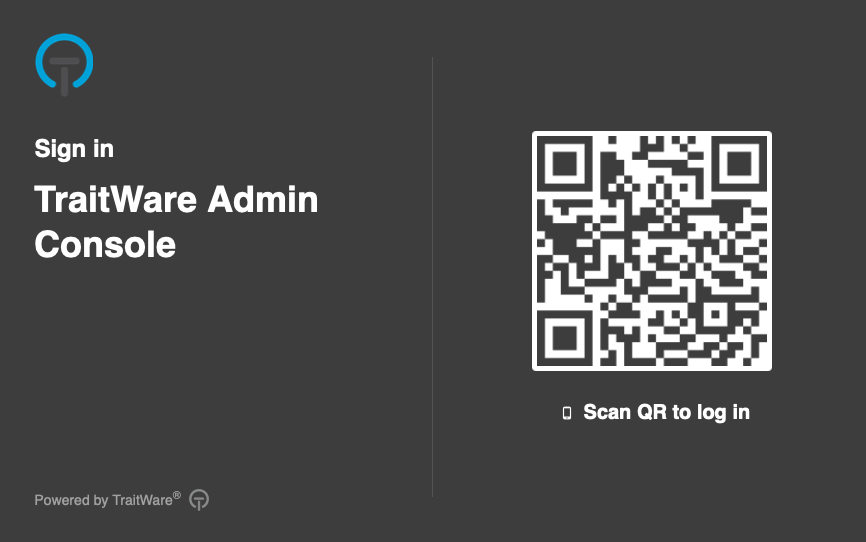
- Once you have completed the email registration process and have access to your TraitWare account, navigate to admin.traitware.com
- Scan the QR with your TraitWare app
TraitWare Account Console (TAC)
- Depending on your account level, you will either be signed in to the TAC or the TCC
- If you have signed up through the free trial, you will have TAC and TCC access
- Here you can edit the existing customer name or Add A Customer
- All customers on the account will be displayed here on one screen with the # of Users within each customer
- Each Column can be sorted in ascending or descending order by clicking the column title

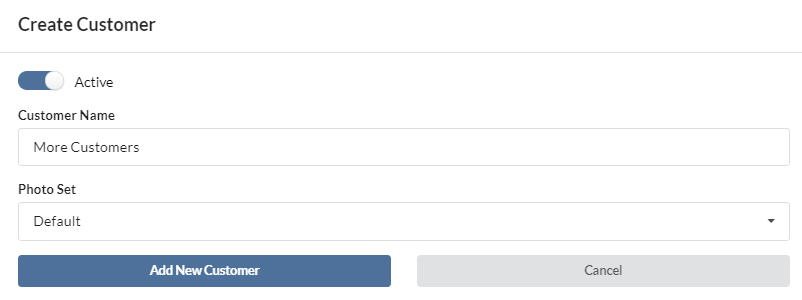
- Add A Customer will allow you to create a name (this can always be modified again later), set as Active, choose the Photo Set for PhotoAuth(choose Default)
- These can also be modified once created
- Select Add A Customer to create new customers
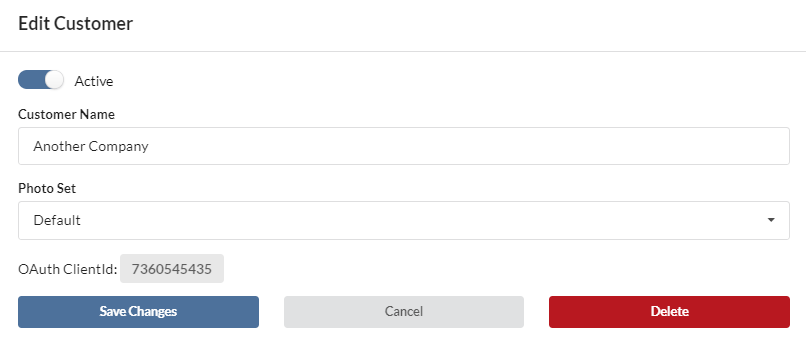
- Selecting a Customer name will allow for the above changes as well as display the OAuth CliendId (Customer number)
- You will also see the option to Delete
- More customer settings can be found in the TCC level
- You can also view users with TraitWare Console access (select Console Users from the menu on the left)
- The customer which that user exists under will appear under Customer Name
- Note that only users who have at least TCC Access (given at TCC User Settings) will be displayed here

- By selecting a Console User, their permissions can be changed
- To change user’s information, you must drop down to the TCC level and modify the user there
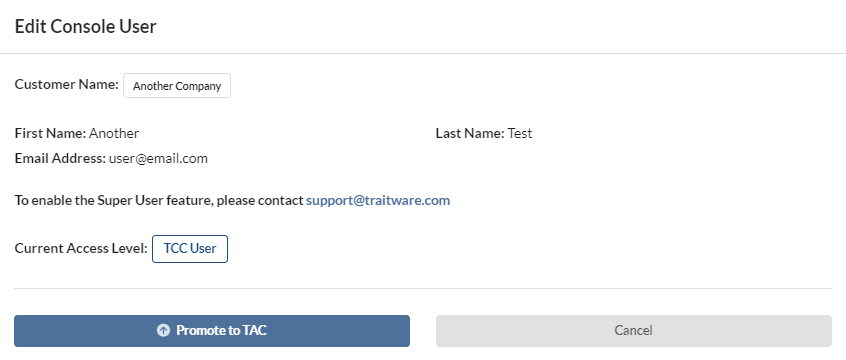
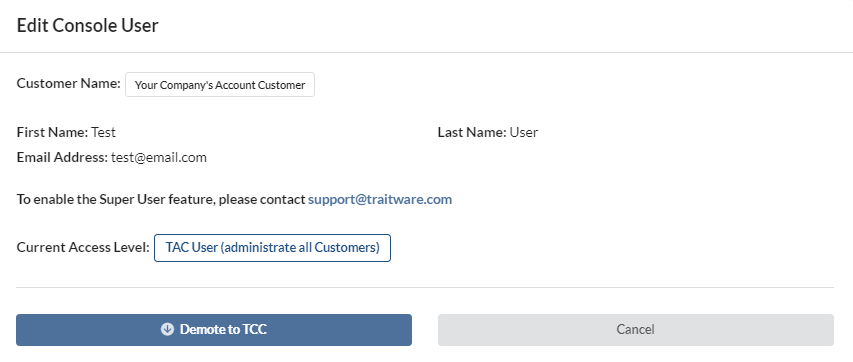
- Change to the TraitWare Customer Console (TCC), by selecting Select Console Level and choosing TCC

TraitWare Customer Console (TCC)
- In the TCC, if you have multiple customers, you will be able to select the current Customer Name that you are viewing and switch between them

Creating an Application
First create a signing key for your application (SAML apps).
- Click Signing Keys under the Applications menu.
- Select Generate new Key Pair.
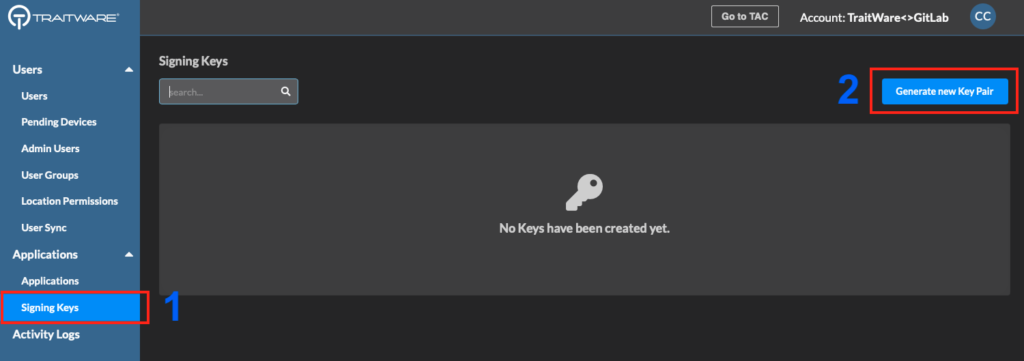
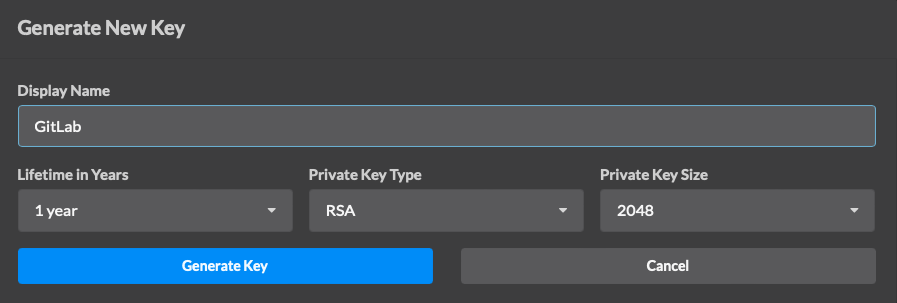
- Enter a Display Name.
- Select the lifetime of time you prefer for your key. NOTE: Owners will be notified by email of pending key expirations. The other options are fixed.
- Select Generate Key.
Adding Applications
- To add or view your existing applications, select Applications in the menu on the left
- You will be able to modify an existing application or add a new one
- Select Add Application to add a new application

- Selecting Add Application will take you to a screen to select your Application Type
- Choose the appropriate type for your application to continue

- For SAML, you will see options to make the application Active, Include in Direct Login(visible directly in the TraitWare Mobile App), Enable Tap-to-Login(send a push to accept/decline in the TraitWare app), Include in the User Portal
- Below that, you will be able to choose to Use a Template (if you see one missing that you want added, please email support@traitware.com), Enter Manually (to enter your own data), or Upload a SAML Metadata file
- Some SAML applications will also require additional Claim Mappings. Select Add New Claim Mapping to add the necessary attributes
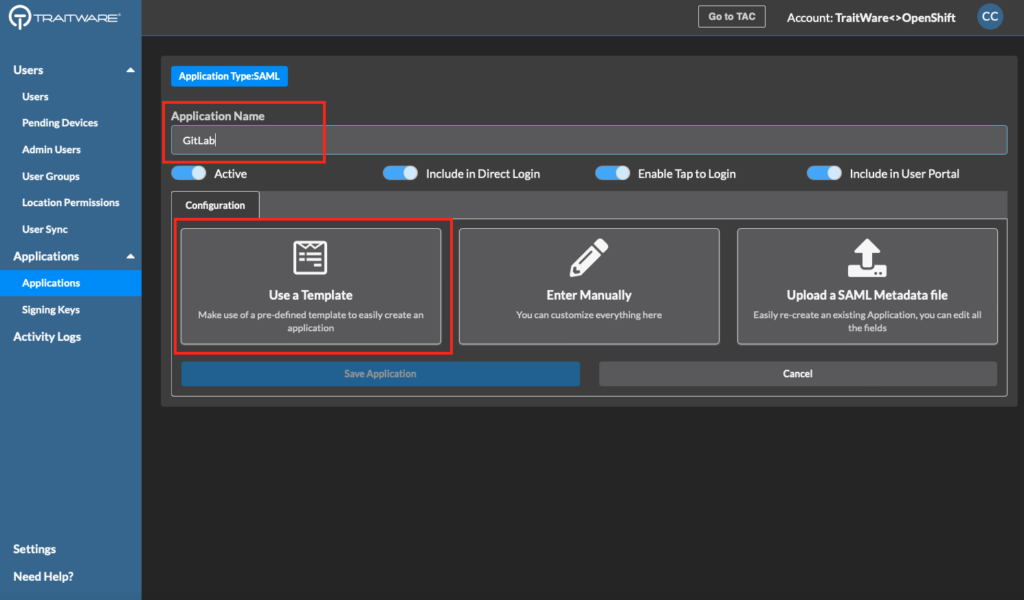
- If you wish to see a full example of a SAML app creation, navigate to documentation.traitware.com
Below is an example of Using a Template. Select a preconfigured template and simply add the needed information.

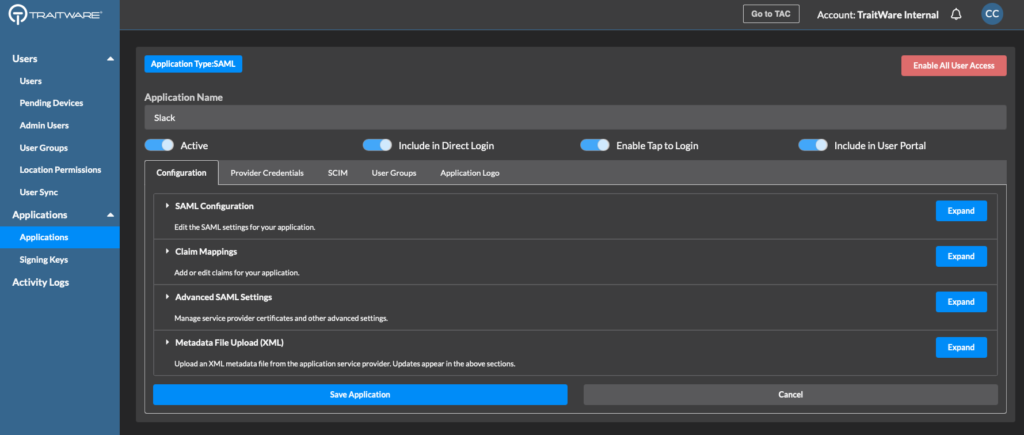
After choosing a provider (Slack in this example) enter the requested information.

- Once an application is saved, you will see more tabs with information as well as an option to Enable All User Access, which toggles access for all users in the Customer Account
Add/Update the Application Signing Key
- Click SAML Configuration to expand the section.
- Click Edit Signing Key
- Select the key you created for this application from the list
WARNING: When changing an existing signing key make sure to log into the service provider (Application) first. The signing keys used at the service provider and TraitWare must match. You must update the key at the service provider to match the key on your application or you may not be able to log in to the service provider to change it. After making the key change, test the application login on a separate browser or private window, keeping the application admin logged in. The logged in admin can still make any needed changes if things are not correctly configured.

Adding Geo-Fencing Locations
- Navigate to Locations in the left menu
- Select Create New Location

- The map will default to United States
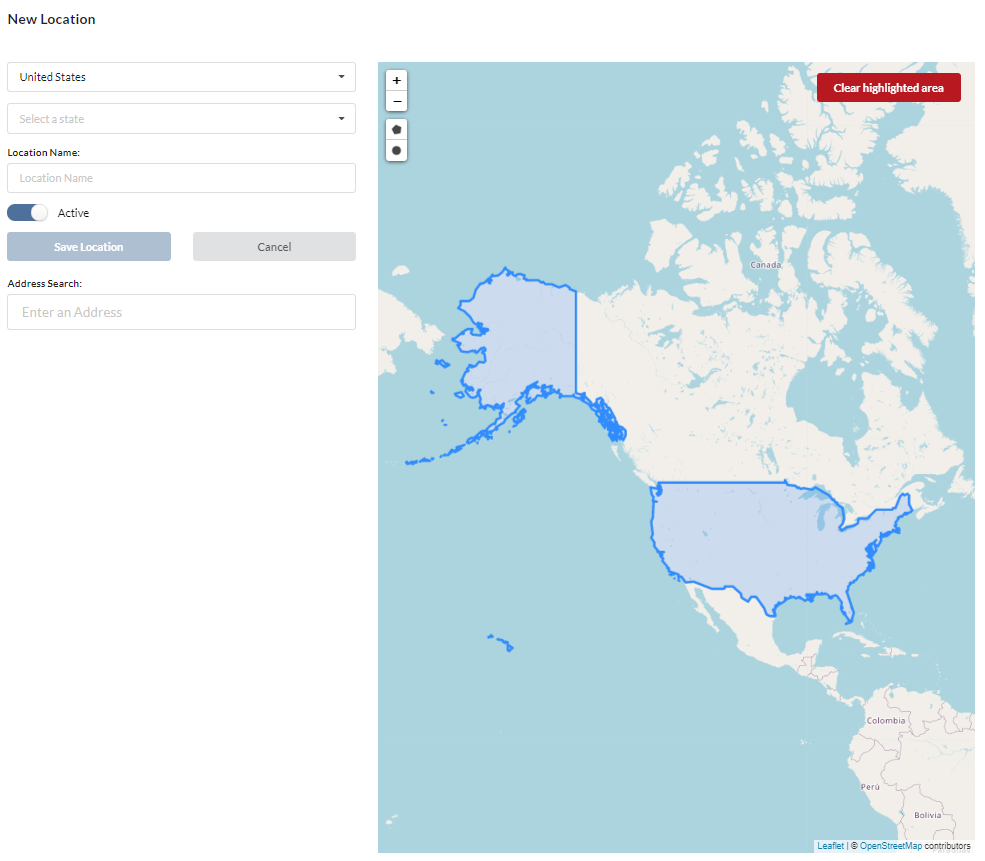
- Choose the appropriate Country/State/Province from the dropdowns
- You can toggle Active to disable the location
- Enter a Location Name and Address for your location
- The map will populate the area of the specified address
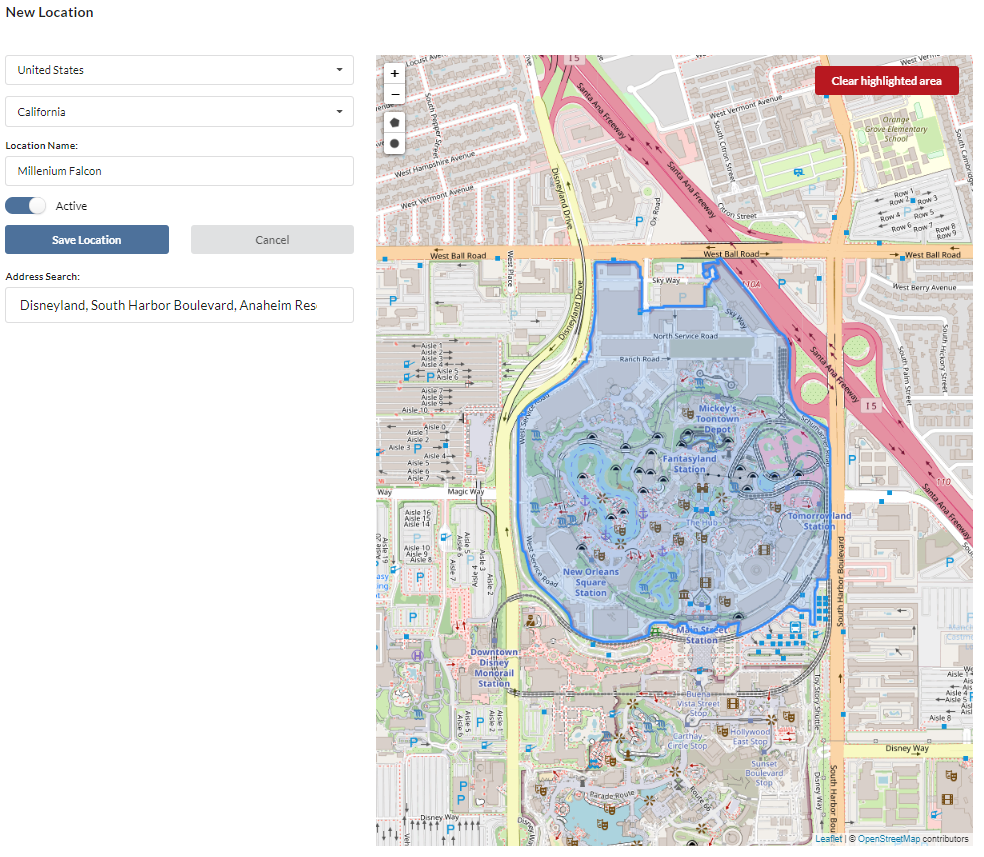
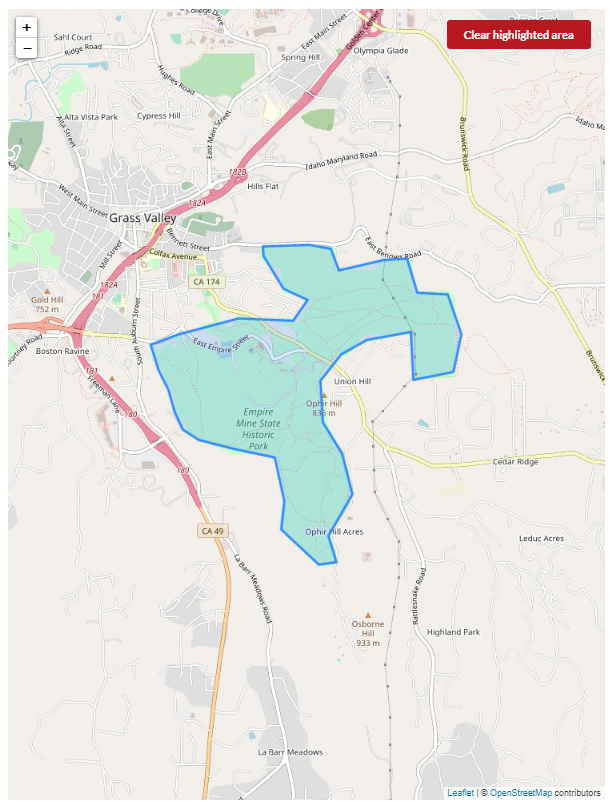
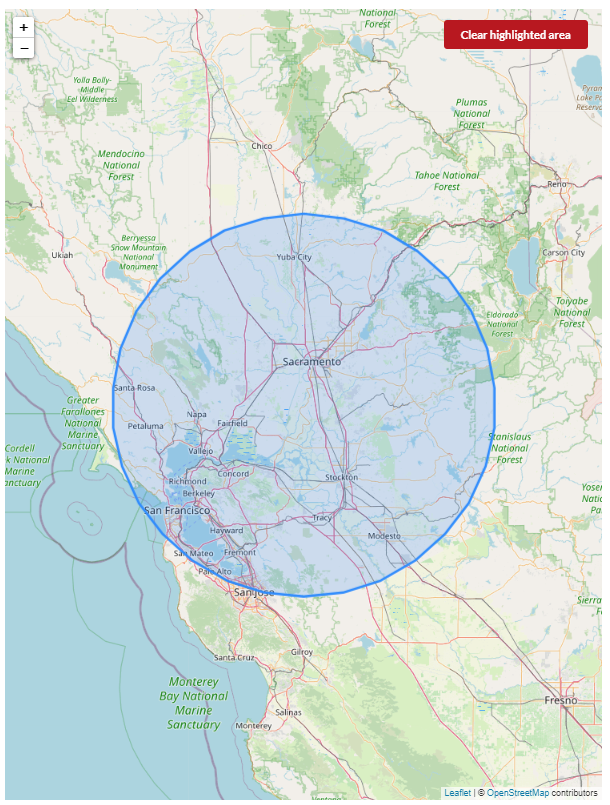
- Alternately, you can choose to draw your own area using the Polygon and Circle tools in the map
- Use Polygon to add multiple points for accuracy of a map
- Use Circle to just create a circle area to allow access within
- When you are done, select Save Location
Modify Location and Location Users
- Once you have created a location, you can Modify it by selecting the desired location
- Here, you can Rename, Change the Address, Update the Map, and Toggle Active

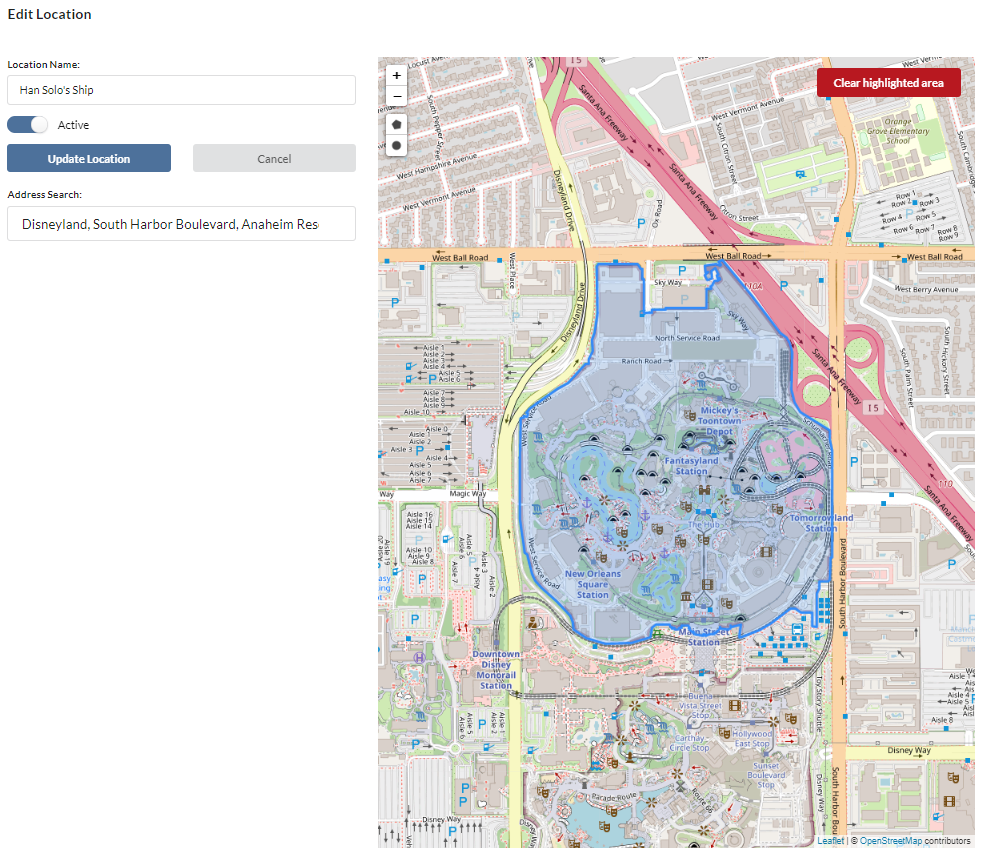
- Select Add/Remove Users to modify which users are assigned to this location


- Once you have Users, you will be able to add them in User Location Administration
- Here you can Add All Users for this Customer or choose individual users with a Check box
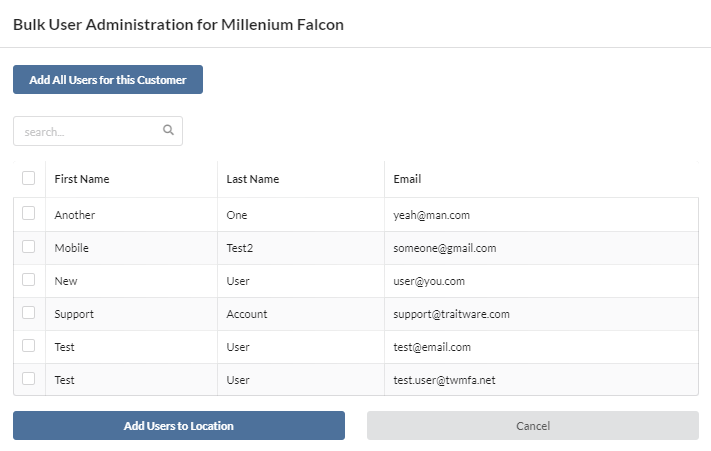
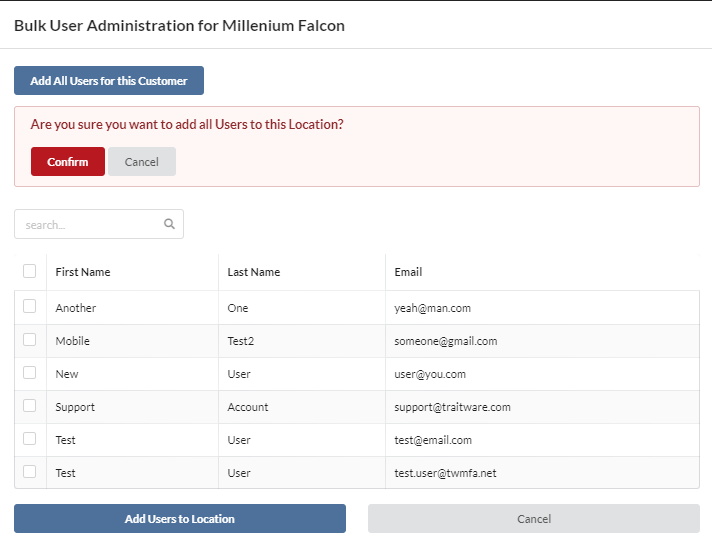
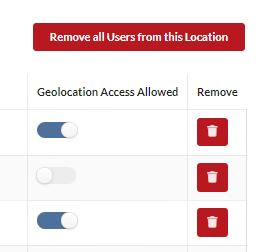
- Once users have been added, you can control their access to the location with the Geolocation Access Allowed toggle

- You also have the option to Remove a single user from the location by selecting the red trashcan icon, or Remove all Users from this Location using the red button
- You also have the option to View Map which shows the current mapped area of the location and Delete Location which will completely remove the location from the account

Create and Register User(s)

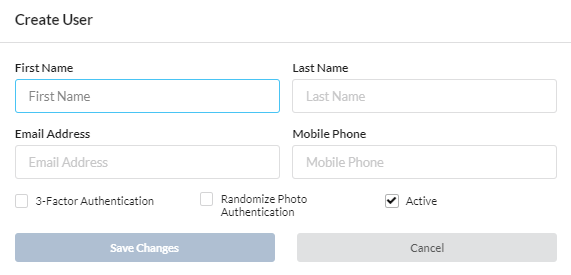
- To create a new user, select Create User from the User options screen
- All fields are required except for Mobile Phone
- You can choose to require 3-Factor Authentication and/or Randomize PhotoAuth at this time, or later by modifying the user
- Select Save Changes
- With a new user, you will see that the Devices has not been registered
- There are a few options to allow a user to register their device
- **Please note that registration codes currently expire 24-hours after being created. The batch options will renew any expired codes before sending out emails or texts

- If you select More Actions, you will see the available options for registering
- Send Text will only send a text if a mobile number exists for the user
- Send Email will send an email to the email listed for the user
- Send Registration Code To Alternate Email will allow you to send the registration email to a separate email than the one listed (this is great for onboarding or a user who has been locked out of their email due to a lost/replaced device)
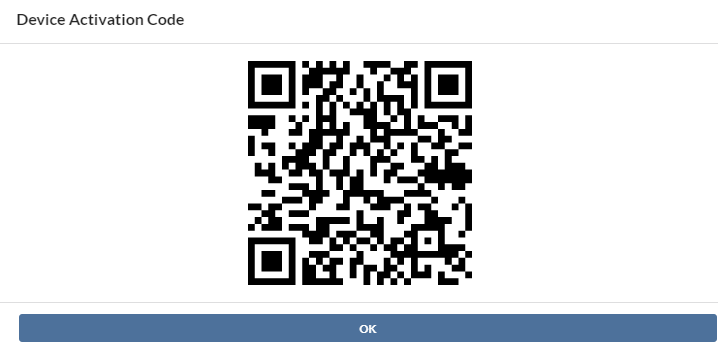
- Show QR will display the QR directly on your screen for someone to scan (This option is great if a user is with you during onboarding)
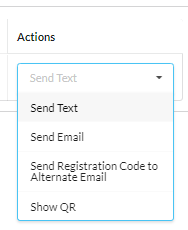
- Send Registration Code To Alternate Email will open a modal for you to fill out the alternate email. Select Send when you have entered the appropriate information

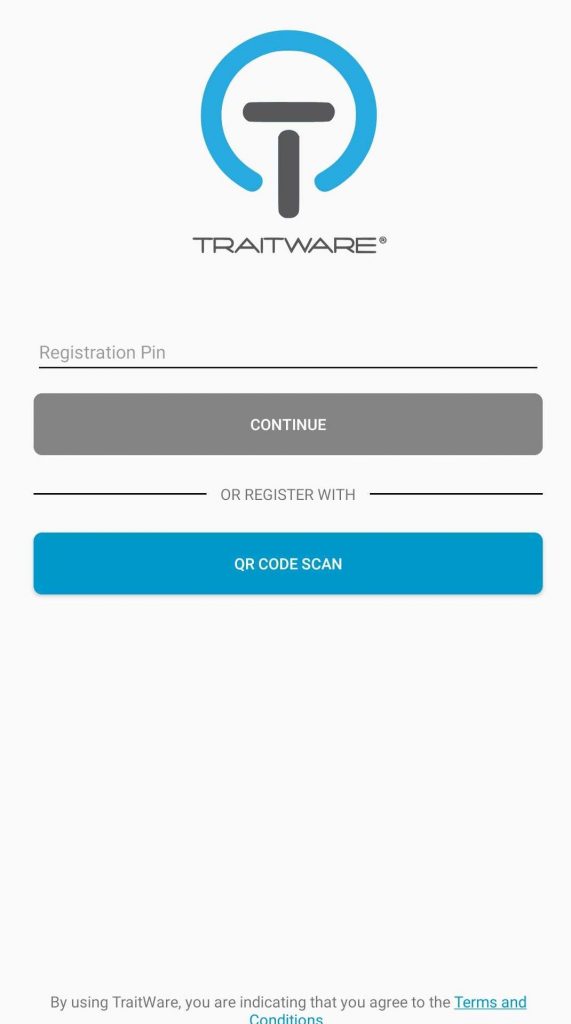
- The QR can be scanned by a user who already has the TraitWare app.
- The user simply needs to open their TraitWare
app and select the + in the bottom right - They will then get an option to add the Registration Pin or QR CODE SCAN
- Users can have multiple accounts with one TraitWare app
Modify Existing User
- To modify existing users, select Users in the left menu
- You will see a list of all users
- Each Column can be sorted in ascending or descending order by clicking the column title
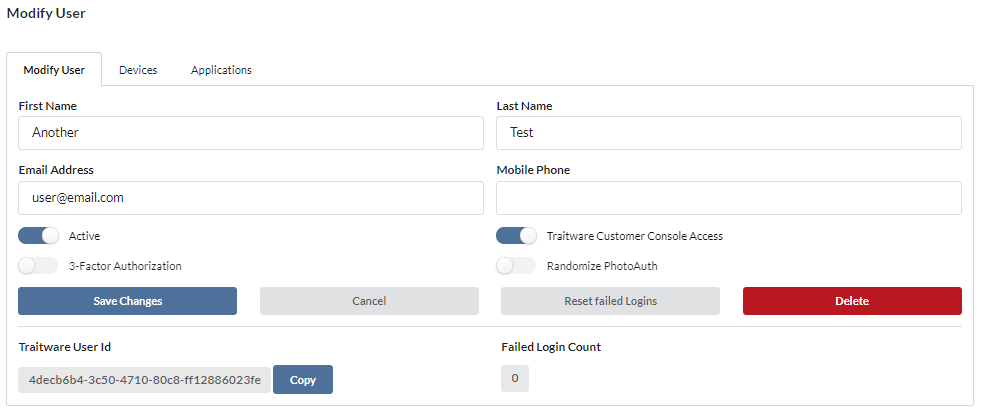
- Select a user to modify their settings

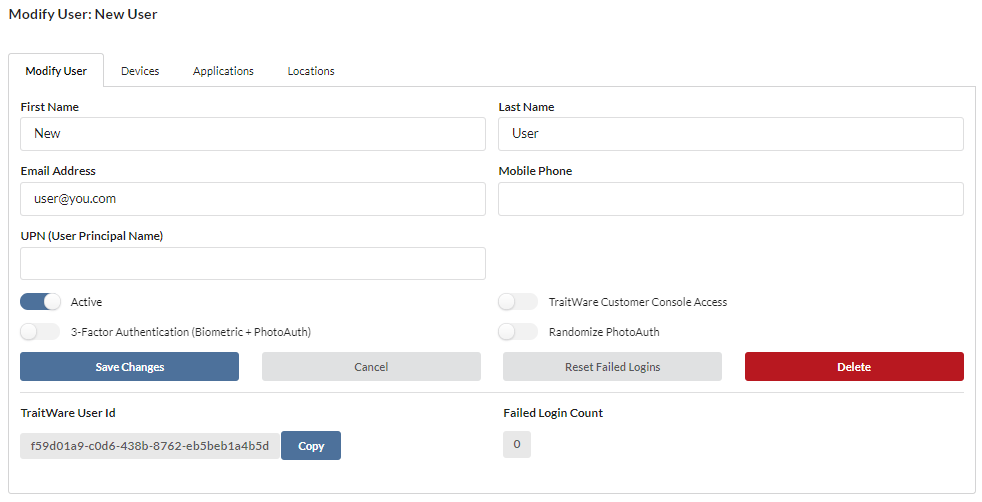
- Here you will be able to modify the First Name, Last Name, Email Address, and Mobile Phone fields (It is suggested to use the email you wish to use with TraitWare. If you need to send the registration email to a different email, please view the options for creating a user.)
- Set the user to inactive by unchecking the Active box
- Allow the user to have TCC admin access by selecting TraitWare Customer Console Access
- Require 3-Factor Authentication (biometric and PhotoAuth authentication)
- Randomize PhotoAuth(scrambles the orders of the images every time they authenticate)
- Reset Failed Logins (typically for PhotoAuth, but with a poor connection, biometric attempts may fail as well. The user will lockout at 3 failed attempts)
- You can also Delete the user
- A Registered user will show device information under Devices. You can Delete the existing device if the user has lost/replaced the device (see next step)
- You will also be able to Toggle Access for Applications that are available in the Customer Account
- Under Locations, you will see options to Enforce Geolocation for User and toggle Geolocation Access Allowed (for more on locations, go back here)


- If a user has lost or replaced their existing device, Delete the current device, and select the Add A Device to add a new one.
- Follow the registration options for a new user to complete the setup

Users Import/Export

- Select Import Users
- Paste user info as displayed below (remember, only First Name, Last Name, Email, and Mobile Phone fields are available)
- Select Preview
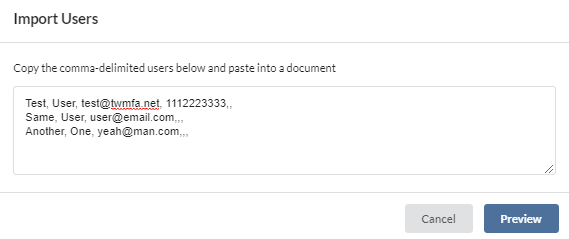
- If there is a comma missing, you will receive an error

- If there are no parsing errors, you will see a display of all users (including duplicates)
- Select Submit Users

- Here you will be shown which users were successfully imported
- Select Return to List to view the list of all users
- Duplicate users will appear with a red x next to their information

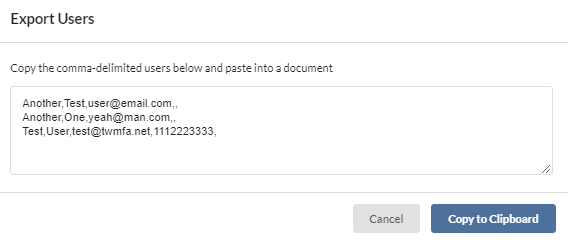
- Select Export Users
- Select Copy to Clipboard (this will automatically close the window)
Batch Device Create/Send Email

- The Batch options will allow you to create/recreate devices (including expired registration codes), and to send out registration emails to any user with an active registration code
- Users who have already registered a device will be excluded from any emails or device recreation
- Batch Add Devices will create/recreate a Registration code for a user who does not have one, or for one with an expired code


- Selecting Batch Add Devices will automatically search through all current users to find missing/expired Registration Codes
- Select Yes if you wish to replace them all (this will not send an email)

- You should see a confirmation in the lower right. An error will be displayed if it fails

- If you wish to send out a Registration email, select Batch Send Emails.
- You will also see the option to Batch Add Devices here if you wish to complete both steps with one button
- It will confirm that you wish to recreate Registration code, then you must select Yes in both windows to send the emails

- You will receive a confirmation that the emails were successfully sent in the lower right

Edit Customer Settings
- If you select Customer Settings in the left menu, you will be able to access Customer settings
- Here you can once again change the Customer Name and view the OAuth ClientId
- You will also be able to Regenerate the Client Secret

User Sync
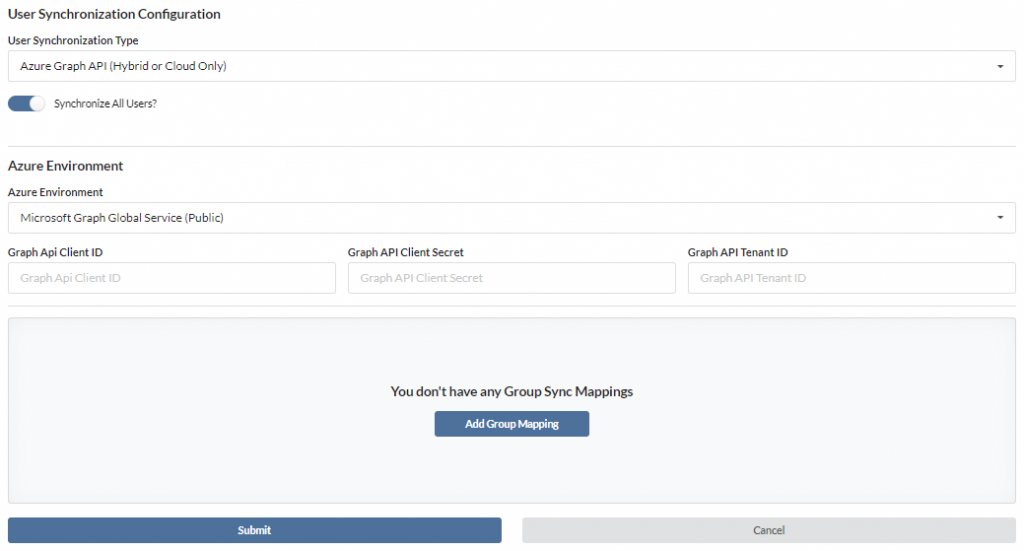
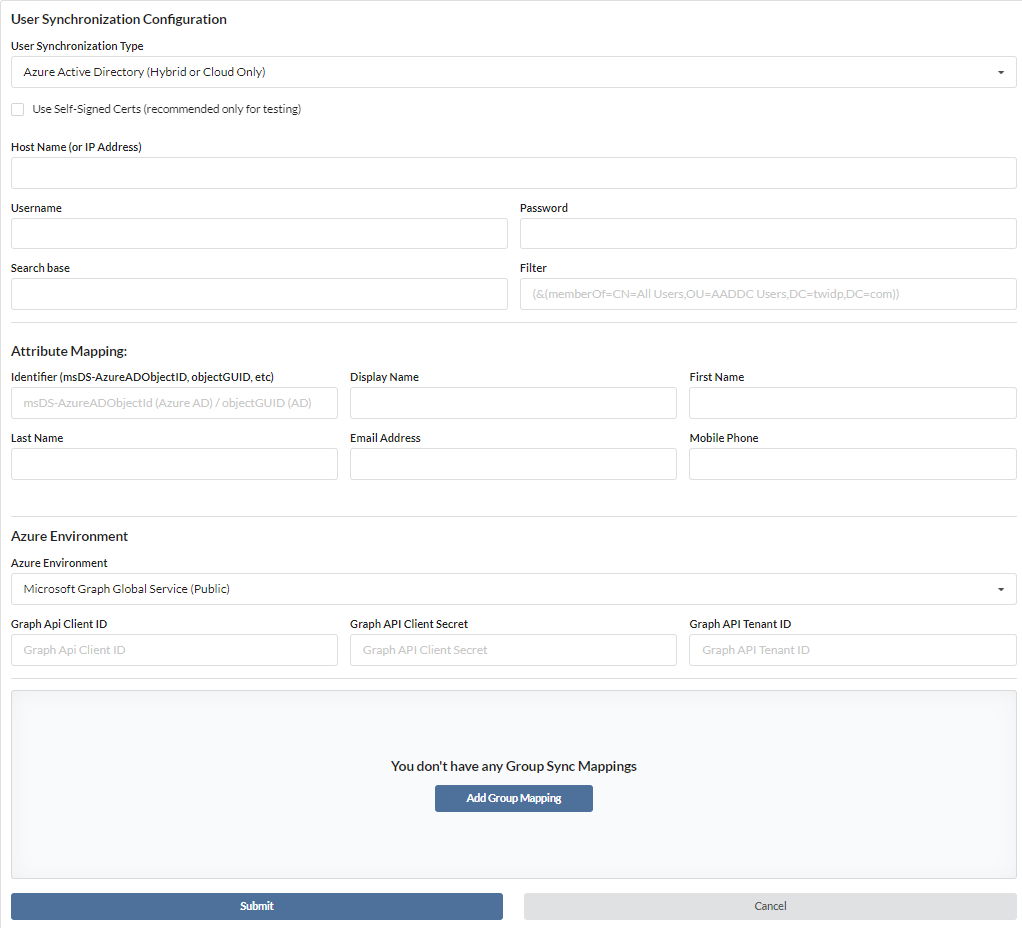
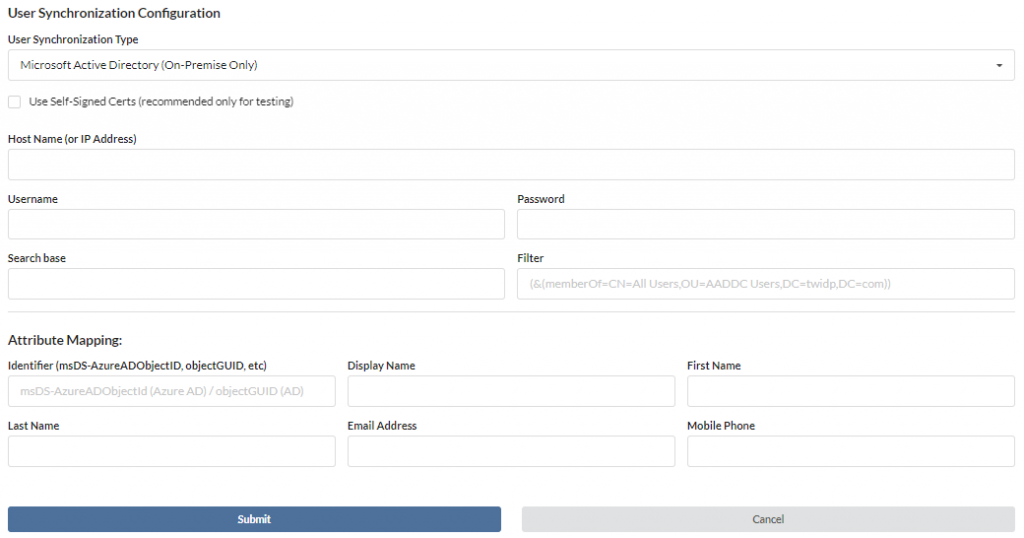
- To use LDAP, select User Sync in the left menu
- The dropdown will contain 4 different options
- Depending on which option you choose, different configurations will populate
- Fill these options out according to your LDAP requirements
- If you need to setup LDAP configurations for Microsoft, please use the Microsoft specific LDAP documentation.
- Select Save if you have made any changes


View Activity
- By selecting Activity Logs in the left menu, you will be able to view certain details about your users’ activities
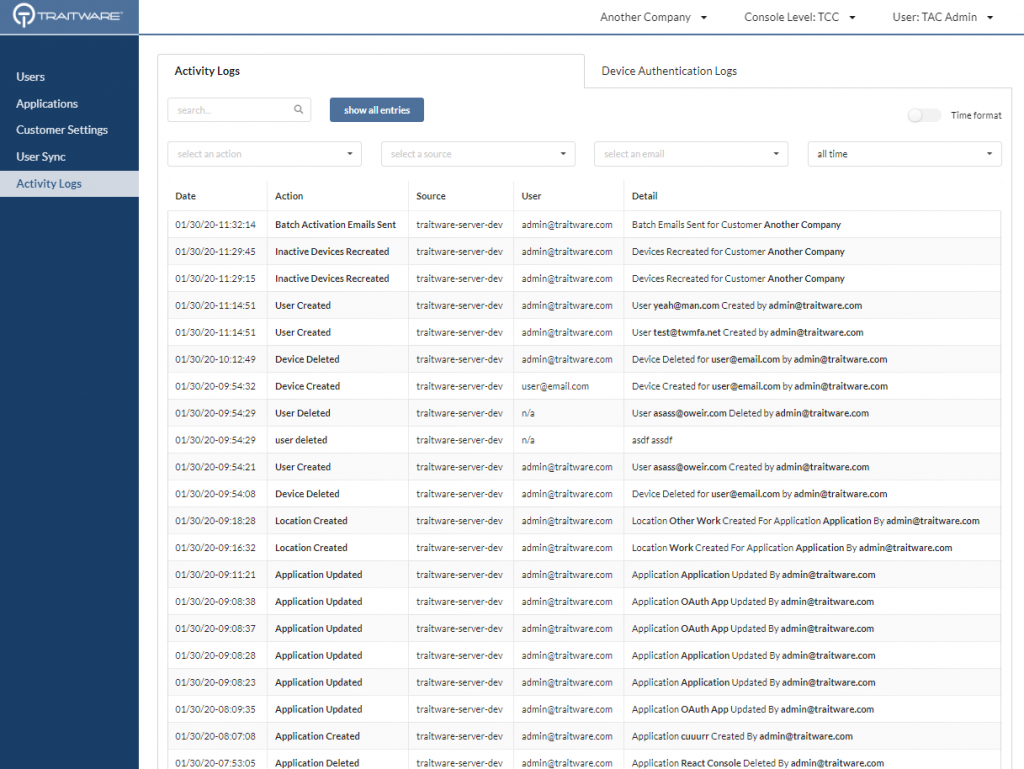
- You can also view Device Authentication Logs by selecting the corresponding tab

User Portal
- Both Admins and Users will be able to access their SSO capable applications from the User SSO Portal
- Navigate to login.traitware.com
- Scan the QR with your TraitWare app
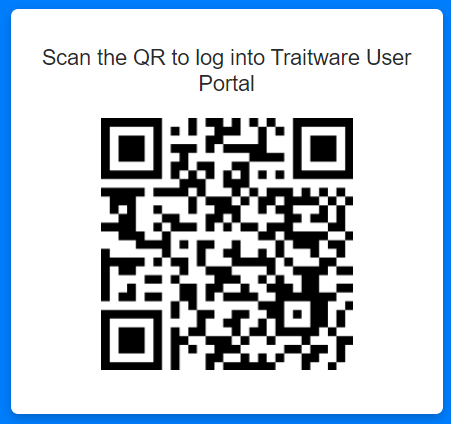
- Once signed in, a user will see whichever applications they have access to
- The SSO User Portal is currently available for SAML applications and WordPress sites
